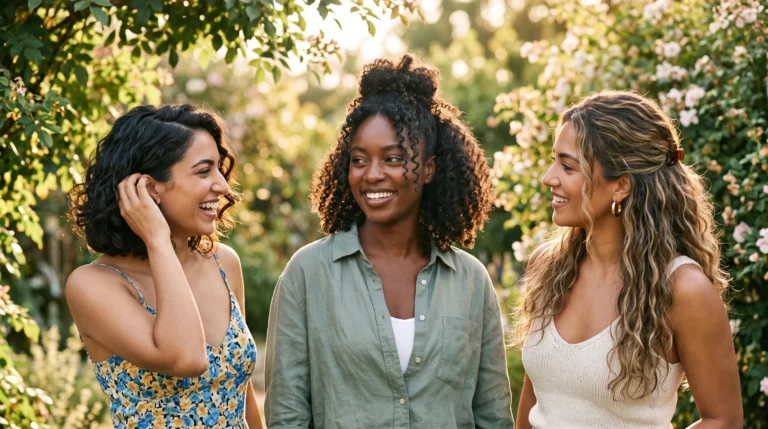
10 Vacation Claw Clip Twist Hairstyles You’ll Actually Want to Wear
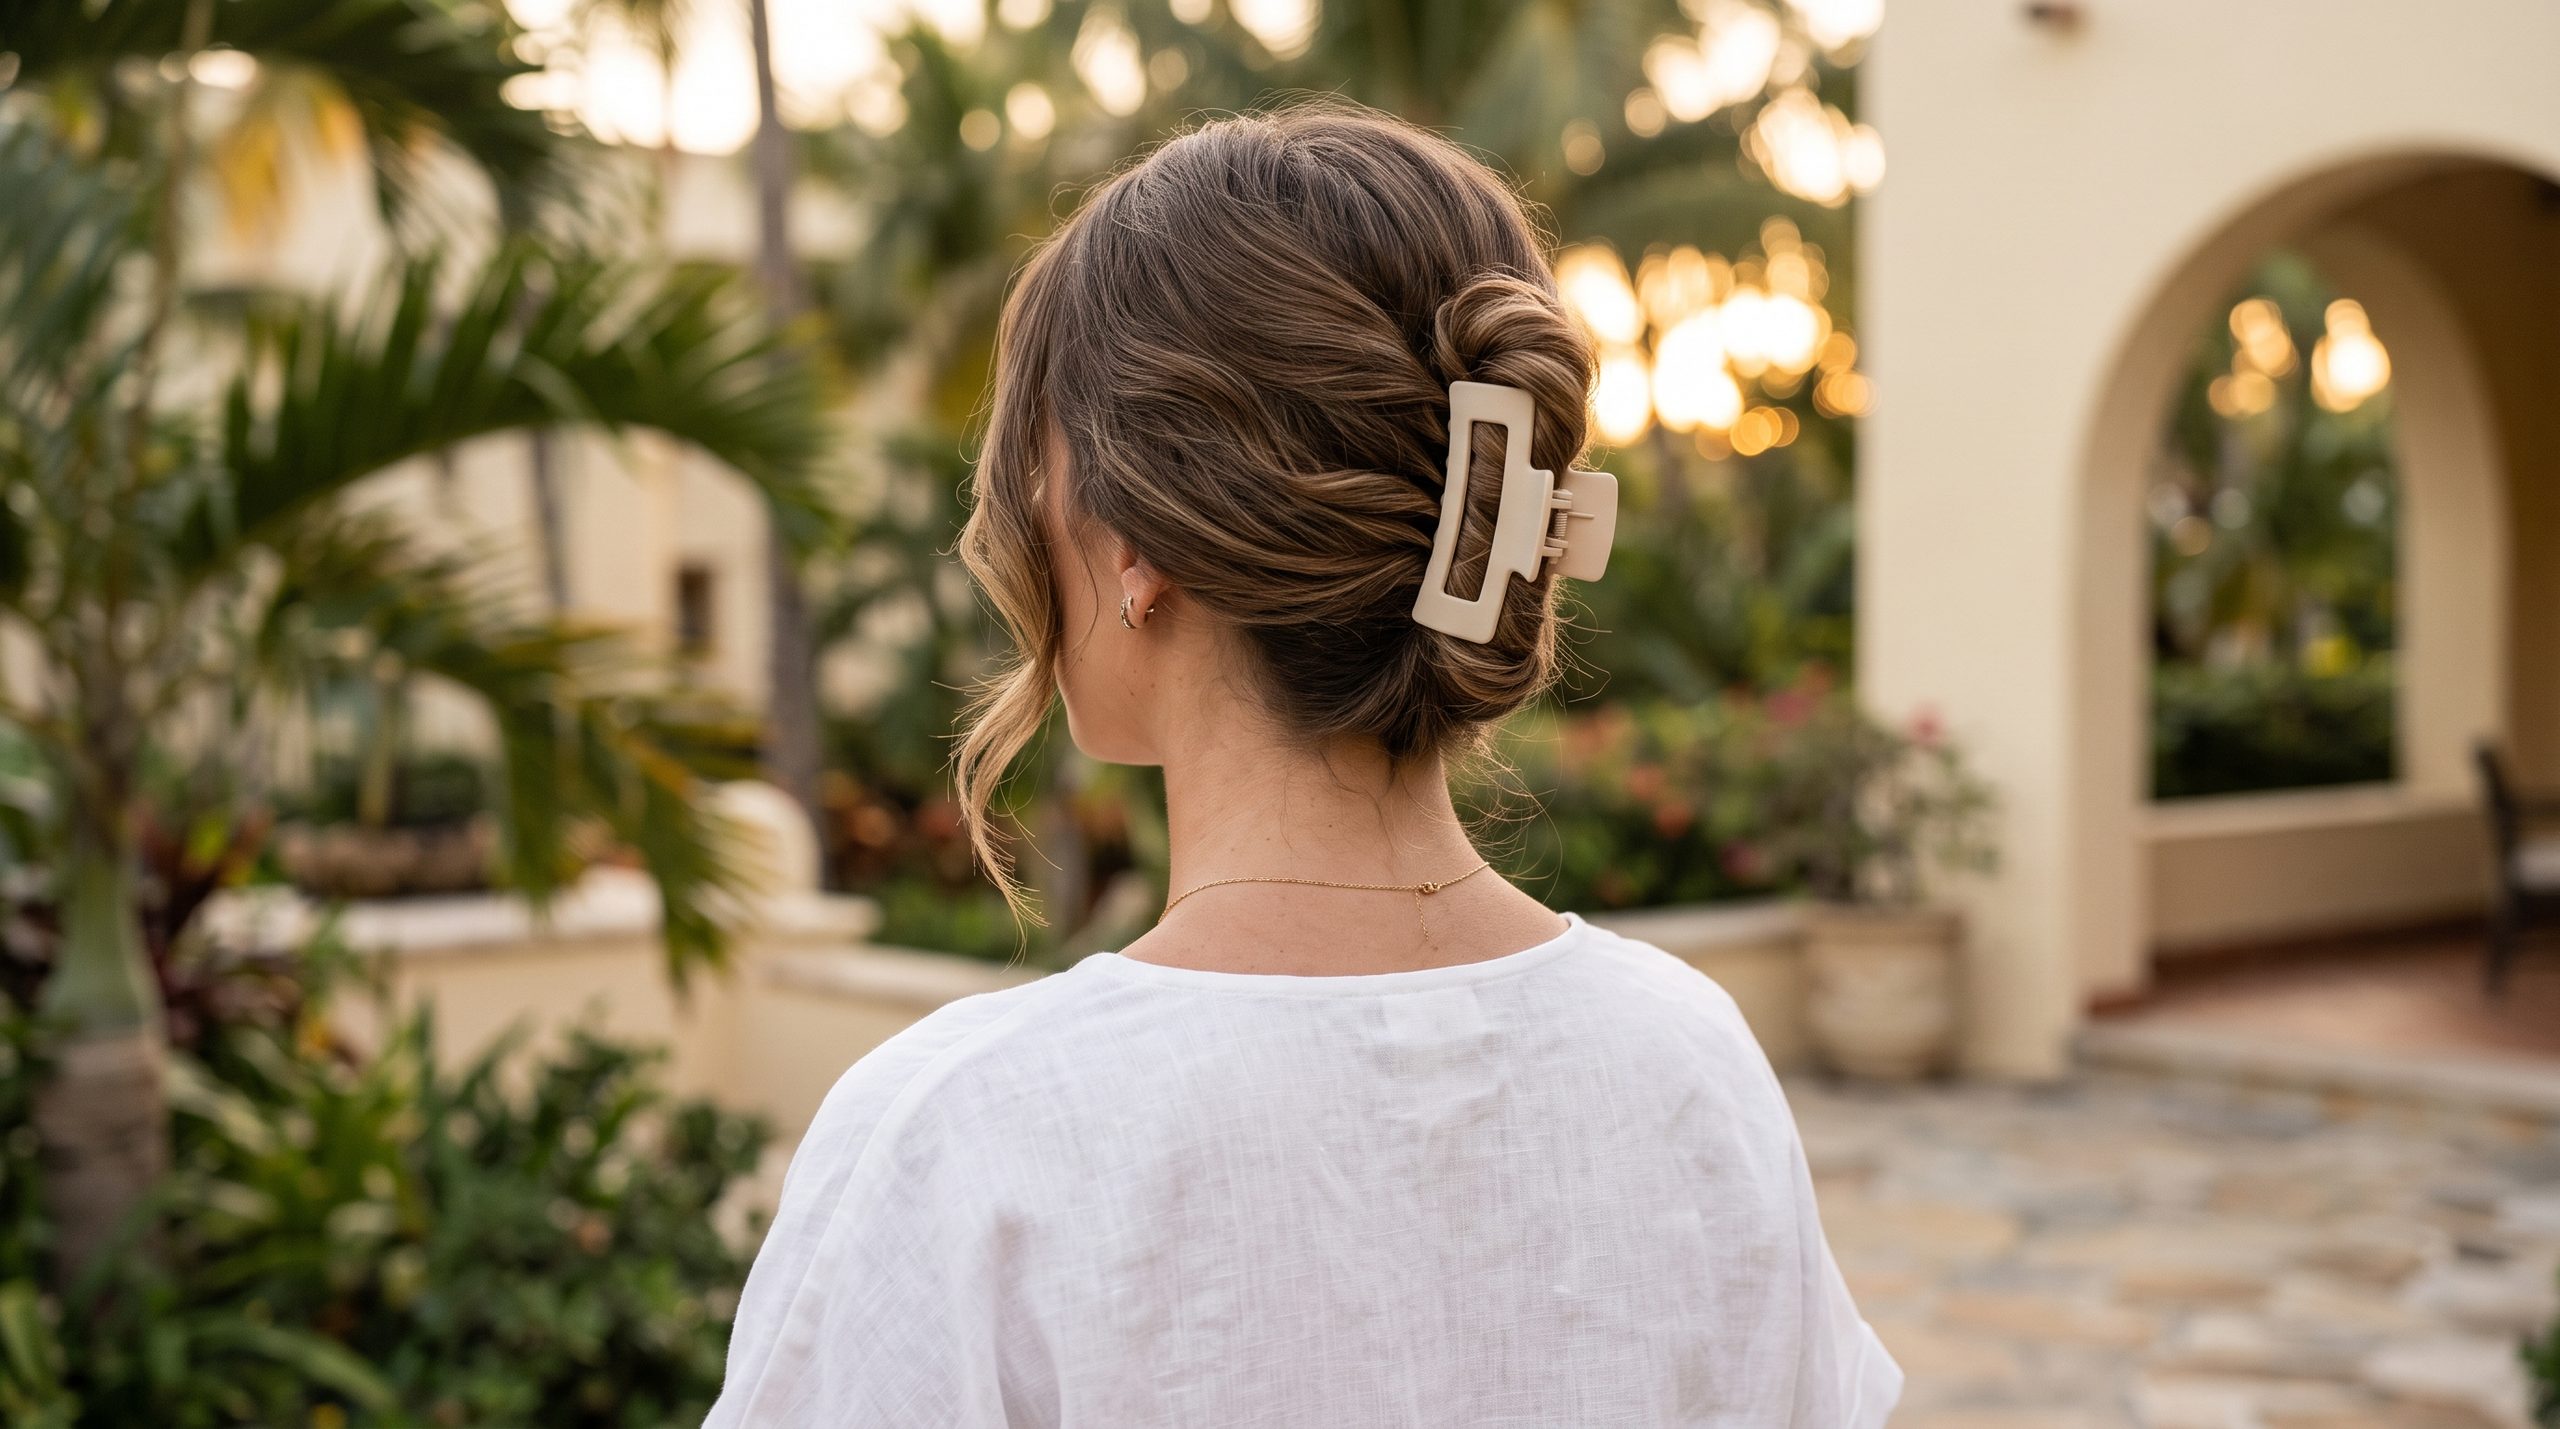
When I’m packing for a trip, my hair kit comes down to three things: a claw clip, a light-hold spray, and a comb. That’s really all I need. Claw clip twist hairstyles are the easiest trick I know for keeping hair off my neck in the heat while still looking finished for dinner, sightseeing, or a beach day. They hold up through humidity, salt water, and long travel days, and once you get the hang of the twist, most of them take under two minutes. I’ve rounded up ten of my favorite vacation claw clip twist hairstyles below, with the exact steps I use, who each one flatters, and the products I always pack.
I also like keeping a couple of these in rotation rather than relying on just one look, because your hair behaves differently on a humid beach morning than it does after a shower before dinner. Having three or four claw clip twists you can do without thinking makes vacation mornings so much easier, and none of these require more than a clip, a comb, and a few minutes.
For more effortless holiday styling, explore these easy vacation hairstyles.
Vacation Claw Clip Twist Hairstyles For Every Day Of Your Trip
This is the part of the list I come back to every trip, because it mixes sleek looks, undone looks, and half-up options so you’re covered no matter what the day calls for. I’d suggest picking two or three that suit your hair length and texture so you have a rotation ready for beach mornings, city afternoons, and evening dinners without ever needing more than a minute in front of the mirror.
“For more effortless ideas that work well in warm weather, explore these claw clip hairstyles for hot weather.”
1. Beachy French Twist
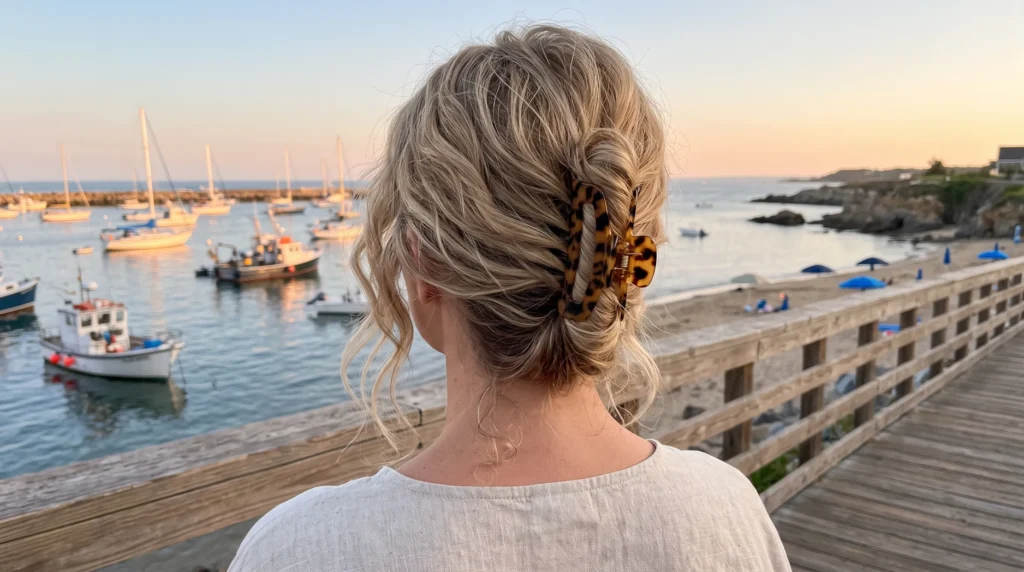
I reach for this one on humid days because the twist sits vertically along the back of the head and the clip does all the holding, so I’m not fighting frizz with a dozen bobby pins. I leave a couple of soft pieces out at the front so it doesn’t look too severe, and if I want a bit more shape, I’ll tease the crown lightly before twisting. It photographs beautifully against a beach or harbor backdrop because it still has movement instead of looking stiff and overworked.
How I style it:
• Smooth hair back loosely; you don’t need a perfect base.
• Twist upward from the nape toward the crown.
• Fold the ends under and secure with a medium claw clip.
• Pull a couple of face-framing pieces loose.
• Scrunch the front lightly with your fingers for softness.
Best for: oval, heart, and round face shapes; straight, wavy, or lightly curly hair.
What I use: a claw clip, a tail comb, light texturizing spray, a couple of bobby pins, and a flexible-hold spray.
2. Loose Low Twist
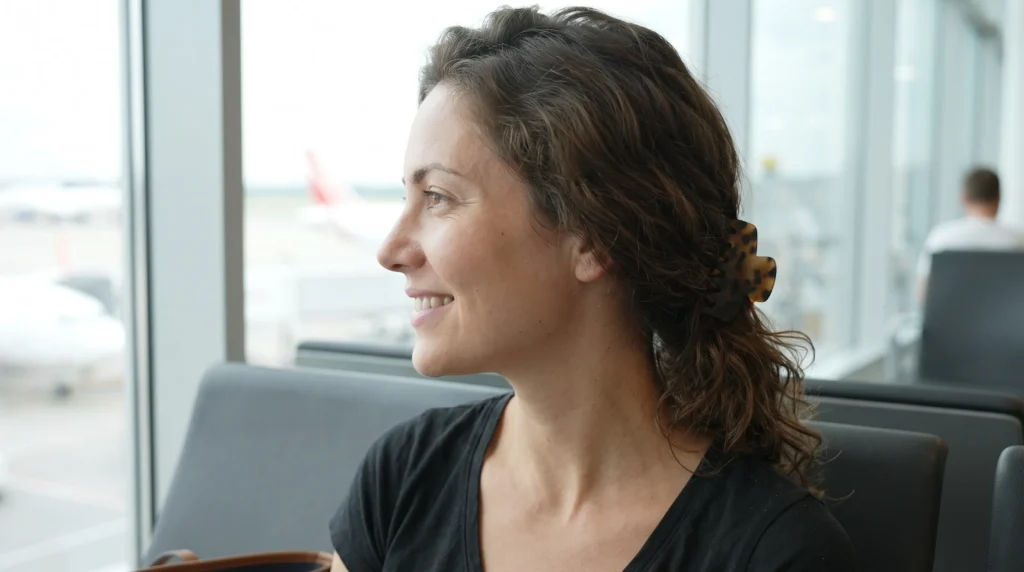
This is my default on travel days because it puts almost no tension on the scalp and still looks pulled together after hours of sitting in an airport or a car. The twist sits low, near the nape, so it works well on medium to long hair without needing precise sectioning. I like leaving the ends slightly loose rather than tucking them in tight, because that softness is what makes it read as vacation-easy instead of office-neat.
How I style it:
• Part hair naturally, wherever it happens to fall.
• Gather it low at the back of the head.
• Twist upward once or twice; don’t overthink it.
• Clip it horizontally near the nape.
• Loosen the crown and a few front strands.
Best for: oval, long, and heart faces; straight, wavy, or thick hair.
What I use: a large claw clip, a soft brush, smoothing cream, texture spray, and bobby pins if I need them.
3. High Vacation Twist Up
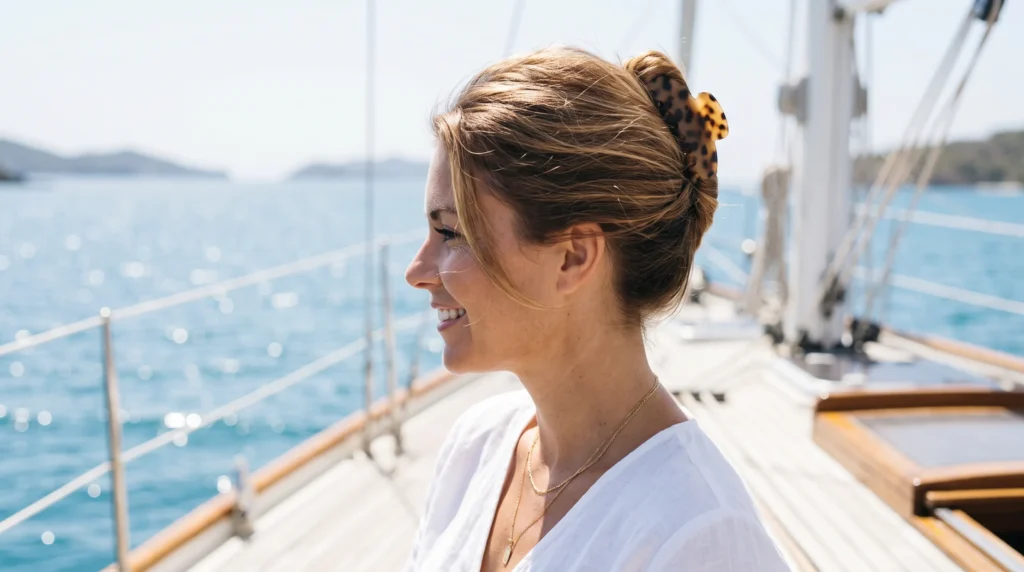
When it’s genuinely hot out, I go high. Lifting the twist up and off the neck keeps you noticeably cooler on boat days, market walks, or anywhere you’re moving around a lot. I’ve also found it gives fine or flat hair more fullness from the side, just because of where the volume sits once it’s clipped. Flipping your head forward while gathering the hair before you twist gives you extra lift and a stronger hold that lasts through an active day.
How I style it:
• Brush hair upward toward the crown.
• Twist the length tightly.
• Fold it upward and clip it securely.
• Fan the ends out slightly above the clip.
• Soften the front so it doesn’t look too polished.
Best for: round, oval, and heart faces; straight, wavy, or medium-thick hair.
What I use: a strong-grip claw clip, a paddle brush, dry shampoo for texture, light-hold spray, and a few pins.
4. Side-Part Soft Twist
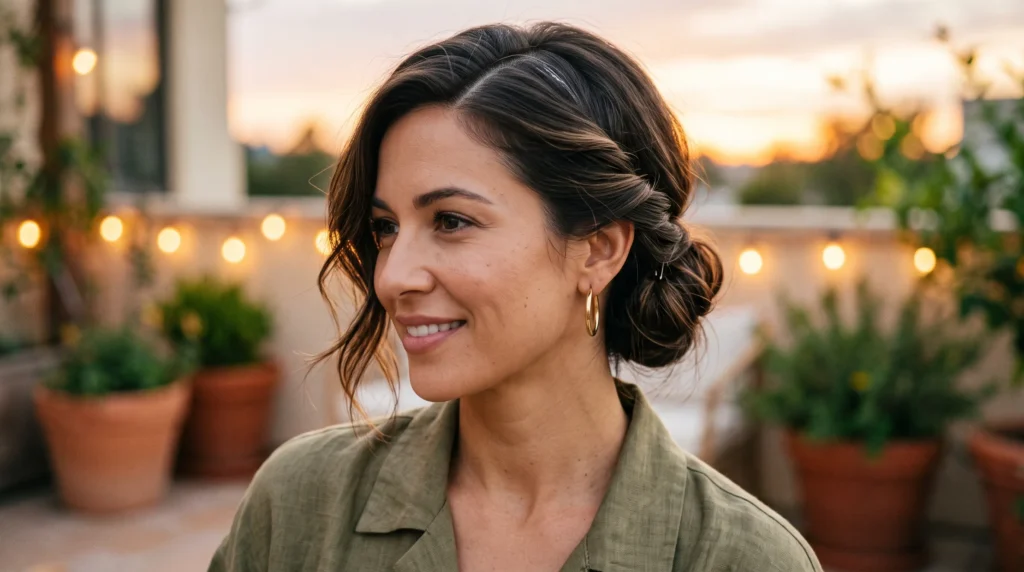
I’ll switch to a side part when I want something a little dressier without extra effort, which makes it perfect for brunch or a sunset dinner reservation. The deep side part softens the front of the face while the twist keeps everything else contained and neat. It’s especially flattering if you like a bit of movement around the cheeks and jaw, and a small amount of cream rubbed along the part side keeps it looking intentional rather than undone.
How I style it:
• Create a deep or soft side part.
• Gather the hair at the back.
• Twist upward and clip in place.
• Loosen the front slightly on the lighter side of the part.
• Tidy any flyaways with a bobby pin.
Best for: round, heart, and oval faces; straight and wavy hair.
What I use: a medium claw clip, a rat-tail comb, smoothing cream, bobby pins, and a light hairspray.
5. Messy Sunset Twist
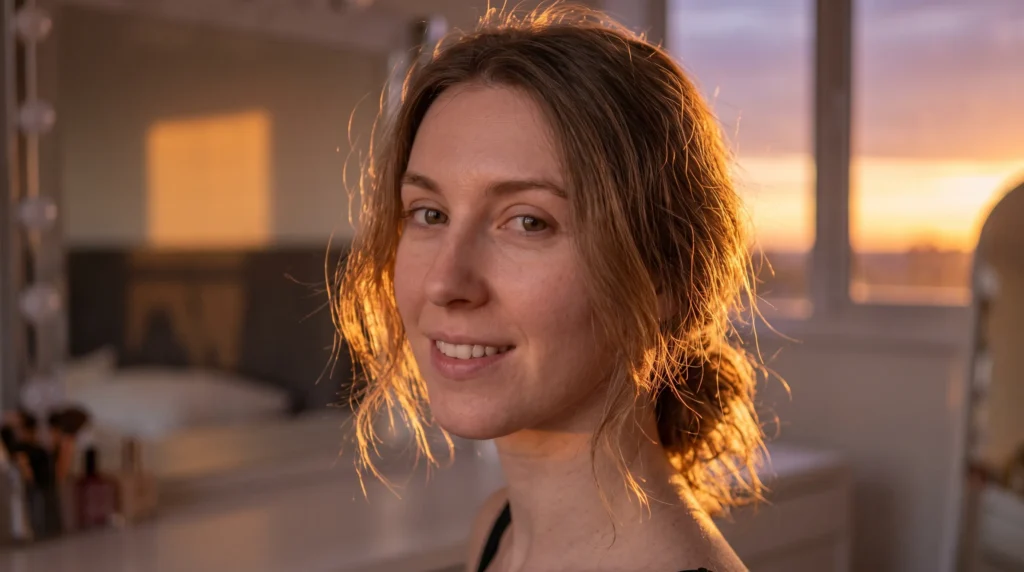
This is the one I do when I want to look like I haven’t tried at all, which honestly takes more product than technique. I mist texture spray through the mid-lengths first so the twist holds its shape without going too smooth, then twist loosely and pull pieces out around the temples and crown until it looks properly lived-in. It’s especially nice on wavy or fine hair because the added texture gives it more body than it would have on its own.
How I style it:
• Mist hair with texturizing spray.
• Gather it loosely with your fingers, not a comb.
• Twist once and clip at the center back.
• Pull small pieces loose near the temples and crown.
• Adjust until it feels soft, not styled.
Best for: oval, round, and long faces; wavy, lightly curly, or fine hair.
What I use: a claw clip, texturizing spray, a wide-tooth comb, a light hair oil, and a few pins.
6. Sleek Poolside Twist
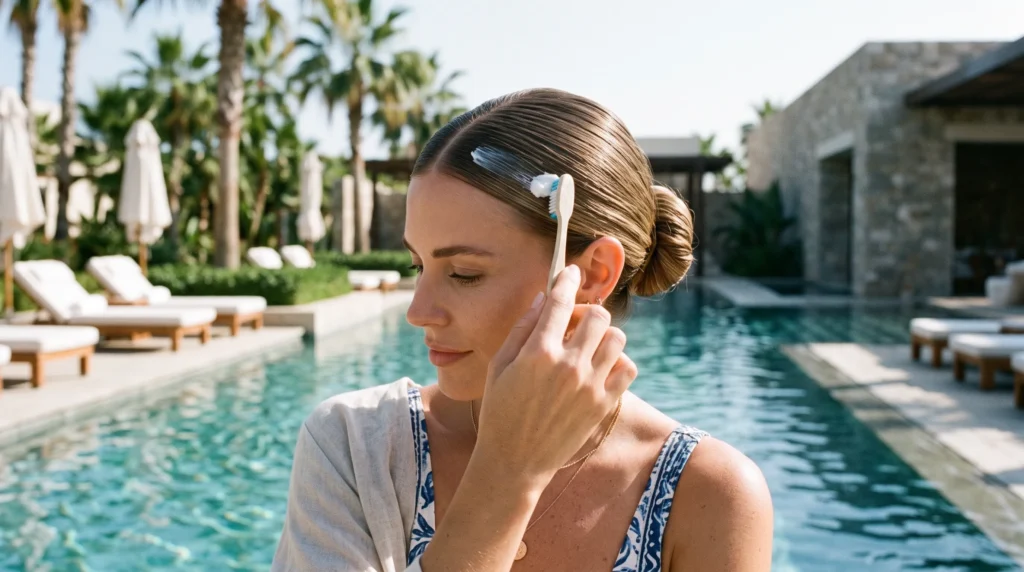
For a cleaner finish, I smooth the front completely and guide the rest into a tight twist at the back. It holds up well in wind and stays neat even after a quick dip in the pool, which is why it’s my pick for resort lunches or an afternoon of lounging. Straight hair takes to this one immediately, and wavy hair just needs a touch of smoothing cream first to match the same sleekness. A dab of cream worked in with a spare toothbrush cleans up any flyaways along the part line.
How I style it:
• Brush hair smooth from front to back.
• Work a little cream through the top layer.
• Twist the length upward firmly.
• Clip it close to the head.
• Refine the front and the part line.
Best for: oval, long, and heart faces; straight or wavy hair.
What I use: a large claw clip, smoothing cream, a boar-bristle brush, a fine comb, and light-hold spray.
7. Half-Up Twisted Clip
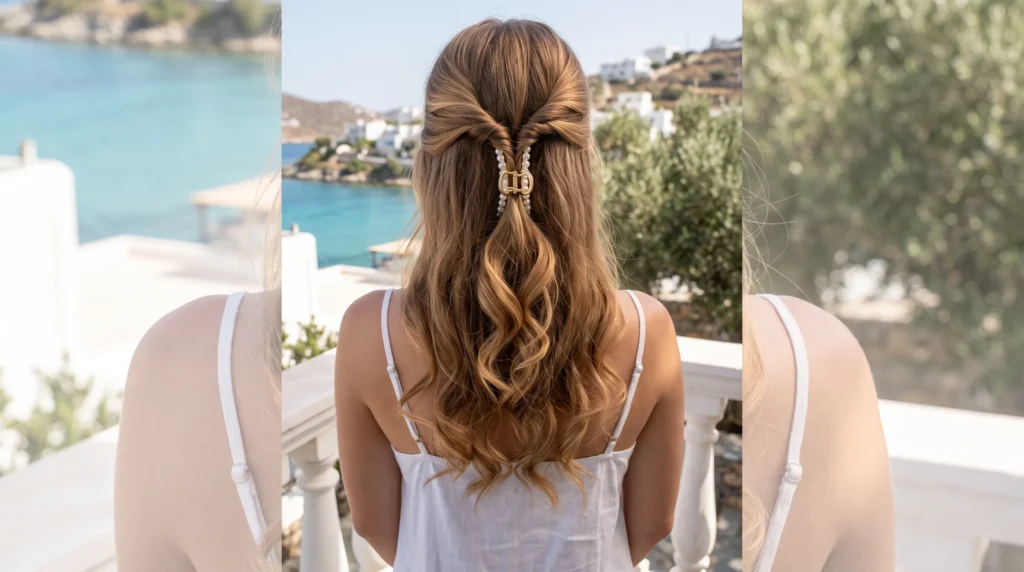
I recommend this one to anyone who finds a full updo too warm or too tight on vacation. Only the top section gets twisted and clipped back, while the rest stays down and moves freely, which keeps things breathable without giving up any polish. Curling or bending the loose lengths beforehand makes the whole look feel more finished and pulled together, especially for photos.
How I style it:
• Section off the top half of your hair.
• Twist that section gently toward the back.
• Secure it with a medium claw clip.
• Fluff the crown for a little volume.
• Loosen the lower lengths so they fall naturally.
Best for: round, oval, and heart faces; straight, wavy, or curly hair.
What I use: a medium claw clip, a curling wand, texturizing spray, a brush, and light hair oil.
8. Tropical Textured Twist
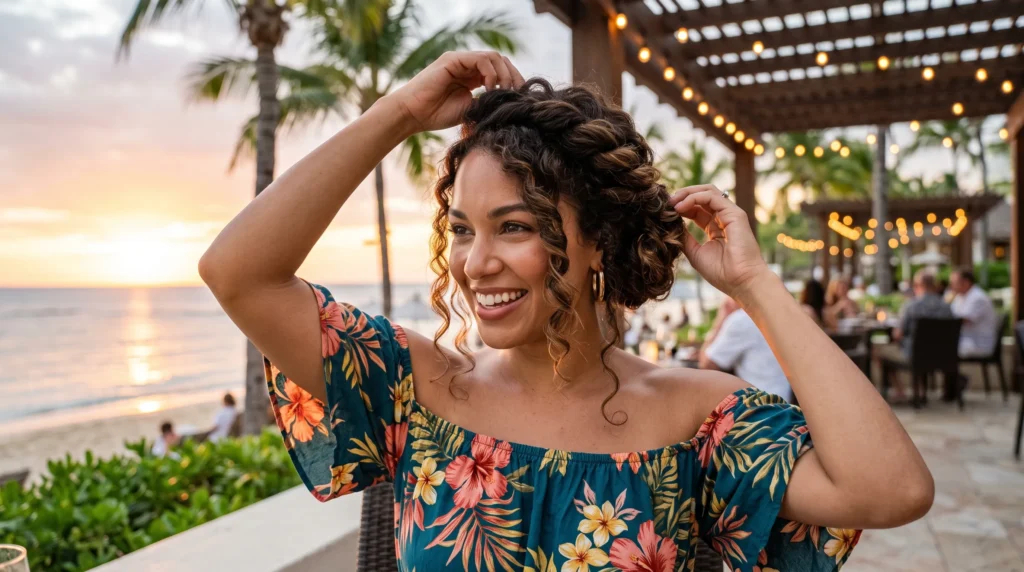
Humidity tends to bring out natural volume anyway, and this style is built around embracing that instead of fighting it. I lift the roots with my fingers, twist loosely rather than tightly, and let the twist itself stay a little chunky instead of sleek. Curly and wavy hair hold this shape especially well, and it’s a forgiving option if you’re short on time before dinner reservations.
How I style it:
• Work texture spray through dry hair.
• Lift the roots with your fingers for volume.
• Gather and twist the hair upward loosely.
• Secure with a large claw clip.
• Pull gently at the crown and sides.
Best for: round, oval, and long faces; wavy, curly, or thick hair.
What I use: a large claw clip, texturizing spray, a diffuser or blow dryer, a wide-tooth comb, and hair pins.
9. Mini Front Twist
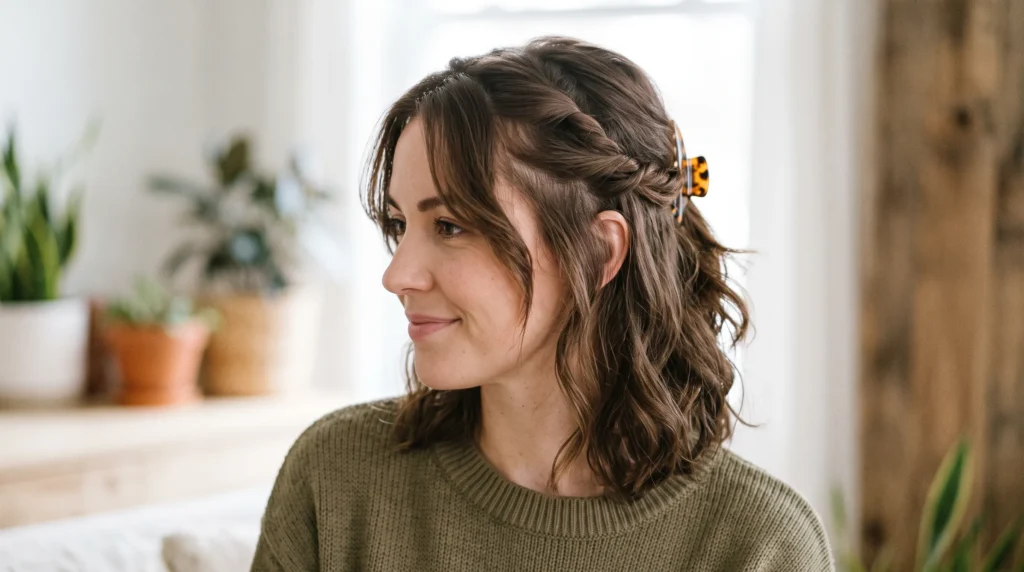
I’ll add small twists at the front before clipping the rest back when I want a little extra detail without much added effort. It frames the face nicely, especially if you like a bit of lift near the temples, and works best on medium to long hair since there needs to be enough length left over to secure everything at the back.
How I style it:
• Take a small section of hair from each side of the front.
• Twist both sections back and away from the face.
• Gather the rest of the hair at the back.
• Twist upward and secure with a claw clip.
• Loosen the front slightly for softness.
Best for: heart, oval, and round faces; straight or wavy hair.
What I use: a claw clip, a sectioning comb, light styling cream, pins, and a flexible-hold spray.
10. Romantic Low Roll Twist
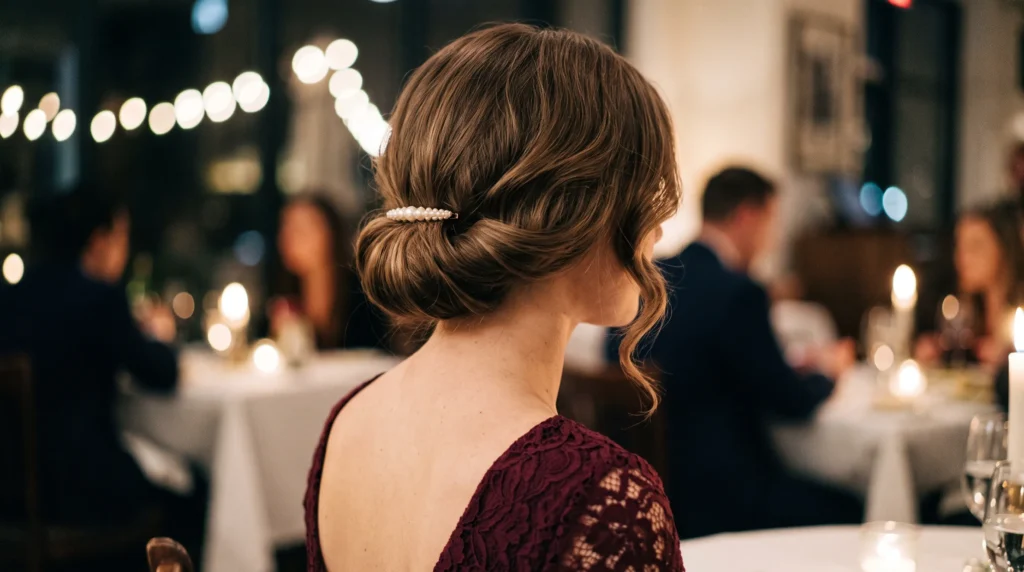
This is my pick for date nights or dressier dinners because the rolled-under shape at the nape reads as more finished without requiring extra pins. It works beautifully on smooth or softly waved hair and can be loosened up for something more casual earlier in the day. Tucking the ends neatly before clipping is what gives it that cleaner, rolled-under look I like for evening.
How I style it:
• Gather hair low at the nape.
• Roll and twist it inward.
• Secure the roll with a claw clip.
• Ease out a few face-framing pieces.
• Set lightly so it stays soft, not stiff.
Best for: oval, long, and heart faces; straight, wavy, or medium hair.
What I use: a medium claw clip, a soft brush, a light serum, bobby pins, and flexible-hold hairspray.
A Quick Note On Claw Clips And Hair Health
One thing I tell every client packing for a trip is that claw clips aren’t just convenient, they’re genuinely gentler on your strands than pulling hair back tight with an elastic, since the hold is spread across the clip’s teeth instead of concentrated at one point.
Final Thoughts
Vacation hairstyles should make your days easier, not add another thing to plan around. These ten claw clip twist hairstyles are quick to do, easy to pack for, and simple to adjust for beach mornings, city walks, or dinner reservations. I always tell people to pick one sleek option, one messy option, and one low twist so they’ve got a few reliable choices for the whole trip. That way your hair still looks fresh without eating into time you’d rather spend on vacation.
Frequently Asked Questions
Are claw clip twist hairstyles good for vacation?
Yes, and they’re honestly one of the first things I pack for a trip. They come together fast, stay comfortable through long days, and keep hair off your neck in heat and humidity while still looking put together.
Do these styles work on short hair?
Most of what I’ve shared here works best on medium to long hair, but a few can be adapted for shorter lengths with a mini clip and a couple of pins. I usually point people toward the half-up twist or the mini front twist as the easiest starting point for shorter hair.
How do I make a claw clip twist last longer in humid weather?
I always prep with a little texture spray or dry shampoo before styling, since it gives the hair more grip to hold onto. A strong clip paired with a couple of hidden pins will also help the twist stay put through a long, humid day.
Can I wear these hairstyles with curly hair?
Definitely. A lot of these look beautiful on curly hair, especially the textured and messy twists. I’d suggest keeping more of your natural volume and letting a few curls frame the face for a softer, less structured finish.
What size claw clip should I pack for a trip?
I always travel with a medium clip since it covers the most styles, but if you have thicker or longer hair, I’d add a large one too. Packing one of each gives you the flexibility to switch between looks without being limited by your clip.