10 Tousled Collarbone Lob Hairstyle Ideas to Try This Season
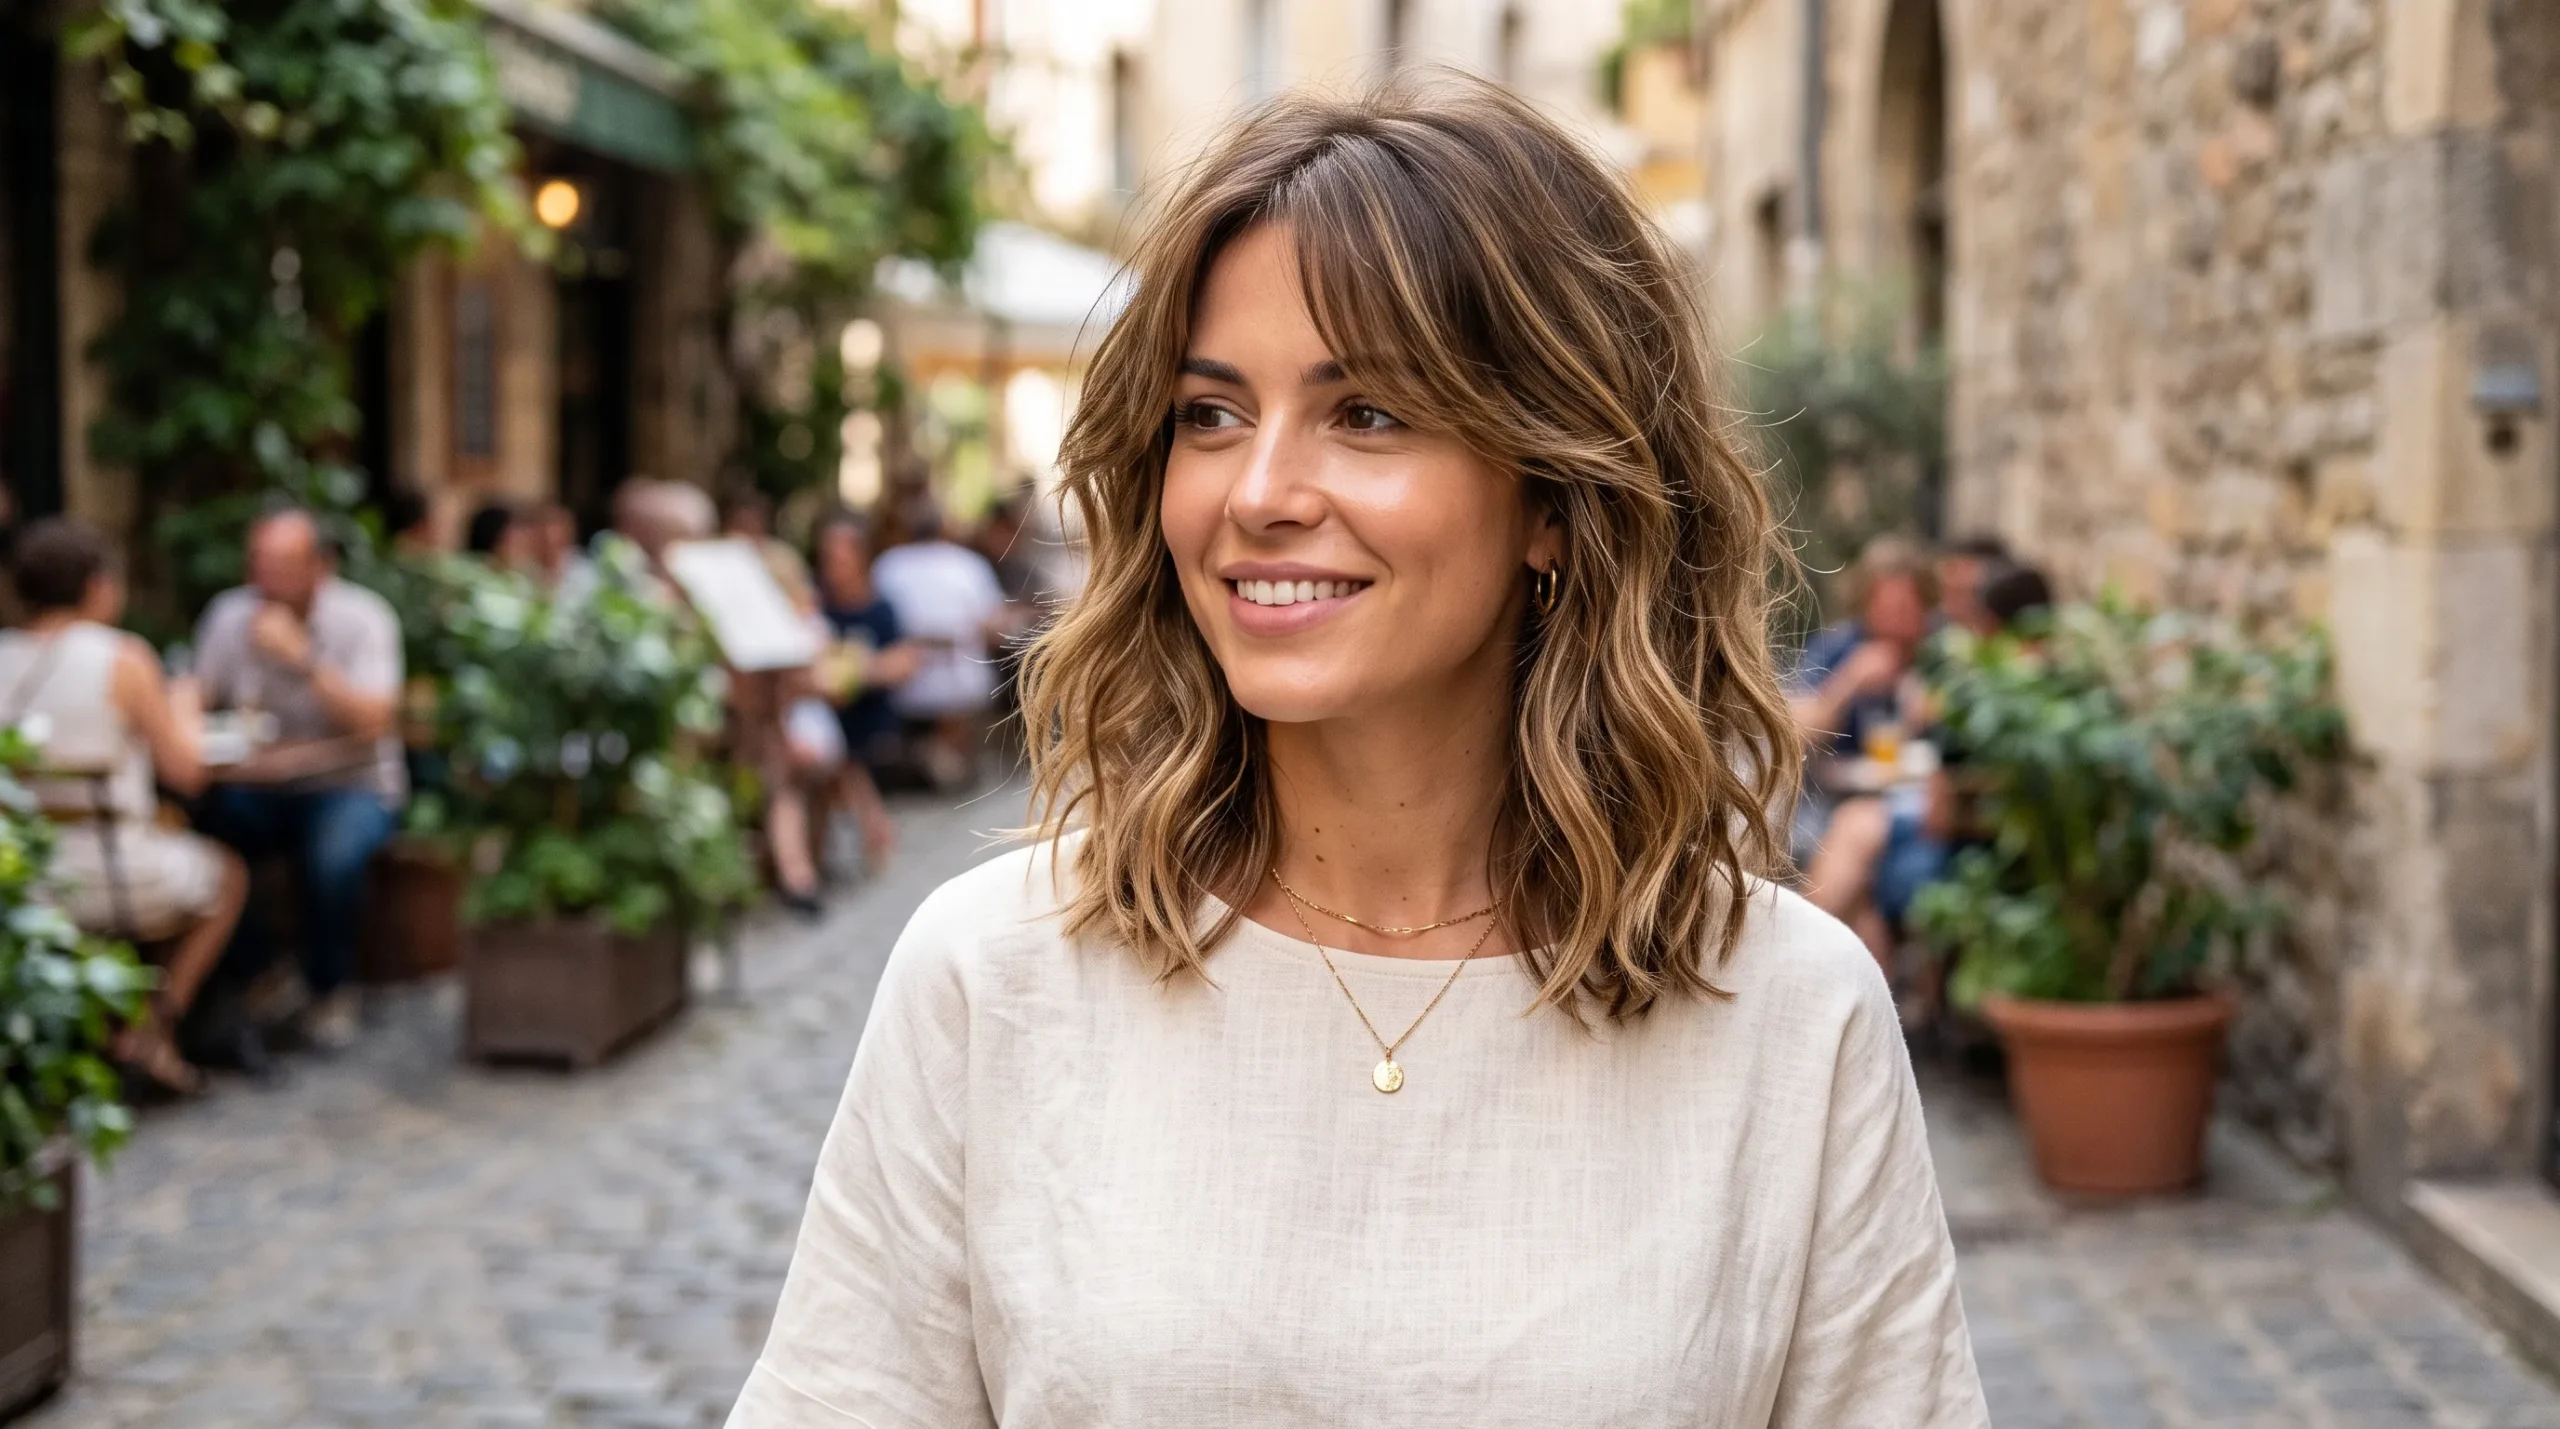
If you want a haircut that feels effortless but still looks put-together, a tousled collarbone lob hairstyle might be exactly what your mirror has been waiting for. This length lands right around the collarbone, which makes it long enough to tie back on lazy mornings but short enough to keep things breezy and low-fuss. Add a little tousled texture into the mix, and you get soft waves, gentle volume, and movement that never looks stiff or overworked.
What makes this cut so popular is how forgiving it is. A tousled collarbone lob hairstyle can be dressed up or down, works across straight, wavy, and lightly curly textures, and flatters a wide range of face shapes, including oval, round, and heart-shaped faces. You don’t need a professional styling kit either — a blow dryer, a round brush, a curling wand, and a texturizing spray will get you most of the way there.
Below are ten ways to wear this trend, each with its own personality, from soft and romantic to slightly undone and shaggy. Pick the one that matches your hair type and lifestyle, then tweak the part, the bend pattern, or the bangs to make it your own.
For more movement and texture, explore these medium length layered haircuts.
Quick List of Tousled Collarbone Lob Hairstyle Ideas
- Soft Center Part Tousled Lob
- Side-Swept Textured Lob
- Airy Layered Lob
- Beachy Bend Lob
- Wispy Curtain Bangs Lob
- Blunt Ends Tousled Lob
- Soft Wave Deep Part Lob
- Feathered Front Lob
- Light Shaggy Lob
- Undone Volume Lob
Tousled Collarbone Lob Hairstyle Ideas You Can Recreate at Home
Every style below builds on the same foundation — a collarbone-grazing length with soft, undone texture — but each one shifts the part, the bend, or the finish to create a slightly different mood. Think of this as your style menu; mix and match until you land on your version.
1. Soft Center Part Tousled Lob

A center part keeps this look symmetrical and calm, while loosely tousled ends stop it from feeling too rigid. It’s the kind of hairstyle that works whether you’re heading into a meeting or grabbing coffee with friends, because it reads as polished without looking overly styled. Fine hair gains the illusion of extra density from the texture, and thicker hair avoids feeling heavy or flat.
How to style it:
- Blow-dry with a center part, directing air downward for smoothness.
- Wrap a few sections around a curling wand, alternating direction.
- Break up the curls with your fingers once they’ve cooled.
- Finish with a light mist of texturizing spray.
Best for: Oval, round, and heart face shapes; straight to wavy hair.
You’ll need: Blow dryer, round brush, curling wand, texturizing spray, light hair oil.
2. Side-Swept Textured Lob
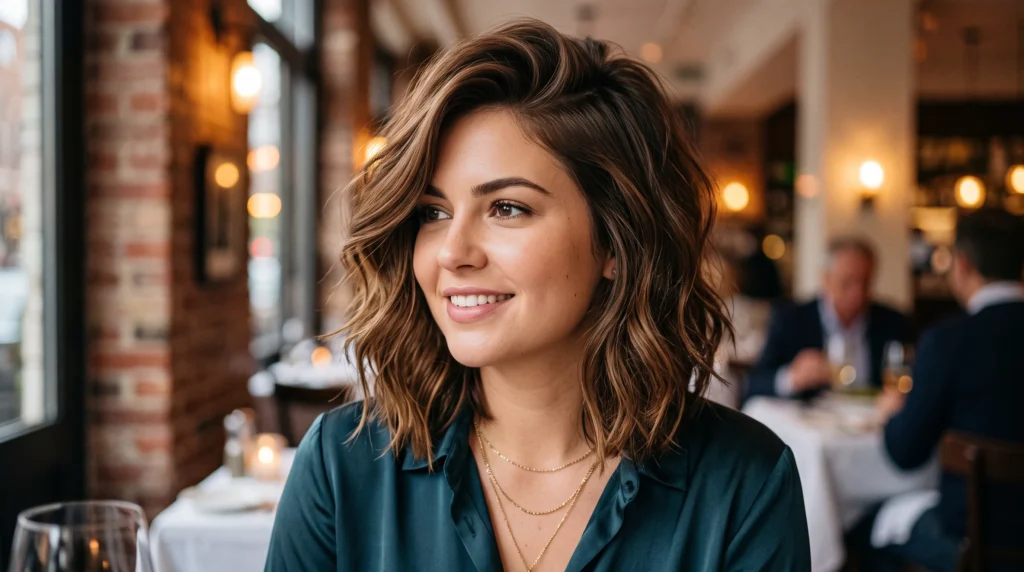
Deepen the part and you instantly get more lift at the crown along with a softer, more angled frame around the face. This version leans slightly dressier than the center-part style, which makes it a nice option for date nights or dinners where you still want your hair to look intentional. The deep side part also tends to read as more flattering for round faces, since it breaks up width across the forehead.
How to style it:
- Create a deep side part with a fine-tooth comb.
- Curl two or three pieces away from your face.
- Flip the roots gently with your fingers for lift.
- Mist texturizing spray through the ends only.
Best for: Round, oval, and heart face shapes; fine to medium hair.
You’ll need: Blow dryer, medium-barrel curling iron, texture spray, volumizing mousse, wide-tooth comb.
3. Airy Layered Lob
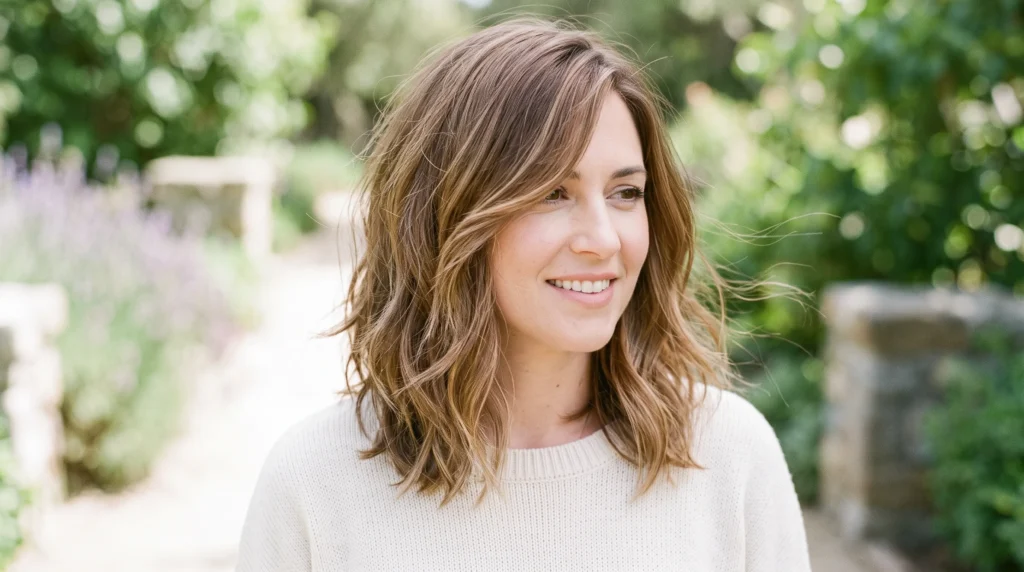
Layering removes bulk and lets the hair move the way it naturally wants to, rather than sitting in one heavy block. This is a strong pick if your hair tends to feel weighed down at collarbone length, since the layers create lift without needing a shorter cut. It also plays well with a simple off-center part if you want something less exact than a true middle part.
How to style it:
- Round-brush blow-dry the layers for shape.
- Add a couple of loose bends to the pieces framing your face.
- Shake the shape loose with your fingers.
- Spray dry texture underneath the top layer, not just on it.
Best for: Oval, long, and heart face shapes; thick, straight, or wavy hair.
You’ll need: Blow dryer, round brush, texture spray, light-hold hairspray, smoothing cream.
4. Beachy Bend Lob
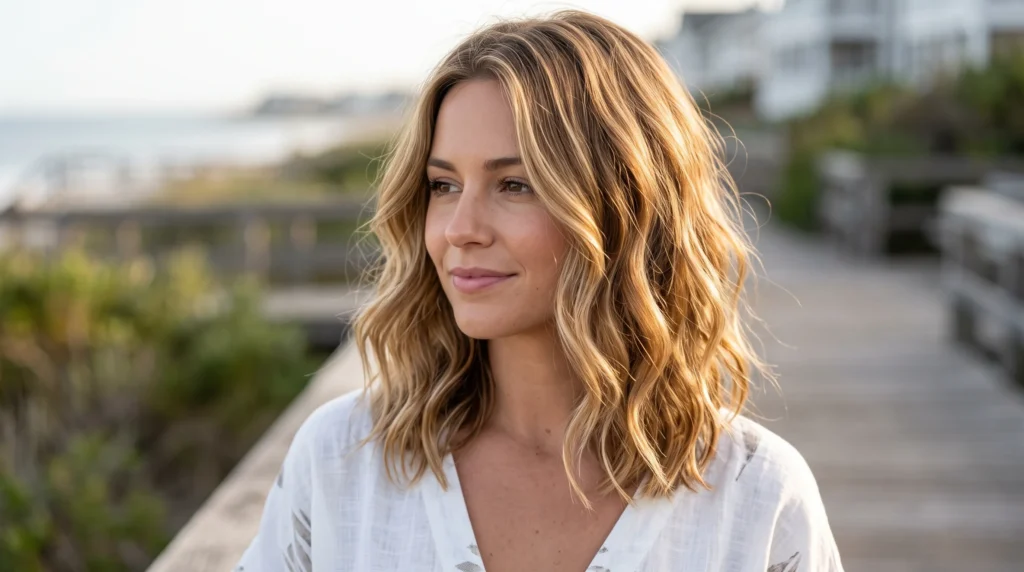
Rather than tight curls, this version relies on loose S-shaped bends that start below the cheekbone. The effect is undone in the best way — the kind of texture you’d expect after a day at the coast, minus the actual sand. Naturally wavy hair takes to this look almost instantly, but straight hair can fake it convincingly with a flat iron and a salt spray.
How to style it:
- Use a flat iron to bend sections into loose S-shapes.
- Leave a few ends straighter for contrast.
- Spritz with sea salt spray for grip and texture.
- Scrunch gently to separate the pieces.
Best for: Round, oval, and heart face shapes; straight to wavy hair.
You’ll need: Flat iron, sea salt spray, heat protectant, sectioning clips, light serum.
5. Wispy Curtain Bangs Lob
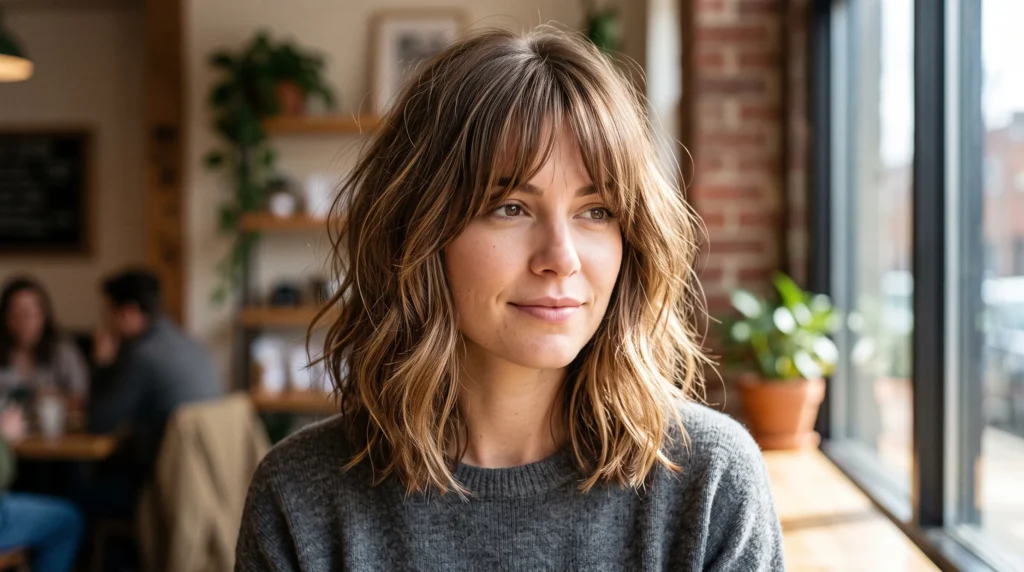
Curtain bangs soften the whole face, and when they blend into a tousled lob, the entire look feels lighter and more romantic. Because the bangs part naturally around the forehead, this style avoids the “too much fringe” feeling while still framing the eyes and cheekbones nicely. It’s an easy way to refresh an existing lob without committing to a full fringe.
How to style it:
- Round-brush the curtain bangs for a soft outward roll.
- Add loose texture through the rest of the lob.
- Separate the bang pieces with your fingertips.
- Set with a soft-hold spray so movement stays intact.
Best for: Heart, oval, and long face shapes; straight to wavy hair.
You’ll need: Small round brush, blow dryer, curling wand, soft-hold hairspray, texturizing cream.
6. Blunt Ends Tousled Lob
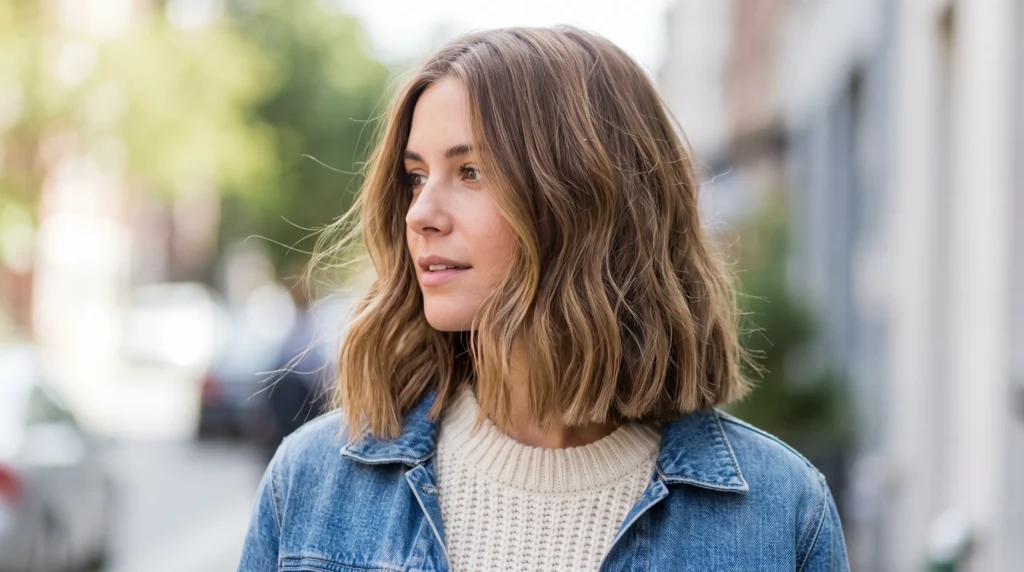
Pairing a crisp, blunt hemline with soft tousled texture gives you shape and movement at the same time. The blunt edge tricks the eye into seeing more density, which is especially useful if your hair is on the finer side. Meanwhile, the loose waves through the mid-lengths keep the overall look from feeling too severe.
How to style it:
- Smooth the hair first with a paddle brush.
- Add loose bends through the middle of the length only.
- Keep the very ends straight for a defined line.
- Finish with a light dry spray for soft separation.
Best for: Round, oval, and long face shapes; fine to medium straight hair.
You’ll need: Paddle brush, blow dryer, curling iron, dry texture spray, heat protectant.
7. Soft Wave Deep Part Lob
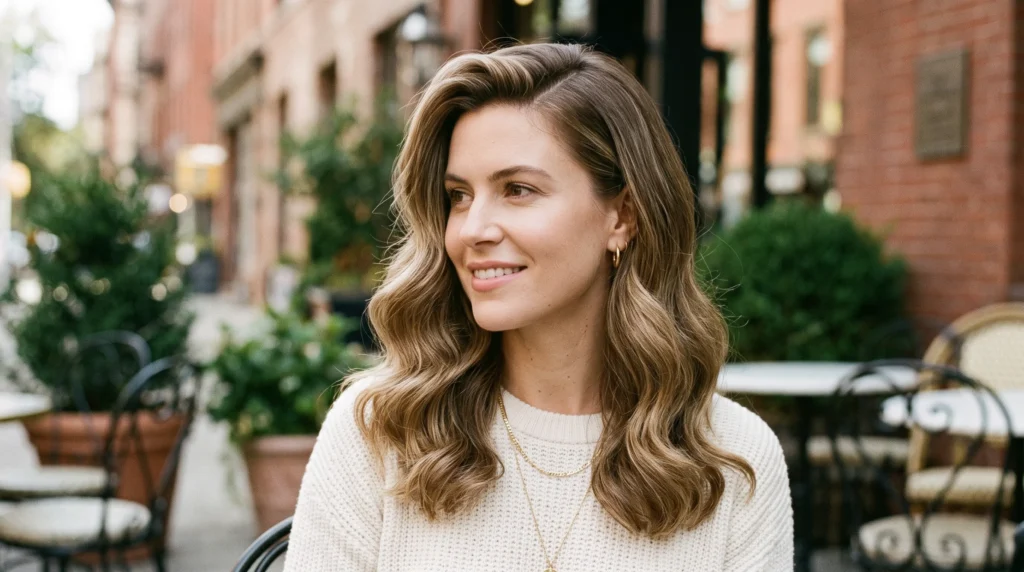
This is the dressier cousin of the beachy bend — a deep part paired with larger, softer waves for a look that reads more finished. The deep part lifts the roots naturally, while the waves add flow through the length. It’s a great choice when you want something that photographs well but still took under twenty minutes to style.
How to style it:
- Part deeply to one side.
- Curl large sections loosely, curling away from the face.
- Brush through gently once cooled to loosen the curl.
- Set the roots with a light volumizing spray.
Best for: Round, heart, and oval face shapes; straight to wavy medium hair.
You’ll need: Large-barrel curling iron, volumizing spray, blow dryer, sectioning clips, light finishing spray.
8. Feathered Front Lob

Feathering the front pieces lifts and opens the face without needing bangs at all. The lighter sections near your temples flip gently away, which keeps the style from looking flat against the forehead. It’s a low-commitment way to add movement near the face while keeping the rest of the lob simple.
How to style it:
- Blow-dry the front sections away from your face using a round brush.
- Add loose bends through the lower half of the hair.
- Fluff the roots lightly with your fingers.
- Smooth a small amount of cream through the ends.
Best for: Oval, heart, and square face shapes; straight to wavy hair.
You’ll need: Round brush, blow dryer, styling cream, curling wand, heat protectant.
9. Light Shaggy Lob
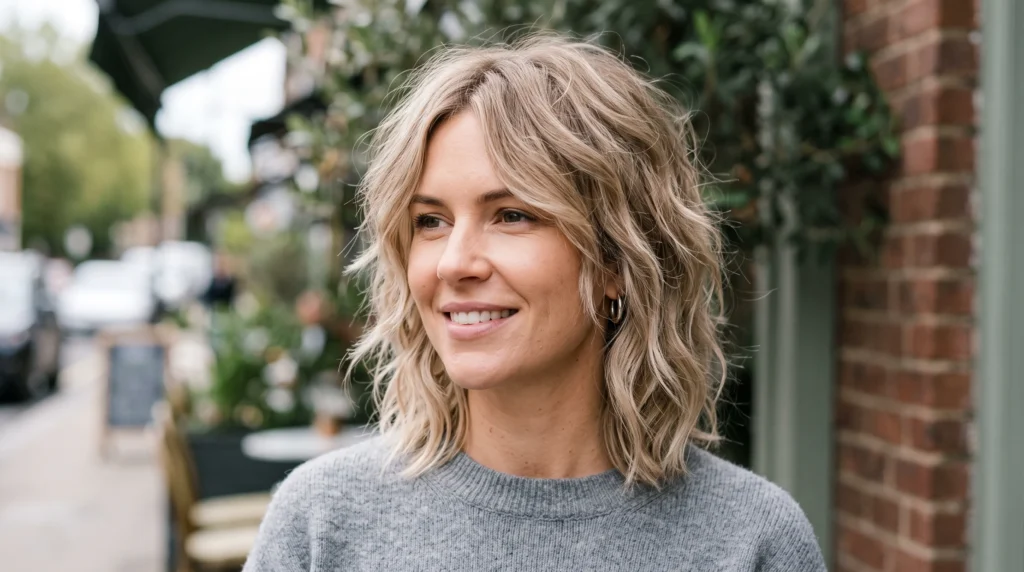
If you want a bit more edge than a classic lob offers, this shaggy take adds texture around the crown and sides while keeping the layers soft enough to stay wearable. The lived-in finish suits people who like their hair to look a little undone on purpose, and it holds up especially well on naturally wavy textures.
How to style it:
- Work mousse through damp hair before drying.
- Rough-dry while lifting the roots with your fingers.
- Twist a few random pieces around a wand.
- Scrunch in texture spray for a soft, shaggy finish.
Best for: Round, oval, and long face shapes; wavy or medium-density hair.
You’ll need: Volumizing mousse, blow dryer, texturizing spray, curling wand, wide-tooth comb.
10. Undone Volume Lob
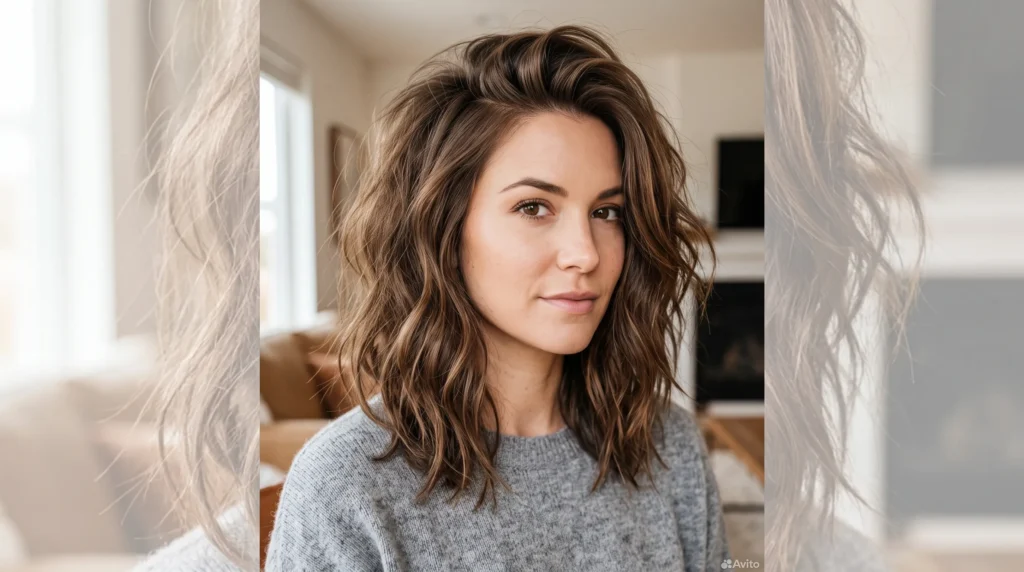
This final style is all about lift at the roots paired with loose, irregular texture through the rest of the hair. It’s an especially good option if your hair tends to sit flat, since the combination of root volume and undone ends creates the appearance of much thicker hair. Keep the bends irregular so it never edges into full ringlets.
How to style it:
- Apply mousse at the roots before drying.
- Blow-dry with your head tilted slightly for extra lift.
- Add a few loose bends near the ends only.
- Finish with a dry lift spray and finger-fluff to set.
Best for: Round, heart, and oval face shapes; fine to medium hair.
You’ll need: Root-lifting mousse, blow dryer, round brush, dry lift spray, curling iron.
Choosing the Right Version for Your Hair
The reason a tousled collarbone lob hairstyle works on so many people is that it’s really a framework, not one fixed look. Fine hair generally benefits from blunt ends or extra root lift, while thicker hair tends to look best with layering that removes bulk. Curly and wavy textures can often skip the heat tools almost entirely, since the natural texture does a lot of the work already. According to Who What Wear, collarbone-length cuts have become a popular middle ground for people who want the ease of shorter hair without fully letting go of length, and stylists often describe the length as flattering across a wide range of face shapes and textures.
If you’re not sure where to start, bring in a few reference photos from this list when you sit down with your stylist. Small adjustments — like where the part falls or how heavy the layering is — can shift the whole feel of the cut without changing the base length at all.
Final Thoughts
A tousled collarbone lob hairstyle is one of those rare cuts that manages to look intentional and relaxed at the same time. It’s forgiving on multiple face shapes, adapts to straight, wavy, and curly textures, and doesn’t demand a full styling routine to look good. Start with whichever version above matches your current hair type, then experiment with the part, the bend pattern, or a set of curtain bangs until it feels like your own signature look.
Save this list and bring your favorite version to your next salon appointment.
FAQs
1. Is a tousled collarbone lob hairstyle good for fine hair? Yes. The length holds onto enough weight to look full, while blunt ends, soft texture, or a bit of root lift can help fine hair appear thicker.
2. Does this style work on straight hair? Definitely. A few loose bends from a wand or flat iron, plus a texturizing spray, are usually enough to create that soft, tousled finish on straight hair.
3. Which face shapes suit a collarbone lob best? Oval, round, heart, and long face shapes all tend to wear it well. The most flattering result usually comes down to where the part sits and how the front pieces are styled.
4. How do I keep a tousled lob from looking messy instead of styled? Lean into soft shape rather than heavy product. Keep the roots lifted, leave a few sections smoother than others, and avoid over-curling every piece the same way.
5. What tools do I actually need? At minimum, a blow dryer, a round brush, and either a curling wand or flat iron. A texturizing spray and heat protectant will make the style easier to achieve and help it last longer through the day.