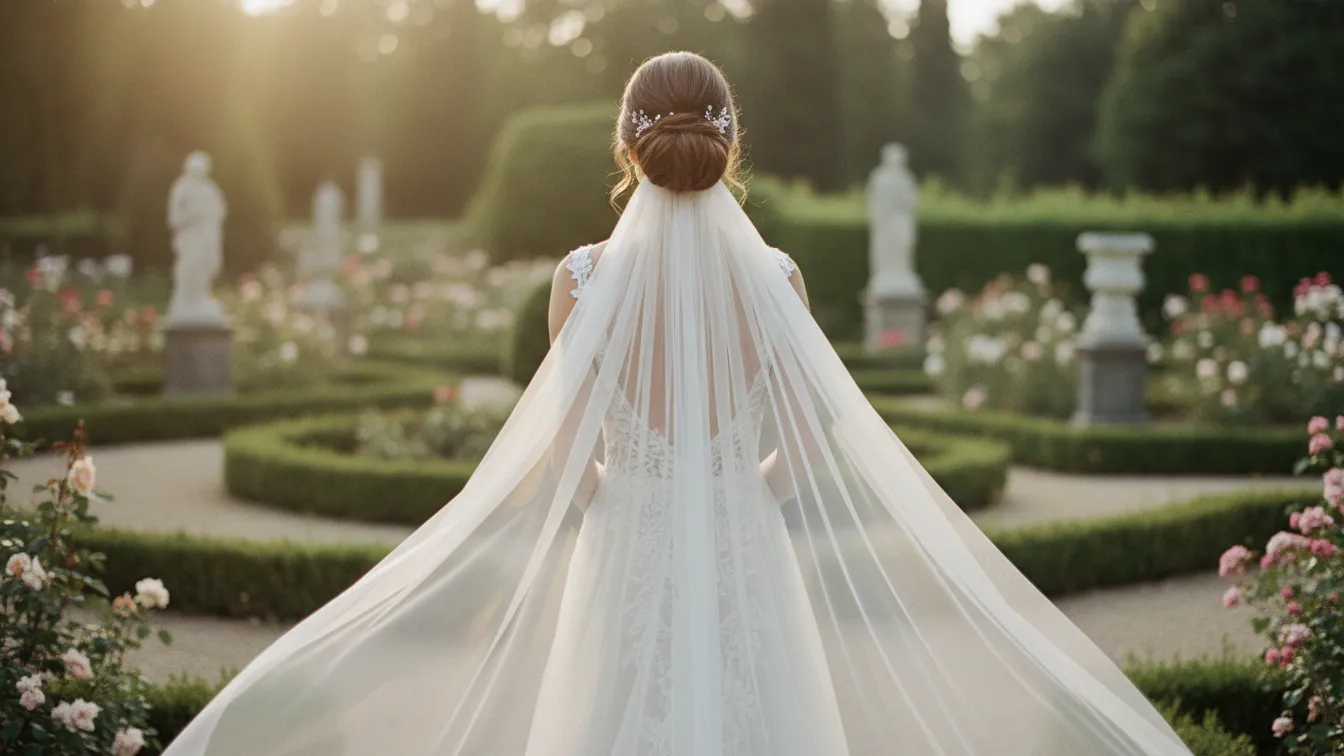
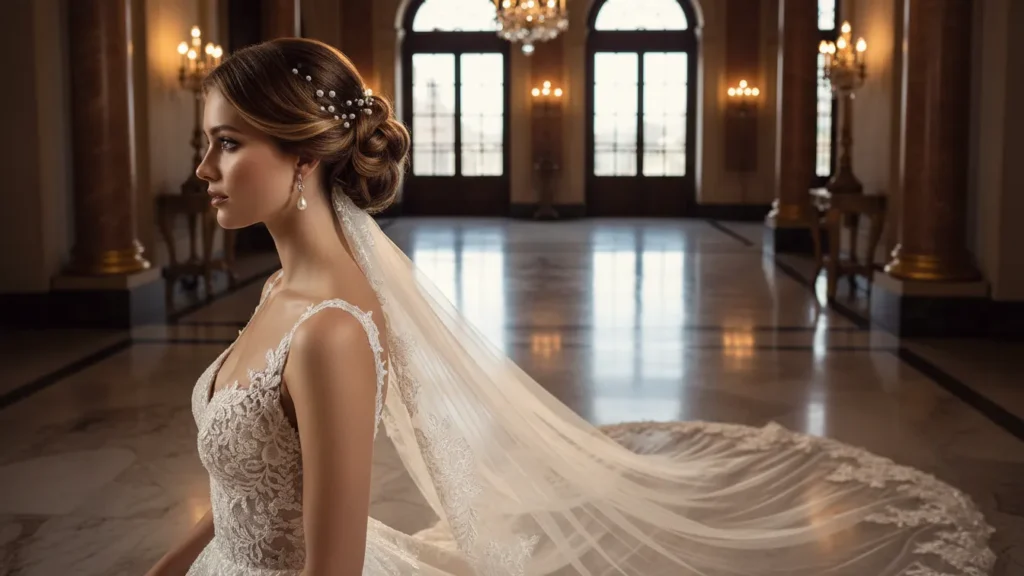
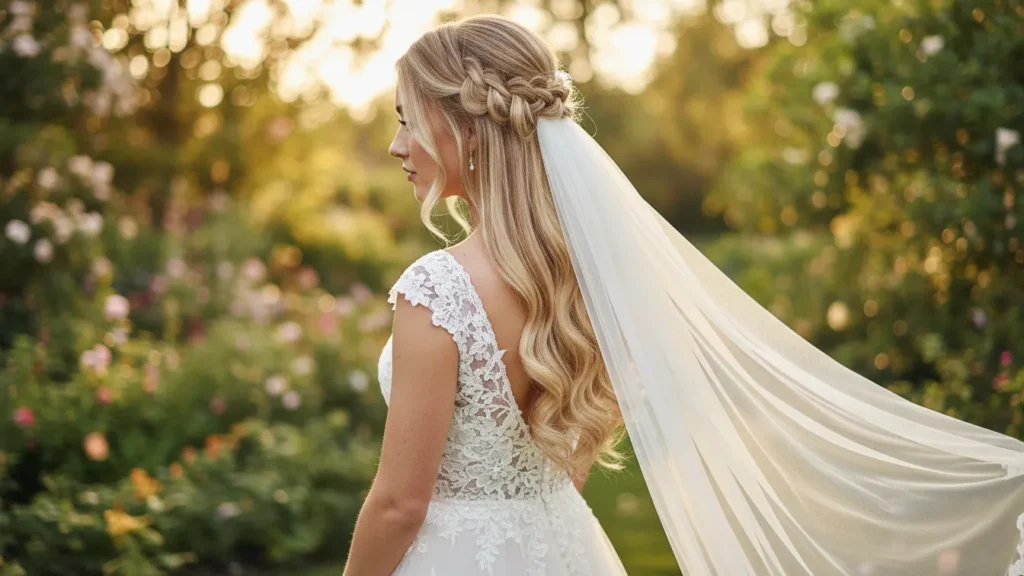
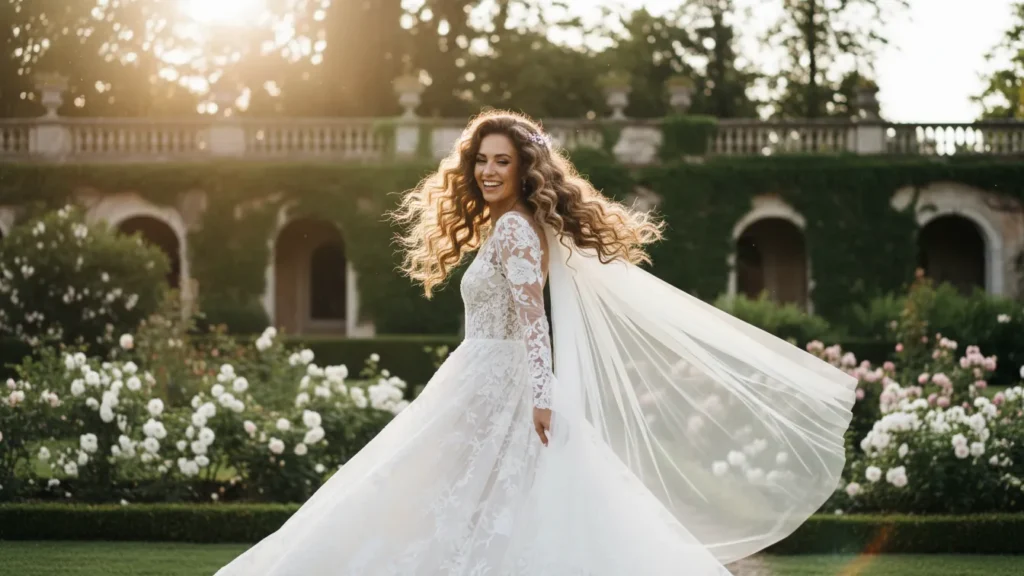
30 Stunning Wedding Hairstyles for Long Hair With Veils That Actually Stay Put
You’ve found the perfect dress. The venue is booked. But now you’re staring at Pinterest boards at 2 AM, wondering: How on earth do I make my veil work with my hair?
I get it. The veil question keeps more brides up at night than you’d think. Will it slip? Will it hide your carefully planned hairstyle? And seriously, where do all those bobby pins even go?
Here’s the thing—wedding hairstyles for long hair with veils don’t have to be complicated. In my experience working with dozens of brides, the secret isn’t just picking a pretty style. It’s understanding how your face shape, hair texture, and veil type work together.
In this guide, you’ll find 30 gorgeous hairstyle ideas, plus the practical tips that actually matter. We’re talking bobby pin techniques that work, veil placement that won’t give you a headache, and honest advice about what you can DIY versus when you need a pro.
Quick Reference: Find Your Perfect Style in 60 Seconds
Before we dive deep, here’s a handy table to help you narrow down your options fast:
| Hairstyle | Best For | Ideal Veil Length | Difficulty | Styling Time |
|---|---|---|---|---|
| Classic Low Bun | Round, square faces | Cathedral, chapel | Medium | 45-60 min |
| Romantic Waves Down | All face shapes | Fingertip, waltz | Easy | 30-40 min |
| Half-Up Twist | Oval, heart faces | Elbow, fingertip | Easy | 25-35 min |
| Braided Crown | Long faces | Birdcage, blusher | Hard | 60-90 min |
| Side-Swept Curls | Round faces | Chapel, fingertip | Medium | 40-50 min |
| High Textured Bun | All face shapes | Cathedral | Hard | 50-70 min |
| Loose Chignon | Square, heart faces | Chapel, waltz | Medium | 45-55 min |
| Beachy Waves | Oval, long faces | Fingertip, elbow | Easy | 30-40 min |
Understanding Wedding Veils: What You Need to Know First
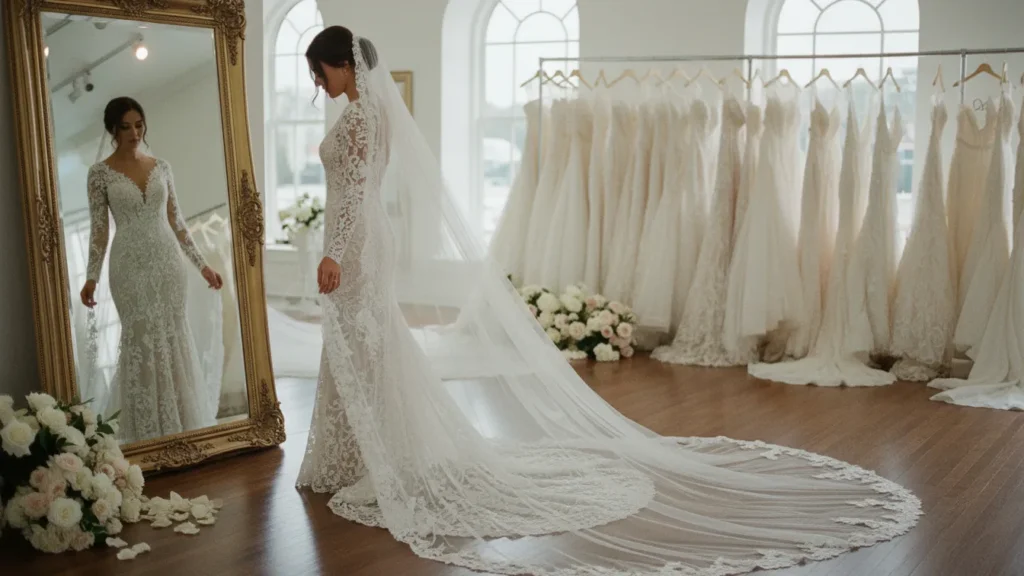
Now here’s where it gets interesting. Not all veils are created equal, and choosing the wrong one for your hairstyle can create a styling nightmare.
Veil Lengths and What They Mean for Your Hair
Wedding veils come in several standard lengths, and each one plays differently with long hair:
- Birdcage/Blusher (face length): Perfect for short, vintage-inspired styles. These won’t weigh down your hair at all.
- Shoulder/Flyaway (12-18 inches): Great for showcasing your hairstyle since they end right at your shoulders.
- Elbow Length (25 inches): The Goldilocks option—not too long, not too short. Works with almost any bridal hairstyle.
- Fingertip (36-40 inches): One of the most popular choices. Hits right where your fingertips fall, creating an elegant drape.
- Waltz/Ballet (60 inches): Reaches mid-calf. You’ll need a sturdy hairstyle foundation for this weight.
- Chapel Length (90 inches): Touches the floor and extends slightly behind you. Requires professional securing techniques.
- Cathedral Length (120+ inches): The most dramatic option. This is heavy, folks. Your updo needs to be rock-solid.
How Veil Weight Affects Your Hairstyle Choice
Here’s what most articles won’t tell you: a cathedral veil can weigh as much as half a pound. Try holding a water bottle on your head for four hours—that’s basically what you’re signing up for.
What I love about this is you can plan ahead. If you’re set on a super long veil, you’ll want:
- A low placement point (less leverage = less headache)
- Multiple securing points with bobby pins
- Possibly hair extensions for extra anchoring volume
- A hairstyle with texture (smooth hair = slippery veil base)
For lighter veils like fingertip or elbow length, you’ve got way more flexibility. Hair down? Totally doable. Loose half-up style? Go for it.
Common Mistakes Brides Make (And How to Avoid Them)
After seeing countless hair trials go wrong, here are the mistakes that keep popping up:
- Choosing the hairstyle before the veil: Always pick your veil first. The weight and length dictate what’s actually possible.
- Not testing with the actual veil: Your hair trial with a cheap craft-store veil won’t prepare you for the weight of your real one.
- Ignoring your hair texture: Fine hair needs different techniques than thick hair. One bride’s “easy updo” is another bride’s four-hour battle.
- Skipping the grip products: Yes, that texturizing spray matters. A lot.
- Planning complicated styles for outdoor weddings: Wind + intricate loose curls = disaster. Be realistic about your venue.
Expert Tips Before You Start Styling
Celebrity hairstylist recommendations emphasize preparation over perfection. Here’s your game plan:
Hair Preparation Timeline
3 Months Before:
- Get a trim to remove damaged ends
- Start deep conditioning treatments weekly
- If considering extensions, get them now so they blend naturally
- Book your hair trial appointment
1 Month Before:
- Final trim (just to clean up, not a major cut)
- Do a test run with your actual veil
- Buy all styling products and tools you’ll need
- Practice the style at least once if DIYing
1 Week Before:
- Deep condition every other day
- Avoid trying new hair products (no surprises!)
- Confirm timing with your hairstylist
- Prepare your styling kit
Wedding Day:
- Wash hair the day before (day-of hair holds style better)
- Use dry shampoo at roots for grip
- Eat breakfast (low blood sugar = shaky hands if self-styling)
Must-Have Supplies Checklist
Whether you’re DIYing or working with a pro, here’s what you need:
For Securing the Veil:
- Bobby pins (at least 20—seriously, they disappear)
- Clear elastic bands
- Texturizing spray or dry shampoo
- Strong-hold hairspray
- Small comb for backcombing
For the Hairstyle:
- Curling iron or wand (1-1.5 inch barrel)
- Paddle brush
- Teasing brush
- Hair ties
- Sectioning clips
- Shine serum (just a tiny bit)
Pro Tip: Buy bobby pins that match your hair color exactly. Black pins on blonde hair photograph terribly.
Questions to Ask Your Hairstylist
You might be wondering what even matters at a consultation. Ask these:
- “Have you worked with my veil length before?”
- “How will you secure the veil so it doesn’t slip?”
- “What’s your backup plan if my hair won’t hold the style?”
- “Do I need hair extensions for this look?”
- “How long will this style realistically last?”
- “What products will you use, and can I buy them?”
- “What should I do for touch-ups during the reception?”
Don’t be shy about these questions. A good stylist loves when brides come prepared.
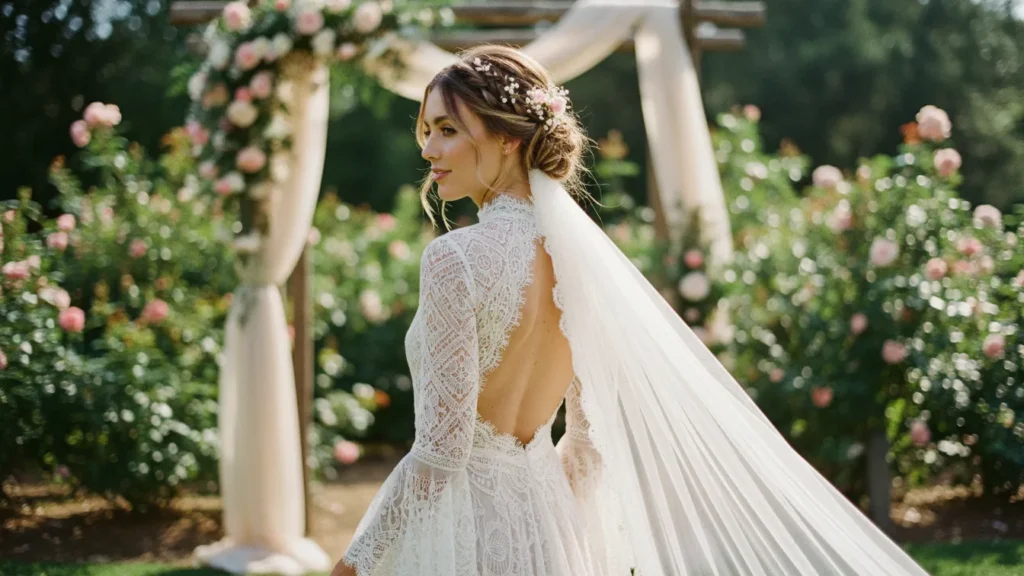
30 Wedding Hairstyles for Long Hair With Veils
Now for the good stuff—the actual hairstyles. I’ve organized these by category so you can jump straight to your preferred style.
UPDOS WITH VEILS
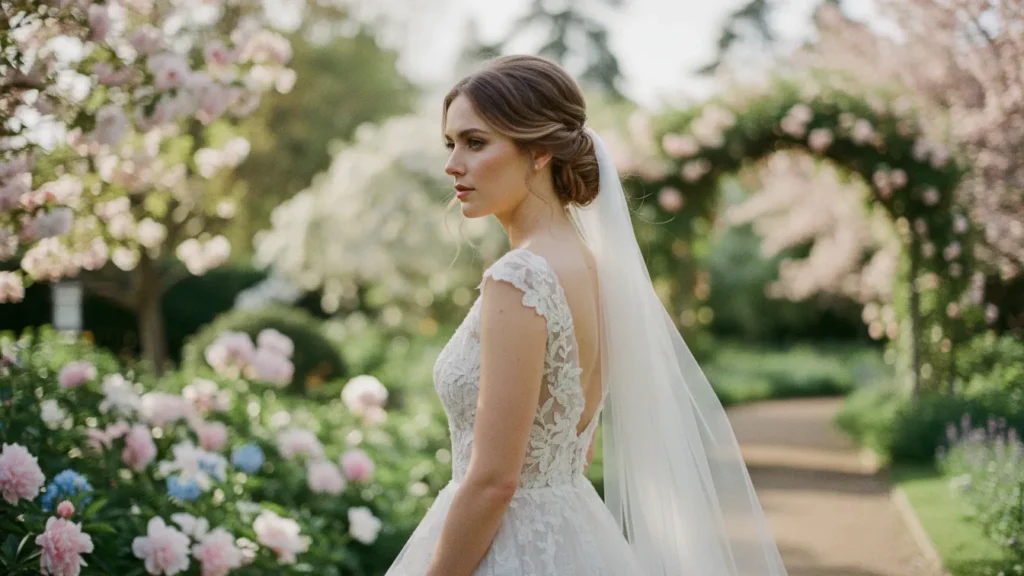
1. Classic Low Chignon
This timeless wedding updo with veil works for literally everyone. The low placement means your veil sits comfortably without pulling.
Best for: Round or square faces (the low bun elongates)
Veil placement: Clip the veil directly above the bun for a cascading effect
Hair texture needed: Works with all textures
Pro tip: Leave a few face-framing tendrils loose before securing. This softens the look and photographs beautifully.
The classic chignon has been gracing royal weddings for decades because it’s elegant without being fussy. What I love about this style is how it showcases your neckline—perfect if you’ve chosen a strapless wedding dress or illusion back.
To secure your veil: Create a horizontal line of crisscrossed bobby pins just above the bun. Slide your veil comb into this foundation, then add two more pins through the comb itself.
2. Textured Messy Bun
Now here’s where it gets fun. The “undone” bun gives major bohemian wedding vibes while still being formal enough for traditional venues.
Best for: Oval and heart-shaped faces
Veil placement: Low, just at the nape of your neck
Hair texture needed: Thick or medium hair works best
Pro tip: Use a texturizing spray before styling—smooth hair won’t hold the “messy” texture well.
This style is having a huge moment right now. Unlike the sleek chignon, you want visible texture and deliberately pulled-apart sections. Some brides worry it looks too casual, but paired with a cathedral veil, it’s absolutely stunning.
The key is strategic messiness. Pull out small pieces randomly, but keep the overall structure secure. Think “effortlessly chic” not “forgot to brush.”
3. Braided Low Bun
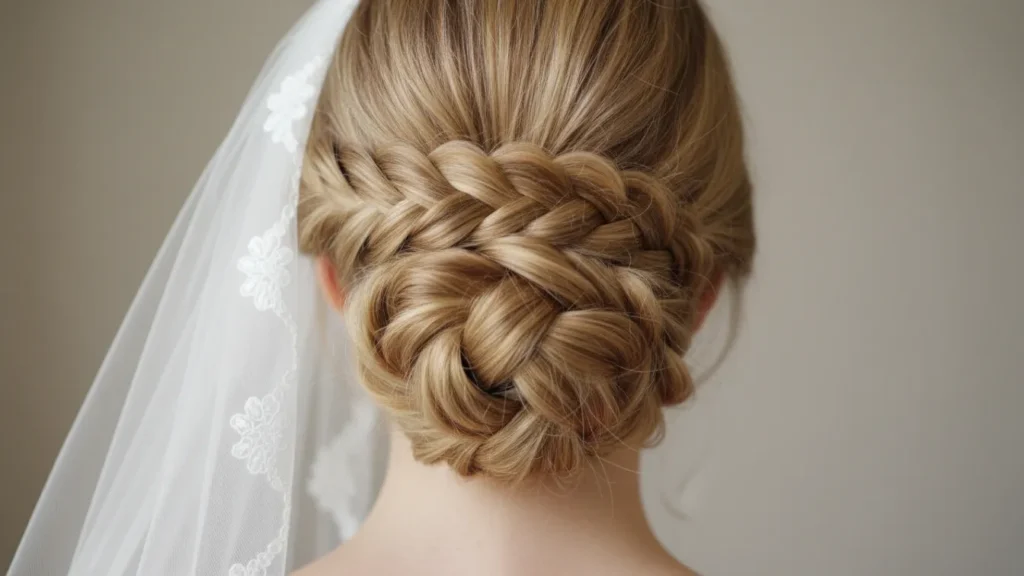
If you want something special but not over-the-top, this is it. A braided bun adds visual interest without requiring a million bobby pins.
Best for: Long faces (horizontal braiding adds width)
Veil placement: Above or below the bun—both work
Hair texture needed: Any texture; fine hair benefits from extensions
Pro tip: Pancake your braids (gently pull the sides) for a fuller, more romantic look.
The most popular version uses a Dutch braid or fishtail wrapped around a low bun. You can also do multiple small braids incorporated into the bun itself for a more intricate bridal hairstyle.
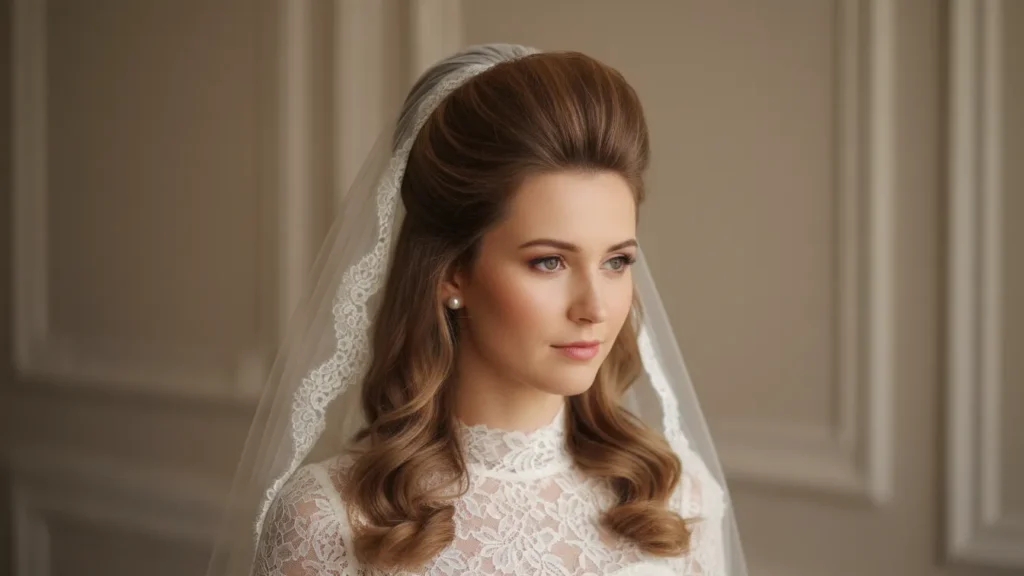
4. High Bun with Volume

This one’s dramatic. A high bun gives you major height and works incredibly well with long, flowing veils.
Best for: Petite brides or those wanting to add height
Veil placement: Right at the base of the bun
Hair texture needed: Thick hair or extensions highly recommended
Pro tip: Backcomb at the crown before pulling hair up to create that gorgeous volume.
Celebrity hairstylists love this look for evening weddings and formal venues. It’s got old Hollywood glamour written all over it. The veil drapes beautifully from the high placement point, creating an elegant waterfall effect.
Be warned though—this style can feel heavy by hour three. Consider removing your veil after the ceremony if you’re going for this look.
5. Twisted Low Updo
Here’s a softer alternative to the traditional bun. Twisting sections instead of braiding creates subtle texture.
Best for: All face shapes
Veil placement: Low, where the twists meet
Hair texture needed: Medium to thick hair
Pro tip: Don’t twist too tightly—you want soft, romantic loops, not tight ropes.
This style is perfect for garden weddings or spring celebrations. It has a naturally romantic vibe that photographs beautifully from every angle. The twists catch light in a way that simple buns don’t.
6. French Twist with Veil

Nothing says elegance quite like a French twist. This is your grandmother’s wedding hair—in the best possible way.
Best for: Square faces, mature brides
Veil placement: At the top of the twist or bottom
Hair texture needed: Smooth, straight hair works best
Pro tip: Use a rat-tail comb to smooth every strand. This style demands perfection.
The French twist is experiencing a major comeback, especially with minimalist brides. It’s sleek, it’s sophisticated, and paired with a simple fingertip veil, it’s absolutely timeless.
One challenge: This style requires practice. If you’re DIYing, do at least three test runs. Your arms will get tired, so consider hiring a pro.
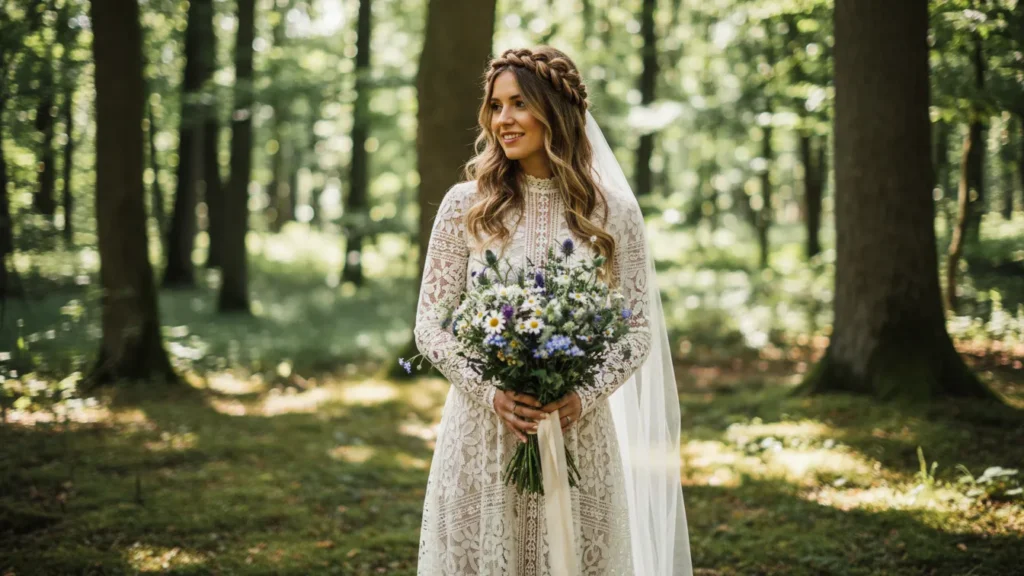
7. Crown Braid Updo

Want to feel like actual royalty? A crown braid delivers. This style involves braiding around the crown of your head, then gathering the rest into a low bun.
Best for: Round faces (the crown braid adds height)
Veil placement: Behind the crown braid, above the bun
Hair texture needed: Any, but wavy hair braids beautifully
Pro tip: Pull the braid slightly apart after securing to create width and dimension.
This bridal hairstyle works particularly well for outdoor or rustic weddings. You can weave in small flowers, pearls, or delicate hair accessories for extra detail.
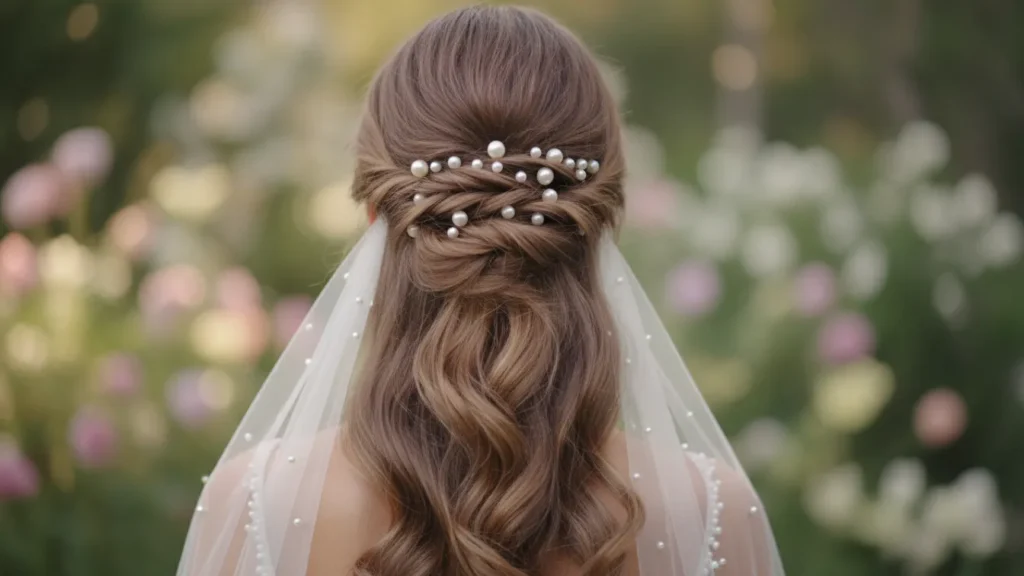
8. Low Twisted Chignon with Pearls
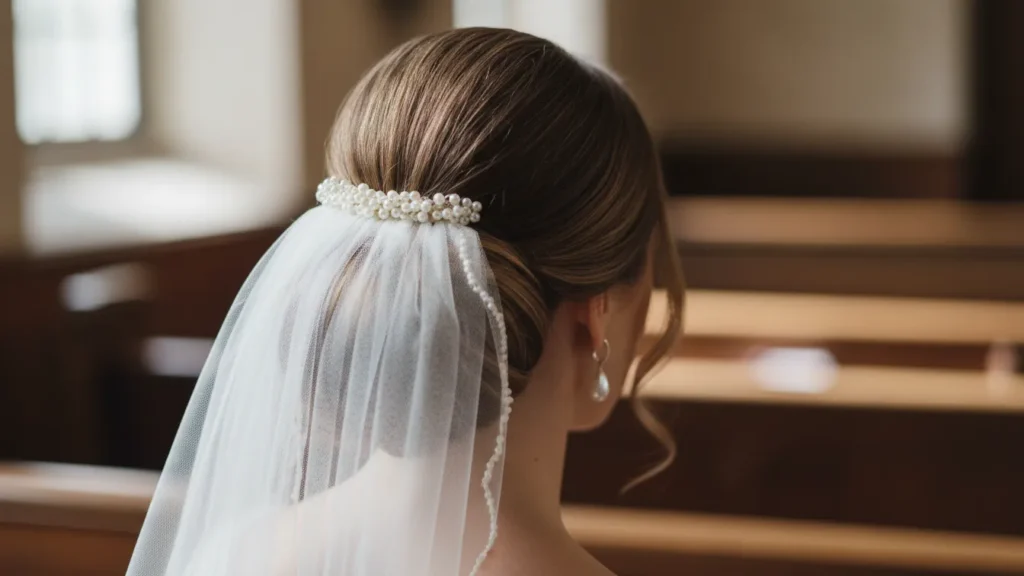
This is the classic chignon elevated. Adding pearl pins throughout creates a subtle sparkle that catches candlelight beautifully.
Best for: Traditional, formal weddings
Veil placement: Above the chignon
Hair texture needed: All textures
Pro tip: Use pearl pins that match your dress embellishments for a cohesive look.
The beauty of this style is in the details. Each pearl pin should look intentional, not randomly placed. Cluster them on one side or scatter them evenly throughout the twists.
9. Side-Swept Updo

Breaking from center placement, this asymmetrical updo creates visual interest and works beautifully with side-swept veils.
Best for: Oval and long faces
Veil placement: On the opposite side of the updo
Hair texture needed: Wavy or curly hair
Pro tip: Keep more volume on the side with the updo to balance the asymmetry.
This style is perfect if you want a signature “look” for photos. The asymmetry photographs incredibly well from multiple angles.
10. Sleek Low Bun with Center Part
Minimalist brides, this one’s for you. A perfectly smooth, sleek bun screams modern sophistication.
Best for: Heart-shaped faces
Veil placement: Directly above the bun
Hair texture needed: Straight hair or willing to flat-iron
Pro tip: Use a boar-bristle brush and lots of smoothing serum. Any flyaways ruin the sleek effect.
This wedding hairstyle for long hair with veil is having a moment in modern bridal fashion. It’s clean, elegant, and lets your dress and veil be the stars.
HALF-UP STYLES WITH VEILS
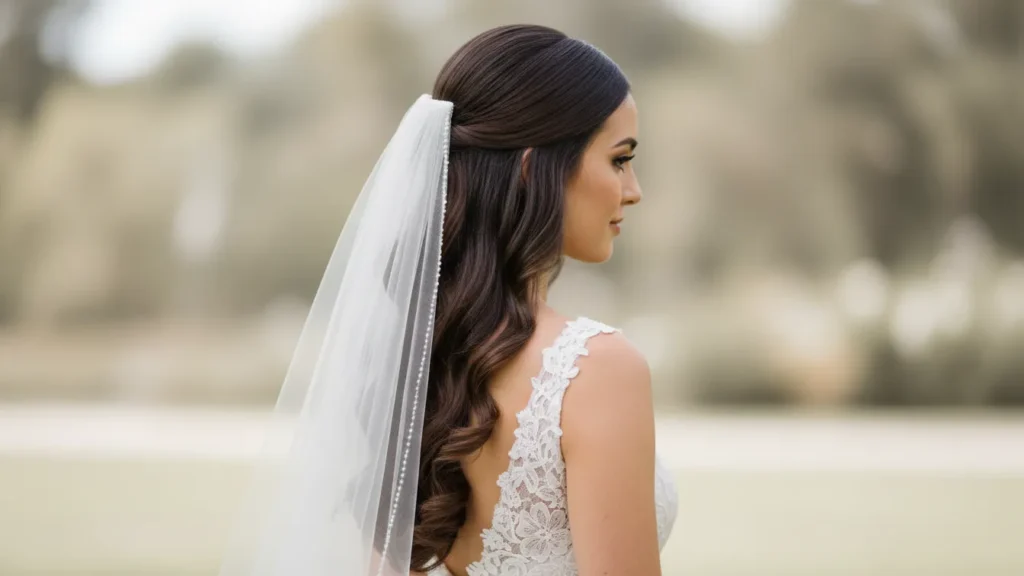
11. Romantic Half-Up with Loose Curls

This is the most popular half-up wedding hairstyle for a reason—it’s flattering, romantic, and relatively easy to achieve.
Best for: All face shapes
Veil placement: Right where the half-up section is secured
Hair texture needed: Any; straight hair needs curling
Pro tip: Curl your hair in different directions for a more natural, lived-in look.
The beauty of half-up half-down wedding hairstyles is versatility. You keep length and movement while still having hair off your face. Your veil comb slips right into the twist or braid securing the top section.
Celebrity hairstylists recommend loose curls over tight ringlets—they’re more forgiving if your hair starts to fall throughout the day.
12. Braided Crown Half-Up
A braid across the crown section adds a bohemian touch without going full boho.
Best for: Long, rectangular faces
Veil placement: Behind the braid
Hair texture needed: Wavy hair braids best
Pro tip: Braid loosely and pull apart sections for a fuller, more romantic effect.
This style works beautifully for outdoor ceremonies. The braid keeps hair controlled even in wind, while the length still flows freely.
13. Twisted Half-Up with Volume

Instead of braiding, twist sections from each side and pin at the back. Simple but elegant.
Best for: Round faces
Veil placement: Where the twists meet
Hair texture needed: All textures
Pro tip: Backcomb the crown area before twisting for added height.
This is one of the easiest wedding hairstyles to DIY successfully. It takes maybe 30 minutes and creates a polished look without requiring advanced skills.
14. Half-Up Top Knot

For brides who want something a little edgier, a half-up top knot brings modern style while keeping it bridal.
Best for: Oval faces
Veil placement: Below the knot
Hair texture needed: Thick hair
Pro tip: Make the knot slightly messy—too perfect looks odd.
This style skews younger and more contemporary. It’s perfect for less formal venues or brides who want a relaxed vibe.
15. Pearl-Adorned Half-Up Style
Taking the basic half-up and adding pearl accessories throughout elevates it into something special.
Best for: All face shapes
Veil placement: Standard, at crown
Hair texture needed: Any
Pro tip: Use a mix of pearl pin sizes for dimension and visual interest.
Pearl accessories are having a major moment in bridal hair right now. They add shine and elegance without being over-the-top.
16. Waterfall Braid Half-Up
This intricate-looking braid is actually easier than it appears and creates stunning dimension.
Best for: Long faces
Veil placement: Behind the braid
Hair texture needed: Wavy or straight
Pro tip: Practice this braid at least twice before your wedding day—it has a learning curve.
The waterfall braid creates the illusion that sections of hair are “falling” through the braid. It photographs incredibly well and adds a fairy-tale quality to your look.
17. Side-Swept Half-Up

All the hair is swept to one side, with just the top section pinned back.
Best for: Round faces
Veil placement: On the pinned side
Hair texture needed: Wavy or curly
Pro tip: Use a texturizing spray so hair holds the side-swept position.
This asymmetrical style is perfect for showcasing statement earrings on one side.
18. Bouffant Half-Up
Channel your inner 1960s style icon with a teased crown section and smooth sides.
Best for: Long, thin faces
Veil placement: At the peak of the bouffant
Hair texture needed: Fine to medium hair
Pro tip: Use a volumizing powder at roots before backcombing for extra lift.
This retro-inspired style adds serious drama and height. It’s perfect for vintage-themed weddings.
HAIR DOWN WITH VEILS
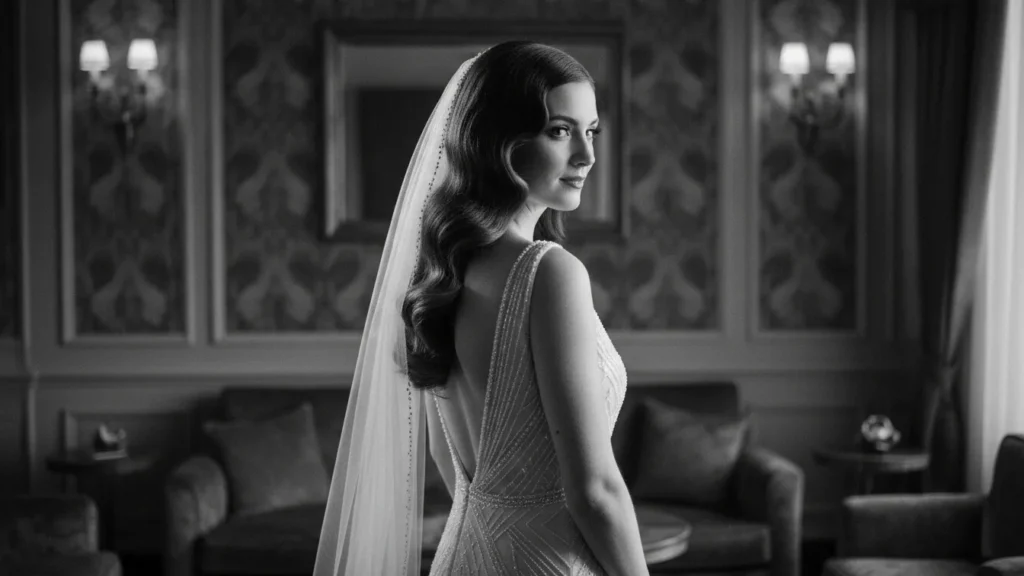
19. Classic Hollywood Waves
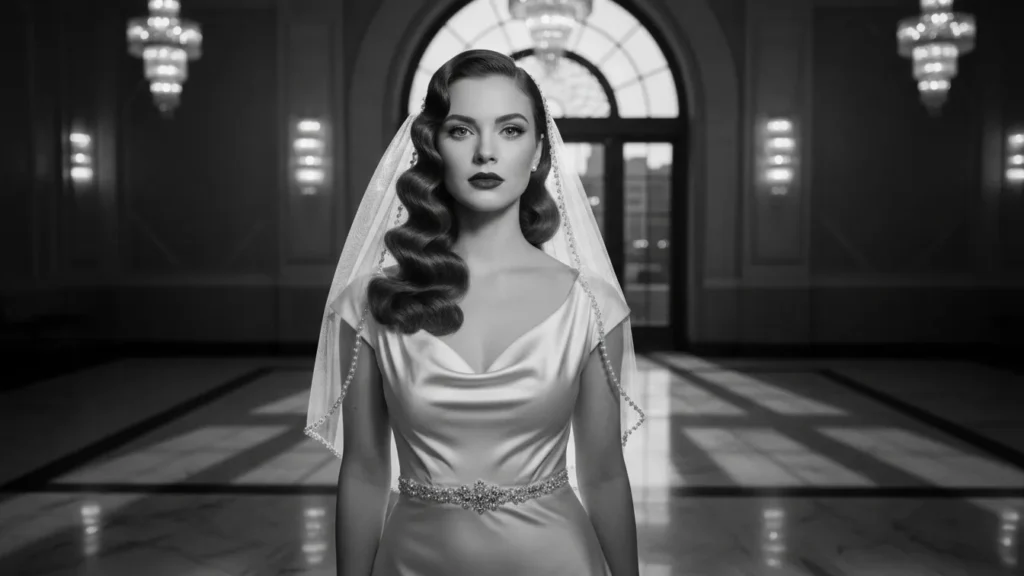
Think old Hollywood glamour—deep, smooth waves with serious shine.
Best for: All face shapes
Veil placement: At crown of head
Hair texture needed: Any; requires hot tools
Pro tip: Use a 1.5-inch barrel curling iron and brush out the curls completely for that smooth wave effect.
Wedding hairstyles with hair down don’t get more elegant than this. The waves are polished and formal enough for the fanciest venues.
The veil attachment can be tricky with hair down—you need a solid foundation. Create a small, hidden braid at your crown as an anchor point for bobby pins.
20. Beachy Waves with Veil

For a more relaxed vibe, beachy waves bring effortless romance.
Best for: Oval and long faces
Veil placement: Crown or slightly to side
Hair texture needed: Naturally wavy is best
Pro tip: Scrunch in sea salt spray while damp, then loosely curl random sections.
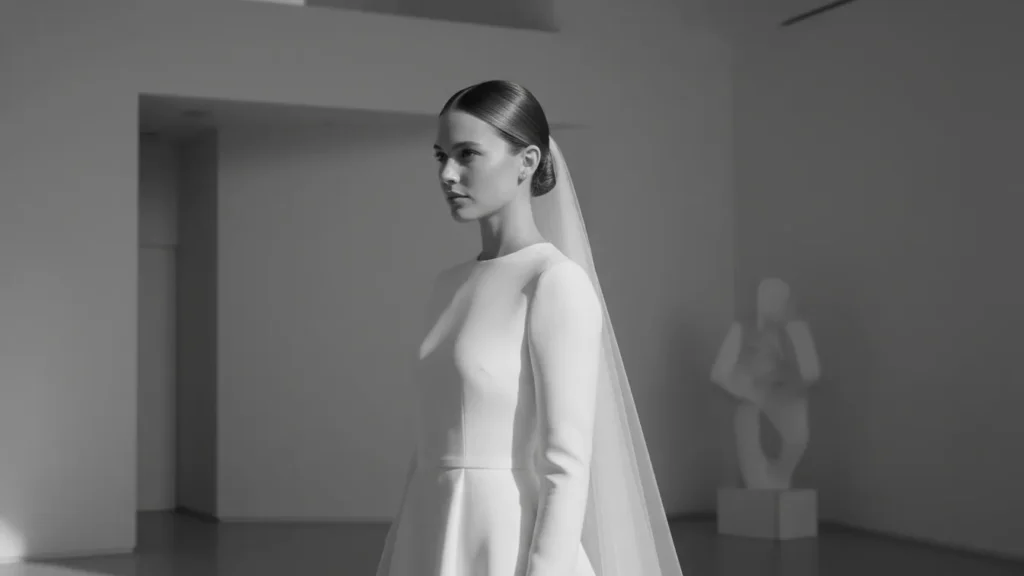
This style screams destination wedding or casual outdoor celebration. It’s low-maintenance and actually looks better slightly imperfect.
21. Sleek Straight Hair
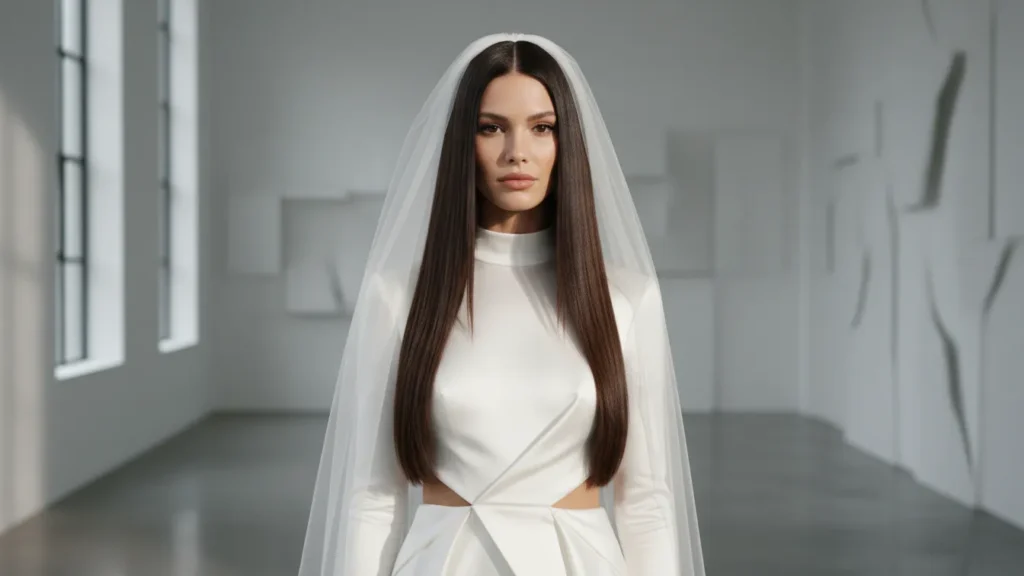
For minimalist brides, perfectly straight hair makes a bold statement.
Best for: Heart-shaped faces
Veil placement: Crown, with center part
Hair texture needed: Naturally straight or willing to flat-iron
Pro tip: Use a heat protectant and finish with anti-humidity spray to keep it sleek.
This ultra-modern look pairs beautifully with simple, architectural wedding dresses.
22. Loose Romantic Curls
Softer than Hollywood waves, looser than beach waves—these curls hit the sweet spot.
Best for: All face shapes
Veil placement: Crown
Hair texture needed: Any
Pro tip: Curl in different directions and sizes for the most natural effect.
This is probably the most universally flattering bridal hairstyle option. The curls add volume and movement without being too structured.
23. Half-Curled, Half-Straight
An interesting contrast—straight at the crown, curled from mid-length down.
Best for: Long faces
Veil placement: Crown
Hair texture needed: Any
Pro tip: This style takes time. Start curling at ear-level and work down.
This modern technique creates visual interest and dimension that photographs beautifully.
24. Face-Framing Layers with Waves

Strategic layering around the face with waves throughout the length.
Best for: Round and square faces
Veil placement: Crown
Hair texture needed: Layered haircut
Pro tip: Curl the face-framing pieces away from your face to create an opening effect.
SIDE-SWEPT STYLES WITH VEILS
25. Deep Side Part with Waves
All hair swept dramatically to one side creates instant glamour.
Best for: Round faces
Veil placement: On the heavier side
Hair texture needed: Wavy or curled
Pro tip: Use several bobby pins on the light side to keep hair from falling forward.
This side-swept hairstyle is perfect for showing off statement earrings or an asymmetrical dress neckline.
26. Side Braid Cascade
A braid starting at one side and cascading over the shoulder.
Best for: Oval faces
Veil placement: Opposite side of the braid
Hair texture needed: Any
Pro tip: Pull the braid apart gently for a fuller, more romantic look.
This style works beautifully for bohemian or rustic wedding themes.
27. Side-Swept Low Ponytail
Hair gathered to one side in a low ponytail, then curled.
Best for: All face shapes
Veil placement: At the base of the ponytail
Hair texture needed: Thick hair
Pro tip: Wrap a section of hair around the elastic to hide it.
This is an underrated option that’s both elegant and practical.
28. Asymmetrical Updo
An updo positioned to one side rather than center.
Best for: Long faces
Veil placement: Same side as the updo
Hair texture needed: Medium to thick
Pro tip: Balance is key—don’t go too far to the side or it looks off-balance.
29. Side-Swept Vintage Rolls
Pin-curl sections and sweep to one side for retro glamour.
Best for: Round faces
Veil placement: Behind the rolls
Hair texture needed: Smooth, styled hair
Pro tip: This takes practice and patience—consider hiring a pro.
Perfect for vintage-themed weddings or brides who love classic Hollywood style.
30. Loose Side Fishtail Braid
A relaxed fishtail braid over one shoulder.
Best for: Oval and heart faces
Veil placement: Opposite shoulder
Hair texture needed: Any
Pro tip: Don’t braid too tightly—you want soft, romantic texture.
How to Secure Your Veil (The Part That Actually Matters)
Alright, this is the section that keeps your entire look from falling apart—literally. I’ve seen too many brides whose veils slipped halfway through the ceremony because nobody explained this properly.
The Foundation: Prepping Your Hair
Before that veil goes anywhere near your head, you need grip. Freshly washed, silky-smooth hair is your enemy here.
Day-before prep:
- Wash hair the evening before your wedding
- Skip the conditioner at your roots
- Let it air dry or rough-dry (no smoothing products)
Wedding morning:
- Spray dry shampoo at your roots
- Lightly backcomb the area where your veil will sit
- This creates texture that bobby pins can actually grip
The Bobby Pin Technique That Actually Works
Here’s what changed everything for me when I finally learned the right way:
Step 1: Create a horizontal foundation
- Take 4-5 bobby pins
- Insert them horizontally, crisscrossing them
- Push them in opposite directions (this creates a locked foundation)
- They should form an “X” pattern
Step 2: Attach the veil comb
- Slide your veil comb into this foundation at a slight downward angle
- The teeth should point toward the base of your head, not up
Step 3: Lock it down
- Take 2-3 more bobby pins
- Insert them through the holes in the veil comb itself
- This prevents the comb from lifting up or sliding
Pro tip: Test by gently tugging on your veil. If it budges at all, add more pins.
Comb vs. Clip Attachment
Most veils come with a comb, but some have clips. Here’s the honest comparison:
Veil Combs (most common):
- Better weight distribution
- More secure for heavy veils
- Requires the bobby pin foundation above
- Can be uncomfortable if placed wrong
Veil Clips:
- Easier to attach yourself
- Better for last-minute adjustments
- Not ideal for very heavy or long veils
- Can feel pinchy after a few hours
For cathedral veils or anything waltz-length or longer, combs with the bobby pin technique are non-negotiable.
Using Hair Extensions as Anchor Points
Now here’s where it gets clever. If you have fine or thin hair, consider getting clip-in hair extensions just for the veil attachment area.
Why this works:
- More hair = more bobby pin grip
- Extensions add volume that balances a heavy veil
- Creates a solid foundation that won’t slip
You don’t need extensions throughout your whole head—just a small weft at the crown where your veil attaches.
Preventing Slippage All Day
Even with perfect placement, veils can shift. Here’s your insurance policy:
- Check the angle: Your veil should angle slightly downward. If it’s perpendicular or angled up, it will eventually pop out.
- Use bobby pins that match your hair color: Black pins on blonde hair (or vice versa) actually slip more because the coating is different.
- Apply hairspray to the bobby pins: Lightly spray pins before inserting them. The slight stickiness helps them grip.
- Have a bridesmaid check every hour: Especially after hugging, dancing, or wind gusts. A quick adjustment beats a fallen veil.
- Consider a backup attachment: Pack extra bobby pins and a small comb in your emergency kit.
The Veil Removal Technique
Most brides remove their veils before the reception. Here’s how to do it without destroying your hairstyle:
Gentle removal:
- Have someone help you (doing it yourself risks pulling hair)
- Remove the locking bobby pins first
- Gently slide the comb out at the same angle it went in
- Remove the foundation bobby pins one at a time
- Do NOT pull or yank
Quick touchup:
- Smooth any disturbed sections
- Add a tiny bit of hairspray
- Fluff any flattened areas
The whole process should take 2-3 minutes max.
Matching Hairstyles to Your Unique Features
Cookie-cutter advice rarely works in real life. Here’s how to choose based on what actually matters—your features.
By Face Shape
Oval Faces (you lucky thing):
You can literally wear any wedding hairstyle. Focus on what makes you feel most beautiful.
Best options: Everything works, but half-up styles are particularly flattering
Avoid: Nothing, really
Round Faces:
Your goal is to add height and length to elongate.
Best options: High buns, side-swept styles, deep side parts
Avoid: Blunt bangs, super-wide styles, center parts with flat hair
Pro tip: Add volume at the crown and keep sides sleek
Square Faces:
Soften the angles with curves and asymmetry.
Best options: Side-swept looks, soft waves, romantic updos
Avoid: Severe center parts, super-sleek straight styles, blunt lines
Pro tip: Face-framing tendrils are your best friend
Heart-Shaped Faces:
Balance a wider forehead with volume at the bottom.
Best options: Low buns, hair down with volume at ends, side-swept styles
Avoid: Very high updos, severe slicked-back looks
Pro tip: Keep some softness near your forehead
Long Faces:
Add width and avoid excess height.
Best options: Side parts, horizontal braids, waves with volume
Avoid: Very high buns, center parts with sleek hair, super-long straight styles
Pro tip: Consider a side-swept bang or face-framing pieces
By Hair Texture
Fine, Thin Hair:
Your challenge is creating volume and grip.
Best options: Textured updos, braided styles, half-up looks
Avoid: Super-sleek buns (they’ll look too small), very heavy veils
Pro tip: Dry shampoo and texturizing spray are essential. Consider extensions for fuller looks.
Thick, Dense Hair:
You have natural volume but might struggle with weight and bulk.
Best options: Low buns, sleek styles, hair down
Avoid: Very high styles (too heavy), super-tight updos (uncomfortable)
Pro tip: Section carefully and use strong-hold products
Curly/Coily Hair:
Embrace your natural texture—it’s gorgeous!
Best options: Natural curls down, defined curl updos, twist-outs
Avoid: Fighting your texture (it never ends well)
Pro tip: Deep condition the week before and use curl-defining products
Wavy Hair (the lucky middle ground):
You can go either direction—embrace or smooth.
Best options: Everything works well
Avoid: Trying to make it perfectly straight (it’ll fight humidity)
Pro tip: Enhance your natural wave pattern instead of fighting it
By Dress Neckline
Your wedding dress neckline should influence your hairstyle choice:
Strapless or Sweetheart:
Show off that collarbone and shoulders.
Best: Updos, half-up styles, side-swept looks
Avoid: Covering your shoulders with too much hair down
Halter or High Neck:
Keep hair up and off the neckline.
Best: High buns, sleek updos, ponytails
Avoid: Hair down (creates bulk at the neck)
Off-the-Shoulder:
Frame the neckline without covering it.
Best: Side-swept, soft updos, hair down with front pieces pinned back
Avoid: Very severe, pulled-back styles
Illusion Back or Open Back:
Show off that gorgeous detail!
Best: Side-swept, updos, anything that keeps the back visible
Avoid: Loose hair covering the back detail
V-Neck or Plunging:
Balance the neckline without competing.
Best: Sleek updos, hair down with middle part
Avoid: Too much volume at the crown
By Wedding Venue and Theme
Beach or Outdoor Weddings:
Wind and humidity are factors.
Best: Secured updos, braided styles, textured looks
Avoid: Super-sleek styles (they’ll frizz), elaborate loose curls (wind will destroy them)
Pro tip: Use anti-humidity products religiously
Formal Ballroom Weddings:
Classic elegance is key.
Best: Chignons, sleek buns, Hollywood waves
Avoid: Super-casual beach waves, too-messy styles
Rustic Barn Weddings:
Relaxed but polished.
Best: Braided styles, loose waves, textured updos
Avoid: Overly formal, stiff looks
Garden or Outdoor Venue:
Romantic and natural.
Best: Soft curls, floral-adorned styles, flowing looks
Avoid: Super-sleek modern styles
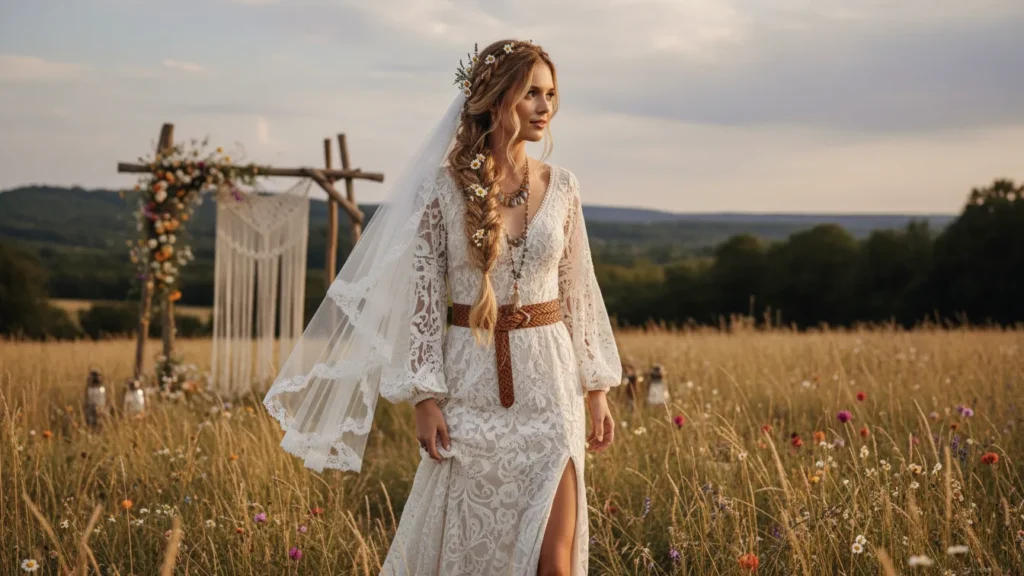
Boho or Festival-Style:
Free-spirited and relaxed.
Best: Braids, loose waves, flower crowns with veils
Avoid: Traditional formal updos
Seasonal Considerations for Wedding Hair
Here’s what nobody tells you: the weather on your wedding day will affect your hairstyle as much as your styling skills.
Summer Weddings (Fighting Humidity and Heat)
The Reality:
Humidity is your arch-nemesis. That gorgeous Pinterest hairstyle? It might not survive a 95-degree outdoor ceremony.
Best styles for summer:
- Secured updos that keep hair off your neck
- Braided styles (braids hold up better in humidity)
- Textured looks (embracing some natural frizz)
Worst styles for summer:
- Super-sleek, straight styles (first to frizz)
- Elaborate loose curls (they’ll droop)
- Anything requiring perfection (it won’t last)
Summer-Proof Products:
- Anti-humidity hairspray (this isn’t optional)
- Smoothing serum for flyaways
- Oil-absorbing powder for sweaty roots
Pro tip: Schedule your ceremony for evening if possible. Late afternoon heat is brutal on hair.
Winter Weddings (Managing Static and Dryness)
The Reality:
Static, hats, and indoor heating create different challenges.
Best styles for winter:
- Sleek updos (humidity isn’t fighting you)
- Smooth, polished looks
- Styles that accommodate a coat/wrap
Worst styles for winter:
- Anything requiring tons of volume (hat head)
- Super-intricate styles you can’t cover with a wrap
Winter-Proof Products:
- Anti-static spray
- Deep conditioning mask the week before
- Shine serum for combating dull, dry hair
Pro tip: Plan your coat removal. Have someone waiting at the venue to take it immediately so you don’t get hat hair at your own wedding.
Spring/Fall (The Goldilocks Seasons)
The Reality:
Weather can be unpredictable—you might get summer heat or winter cold.
Best approach:
- Choose versatile styles that work in various conditions
- Have a backup plan for weather changes
- Pack both anti-humidity and anti-static products
Pro tip: Check the weather forecast obsessively the week before and adjust your product choices accordingly.
Common Problems & Solutions (The Troubleshooting Section)
In my experience, these issues come up way more often than anyone admits. Here’s the honest solutions.
Problem #1: “My veil is too heavy—it’s giving me a headache”
Quick fix:
- Lower the placement point (closer to the nape = less weight leverage)
- Remove the veil right after the ceremony
- Take ibuprofen preventatively before getting dressed
Long-term solution:
- Choose a shorter, lighter veil
- Consider a birdcage or blusher for the ceremony only
- Use multiple bobby pins to distribute weight across a wider area
Pro tip: During your hair trial, wear the veil for at least 30 minutes. If it bothers you then, it’ll be worse for 4+ hours.
Problem #2: “Bobby pins are digging into my scalp”
Why this happens:
The pins are inserted at the wrong angle or pushed too deep.
The fix:
- Bobby pins should slide along your scalp, not stab into it
- Insert at a slight downward angle following your head’s curve
- Don’t push them all the way to the base—leave a tiny bit of space
- Use bobby pins with plastic coating (they’re gentler)
Pro tip: If a pin hurts, remove it and try again. One painful pin will ruin your entire day.
Problem #3: “My hair won’t hold curls”
Common causes:
- Hair is too clean and slippery
- Using the wrong products
- Hair is too heavy
- Not enough heat or hold time
The fix:
- Wash hair the day before, not day-of
- Use mousse on damp hair before drying
- Curl in smaller sections
- Let each curl cool completely in your hand before releasing
- Use hot rollers instead of a curling iron (they hold better)
- Finish with strong-hold hairspray
Pro tip: For hair that refuses to hold curl, consider a texturizing treatment a few weeks before. It creates slight texture that holds style better.
Problem #4: “My veil is covering my carefully planned hairstyle”
The issue:
Veil placement is too high or the veil is too full.
The fix:
- Place the veil lower on your head
- Choose a veil with less volume (fewer layers)
- Use a cut-edge veil instead of a gathered one
- Consider a single-tier veil
During the ceremony:
- Have your photographer focus on side and front angles where the hairstyle shows
Pro tip: Ask your hairstylist to position your hairstyle elements (like braids or twists) on the sides and front where they’ll be visible even with the veil.
Problem #5: “Everything is slipping/falling by hour three”
Why this happens:
- Not enough grip products
- Bobby pins inserted incorrectly
- Hair is too clean or too slippery
- Hairstyle is too complicated to last
Prevention:
- Use dry shampoo at roots even if hair isn’t oily
- Insert bobby pins in opposing directions (creates lock)
- Choose a structured style over loose, flowing looks
- Schedule touch-up time with your stylist
Emergency kit essentials:
- Extra bobby pins (at least 20)
- Travel-size strong-hold hairspray
- Small comb
- Hair ties
- Clear elastic bands
Pro tip: Assign a bridesmaid as your “hair person.” Their job is to check your hair every hour and do minor fixes.
Problem #6: “My fine hair looks too thin in updos”
Why this happens:
Fine hair has less volume naturally.
Solutions:
- Get clip-in extensions (even just a few)
- Backcomb extensively before styling
- Use volumizing powder at roots
- Choose textured, messy styles over sleek ones
- Pull the updo apart slightly after pinning to create fullness
Pro tip: Extensions don’t need to match perfectly—they’ll blend once styled.
Ceremony vs. Reception Hair (Planning Two Looks)
Now here’s where it gets interesting. Most brides wear their veil only for the ceremony and photos. That means you need a hairstyle that works both with and without the veil.
When to Remove Your Veil
Traditional timing:
- After the ceremony
- Before the reception entrance
- After formal photos
Modern approach:
- Whenever you want!
- Some brides keep it all night
- Others remove it after the ceremony
Pro tip: If you’re removing it for the reception, build this into your timeline. Allow 5-10 minutes for removal and touch-ups.
Hairstyles That Transition Well
Best options:
- Low buns: Look complete with or without veil
- Half-up styles: Still polished when veil comes out
- Braided updos: The braiding detail shows beautifully after veil removal
- Textured updos: Don’t rely on the veil for structure
Styles that DON’T transition well:
- Hair down with veil at crown (leaves a flat spot)
- Styles specifically designed around veil placement
- Super-sleek looks that show every bobby pin mark
Adding a Second Look Element
Some brides add something after the veil comes out:
Popular additions:
- Sparkly hair clip
- Fresh flowers
- Decorative comb
- Statement hair pins
- Small tiara
Pro tip: Have your stylist place this before you get dressed, then add the veil over it. When you remove the veil, the accessory is already in place.
Touch-Up Kit Essentials
When you remove your veil, you’ll need quick fixes:
Must-haves:
- Small mirror
- Bobby pins (your color)
- Travel hairspray
- Small comb or brush
- Shine serum (tiny amount for flyaways)
Nice to have:
- Dry shampoo
- Edge control for baby hairs
- Hair tie (backup)
Pro tip: Put one bridesmaid in charge of the touch-up kit. She should check your hair right after veil removal.
DIY vs. Professional Styling (The Honest Breakdown)
Let’s talk money and reality. Can you actually do your wedding hair yourself?
Styles You Can Realistically DIY
Easy difficulty (30-40 minutes):
- Loose waves or curls down
- Simple half-up, half-down
- Low ponytail with curls
- Beach waves
Medium difficulty (45-60 minutes):
- Low bun or chignon
- Side-swept styles
- Basic braided looks
- Textured updos
What you need:
- Multiple practice runs (at least 3)
- Quality hot tools
- Professional products
- Steady hands (or caffeine)
- A helper for the back
Pro tip: Film yourself during practice runs. Watching the video helps you see what needs fixing.
When to Absolutely Hire a Pro
Hire a professional if:
- Your style involves intricate braiding
- You want a sleek, perfect updo
- You’re working with extensions
- You have very heavy or long hair
- You’re already stressed about timing
- Your hands shake when nervous
- The style takes longer than 45 minutes
Average costs (varies by location):
- Basic styling: $75-150
- Updo with extensions: $150-300
- Trial run: $50-100 (often applied to day-of cost)
- Travel fee: $50-200
Cost Comparison
DIY route:
- Hot tools (if you don’t own): $100-200
- Professional products: $50-100
- Practice supplies: $30-50
- Total: $180-350 (one-time investment)
Professional route:
- Trial: $75-100
- Day-of styling: $100-200
- Travel fee: $0-100
- Total: $175-400
The reality: For complicated styles, professional is worth every penny. For simple styles, DIY can work if you practice enough.
Questions to Ask When Hiring
- “How many wedding hairstyles do you do per year?”
- Look for someone doing 30+ weddings annually
- “Do you have experience with my hair texture?”
- Essential if you have curly, coily, or very fine hair
- “What happens if my hair won’t hold the style?”
- Good stylists have backup plans
- “Can I see photos of hairstyles with veils?”
- You want someone experienced in veil attachment
- “What products will you use?”
- Knowing this helps with touch-ups later
- “What’s your timeline for styling?”
- Plan your morning schedule around this
- “Do you bring backup tools?”
- Professional sign: they always have backups
Pro tip: Ask to see photos of hairstyles at the END of the wedding day, not just fresh styling. This shows how well the style holds up.
Your Final Wedding Hair Checklist
Print this out. Seriously.
3 Months Before
- [ ] Choose your veil (yes, before the hairstyle)
- [ ] Research hairstylists or plan to DIY
- [ ] Start hair treatments if needed
- [ ] Get a trim to remove damaged ends
- [ ] Order hair extensions if using them
6 Weeks Before
- [ ] Schedule hair trial
- [ ] Buy all necessary products and tools
- [ ] Practice your DIY style (if going that route)
- [ ] Get second trim if needed
- [ ] Start taking hair vitamins
2 Weeks Before
- [ ] Final hair trial with actual veil
- [ ] Confirm stylist appointment if using one
- [ ] Prepare touch-up kit
- [ ] Assign a “hair person” bridesmaid
- [ ] Do a dress rehearsal with full hair and veil
1 Week Before
- [ ] Deep condition every other day
- [ ] Confirm all timing with stylist
- [ ] Pack emergency hair supplies
- [ ] Do final practice run if DIYing
- [ ] Touch up any root color if needed
Day Before
- [ ] Wash hair (but skip conditioning roots)
- [ ] Get full night of sleep (affects hair health)
- [ ] Prep all tools and products
- [ ] Reconfirm morning timeline
- [ ] Charge phone for morning reference photos
Wedding Morning
- [ ] Eat breakfast (low blood sugar = shaky hands)
- [ ] Apply dry shampoo to roots if needed
- [ ] Have all bobby pins within reach
- [ ] Keep reference photos handy
- [ ] Stay calm (nervous tension affects everything)
Frequently Asked Questions
How many bobby pins do I actually need for a veil?
For most veils, you’ll need 10-15 bobby pins total. The foundation requires 4-5 crisscrossed horizontally, plus 2-3 through the veil comb itself. Always have 20+ pins available—they disappear mysteriously.
Can I wear a veil with short hair?
Absolutely! Short wedding hairstyles with veil work beautifully. Use a birdcage veil, short blusher, or Juliet cap style. The key is creating a secure attachment point with bobby pins at your crown.
Should my veil match my dress exactly?
Not necessarily. Your veil should complement your dress, but exact matching isn’t required. Consider the overall vibe—a heavily beaded dress might pair better with a simple veil, while a minimalist dress can handle an embellished veil.
How do I keep my veil from flying away in wind?
For outdoor ceremonies, choose a heavier veil fabric or shorter length. Secure with extra bobby pins at multiple points. Consider a blusher or shoulder-length veil for very windy conditions.
Can I wear hair extensions with a veil?
Yes! Extensions actually help with veil security by providing more hair to grip. Clip-in extensions are perfect—place them where your veil will attach for extra stability.
What if I want to change hairstyles between ceremony and reception?
Build this into your timeline and budget. You’ll need either a stylist on-site or 30-45 minutes to restyle yourself. Choose styles that transition easily or have a bridesmaid who can help.
How early should I do my hair trial?
Schedule trials 6-8 weeks before your wedding. This gives time for adjustments but isn’t so early that styles change dramatically. Do your final trial with your actual veil 2 weeks before.
My hair won’t hold curls—what do I do?
This is common! Use mousse on damp hair before drying, curl smaller sections, let each curl cool in your hand before releasing, and use strong-hold products. Consider hot rollers instead of a curling iron.
Should I wash my hair the morning of my wedding?
No! Wash it the day before. Day-old hair holds styles much better than freshly washed hair. If your roots get oily, use dry shampoo the morning of.
Can I wear a tiara AND a veil?
You absolutely can. The tiara sits on top of your head at the crown, while the veil attaches behind it. Just make sure both are securely fastened with bobby pins.
How long before my veil gives me a headache?
This varies based on veil weight and placement. Cathedral veils might cause discomfort after 2-3 hours. If you’re prone to headaches, consider a shorter veil or plan to remove it after the ceremony.
What’s the best veil length for a low bun?
Chapel length or fingertip length works beautifully with low buns. The veil drapes elegantly from the low attachment point. Cathedral veils can work too but require very secure attachment.
Can I reuse my veil for photos later?
Definitely! If you remove your veil for the reception, have someone carefully fold and store it. You can easily reattach it for sunset photos or departure shots.
Do I need a special hairstyle for a cathedral veil?
Yes—cathedral veils are heavy and need solid foundation. Low buns, chignons, or structured updos work best. Avoid hair-down styles or loose half-up looks with cathedral veils.
How much does professional wedding hair styling cost?
Prices vary by location but expect $100-250 for styling, plus $50-100 for a trial run. Major cities run higher. Travel fees add $50-150 if the stylist comes to you.
Final Thoughts
Choosing wedding hairstyles for long hair with veils doesn’t have to feel overwhelming. What I love about this process is that there’s genuinely no “wrong” choice—only what feels right for you.
Take your time with the decision. Do multiple trials. Trust your gut. And remember: your hairstyle should make you feel like the best version of yourself, not like you’re wearing a costume.
The perfect bridal hairstyle is the one that makes you forget you’re even wearing anything special. It should feel natural, comfortable, and completely YOU.
Your wedding day will be amazing regardless of whether every hair is perfectly in place. But with the right planning, preparation, and a solid bobby pin technique, your wedding hair with veil will stay gorgeous from the first look through the last dance.
Now go schedule that hair trial and stop overthinking it. You’ve got this.
Still deciding your event hair vibe? Don’t miss hairstyles for high neck dresses, these flattering hairstyles for strapless dresses, and our newest guide on bridesmaid hairstyle ideas for more wedding-ready inspiration.
Pin this guide for later and share it with your bridal party! Got questions about your specific situation? Drop them in the comments below—I love helping brides troubleshoot their hair concerns.