Glitter Ombre Nail Ideas: Your Complete Guide to Sparkling Gradient Nails
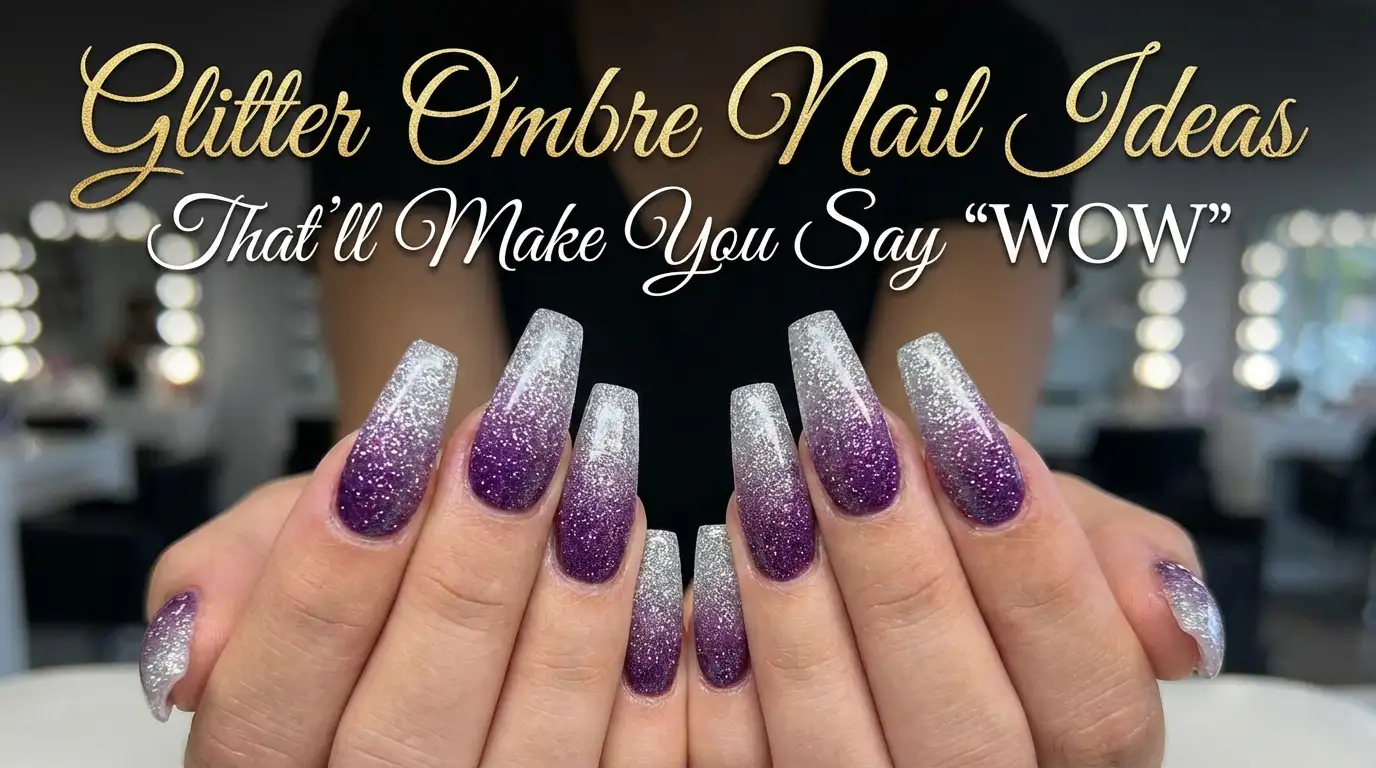
Glitter Ombre Nail Ideas That’ll Make You Say “WOW”
I’ll be honest with you—the first time I tried glitter ombre nails, I thought they’d be too extra for everyday wear. Boy, was I wrong. These gorgeous gradient beauties have become my absolute go-to, whether I’m hitting up a wedding or just grabbing coffee with friends. What I love most about this nail trend is how it manages to be both sophisticated and fun at the same time.
Glitter ombre nail ideas combine the seamless fade of ombre techniques with sparkly glitter for a show-stopping effect that works for literally any occasion. From subtle champagne shimmers to bold rainbow explosions, there’s a glitter ombre look that’ll match your personality perfectly.
What Are Glitter Ombre Nails Exactly?
Here’s the thing about glitter ombre nails—they’re way easier to understand than you might think. Basically, you’re creating a gradient effect where color transitions smoothly from one shade to another, but instead of just using regular polish, you’re incorporating glitter into the mix. The sparkle typically gets more concentrated at either the tips or the base of your nails, creating that magical fade-away effect.
Now here’s where it gets interesting. Unlike regular ombre where you might use two shades of the same color family, glitter ombre opens up a whole world of possibilities. You can go from nude to gold glitter, pink to rose gold sparkles, or even create a rainbow effect that shifts through multiple colors. The glitter concentration intensifies as it reaches your chosen focal point, adding dimension and catching light from every angle.
In my experience, this technique works beautifully on any nail shape. Whether you’ve got short square nails or long coffin-shaped ones, the gradient effect adapts perfectly.
Why Glitter Ombre Nails Are Having Their Moment Right Now
You might be wondering why everyone’s suddenly obsessed with this nail art style. Trust me, there are some pretty solid reasons behind the hype.
First off, glitter ombre nails are incredibly versatile. Seriously, I can’t stress this enough. You can dial the drama up or down depending on where you’re headed. Heading to a professional meeting? Go with a subtle nude-to-champagne gradient. Got a hot date or party coming up? Bring on the bold fuchsia with holographic glitter tips.
The other thing that makes these nails so popular is how they elevate even the simplest outfits. I’ve thrown on jeans and a basic tee countless times, but with some sparkly ombre nails, suddenly I look way more put-together than I actually am. It’s like the jewelry equivalent for your fingertips.
Celebrity nail artists have been going crazy for this trend too. According to research on trending designs, stars like Kylie Jenner, Cardi B, and Rihanna have all rocked their own versions of glitter ombre. And when celebrities jump on board, you know the trend’s got staying power.
25+ Stunning Glitter Ombre Nail Ideas You Need to Try
Classic & Sophisticated Looks
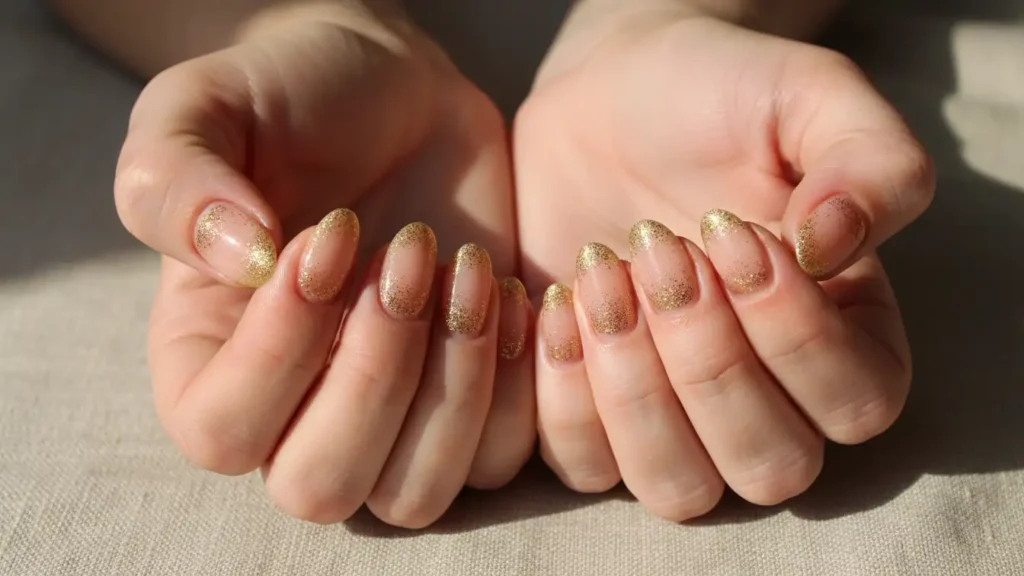
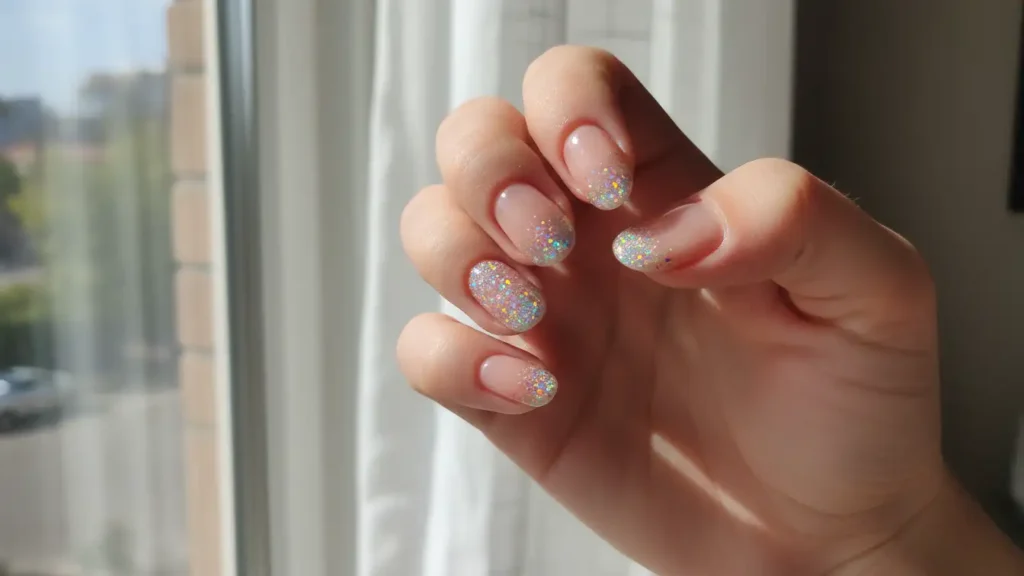
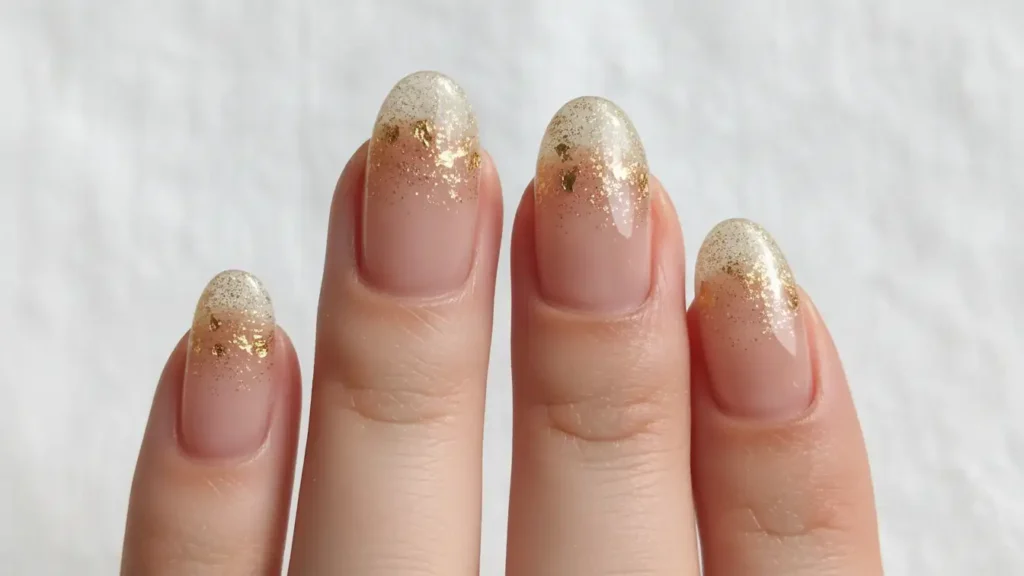
1. Nude to Champagne Glitter

This is my personal favorite for everyday wear. A soft nude base gradually blends into champagne or gold glitter at the tips. It’s classy without being boring, and it literally goes with everything in your closet. Perfect for work environments where you want to look polished but not over-the-top.
2. Pink and White French Ombre with Glitter
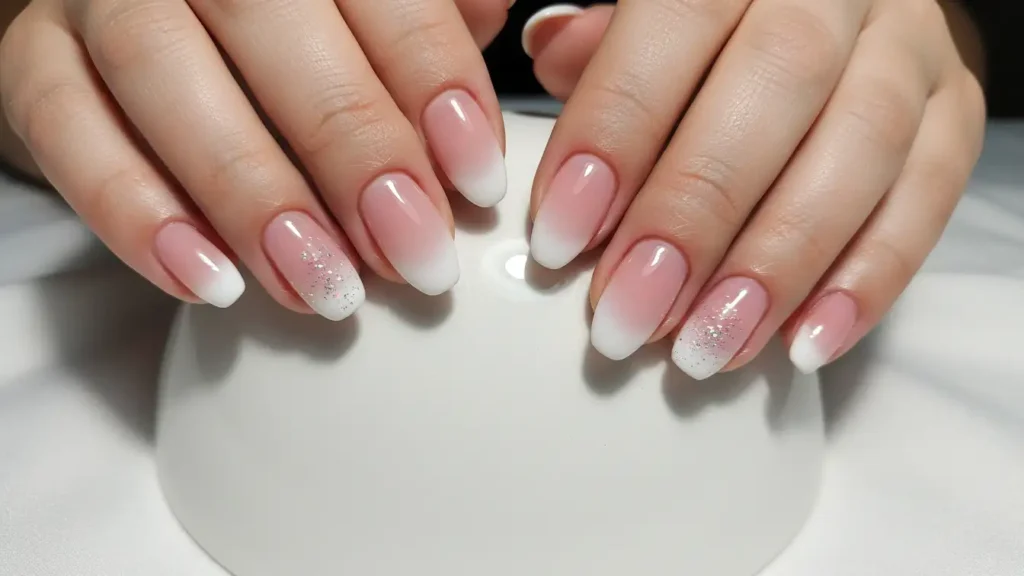
Taking the classic French manicure and giving it a sparkly upgrade? Yes please! Start with a soft pink base that fades to white, then add silver or iridescent glitter to the tips. This look screams elegance and works beautifully for weddings or formal events.
3. Soft Pink to Rose Gold

If you’re a pink person like me, this combination will steal your heart. The gentle transition from blush pink to rose gold glitter creates a romantic, feminine vibe that’s perfect for date nights or bridal showers. The copper undertones in rose gold add warmth that looks gorgeous against most skin tones.
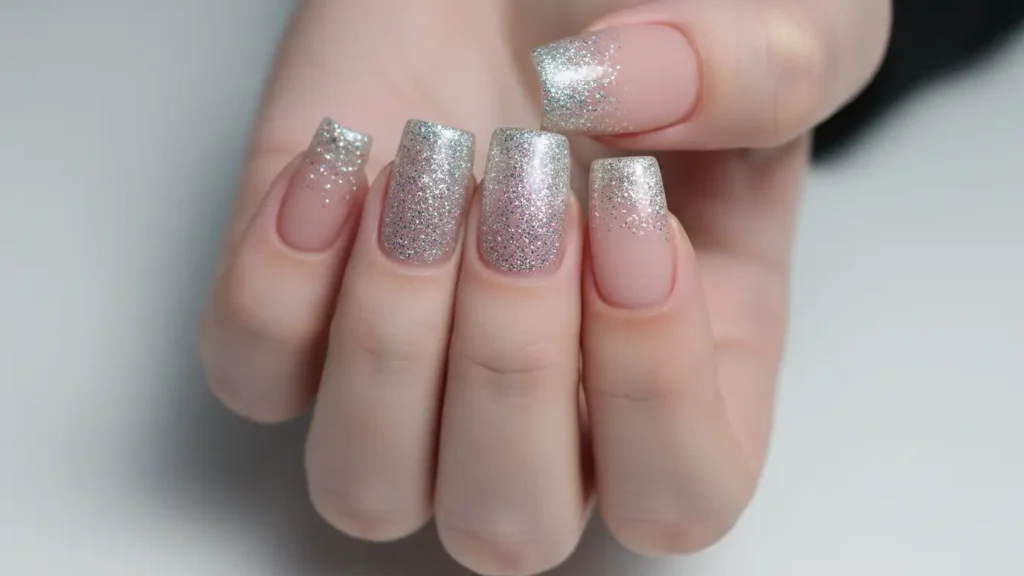
4. White to Silver Glitter Ombre
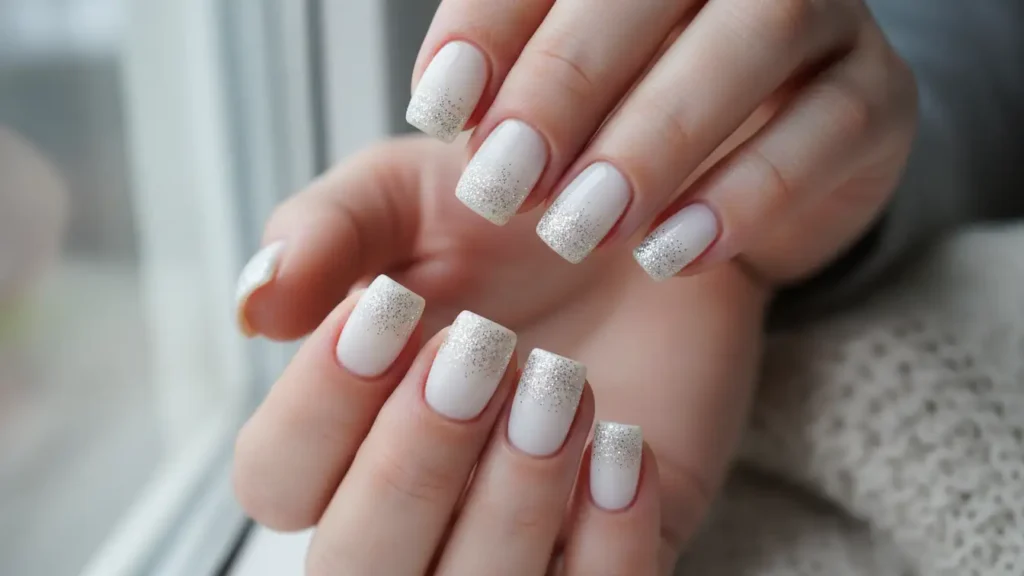
Winter wonderland vibes, anyone? This icy combination features a crisp white base melting into silver glitter. It’s perfect for holiday parties or any time you want to channel snow queen energy. Pair it with silver jewelry for extra impact.
Bold & Dramatic Statements
5. Black and Gold Glitter
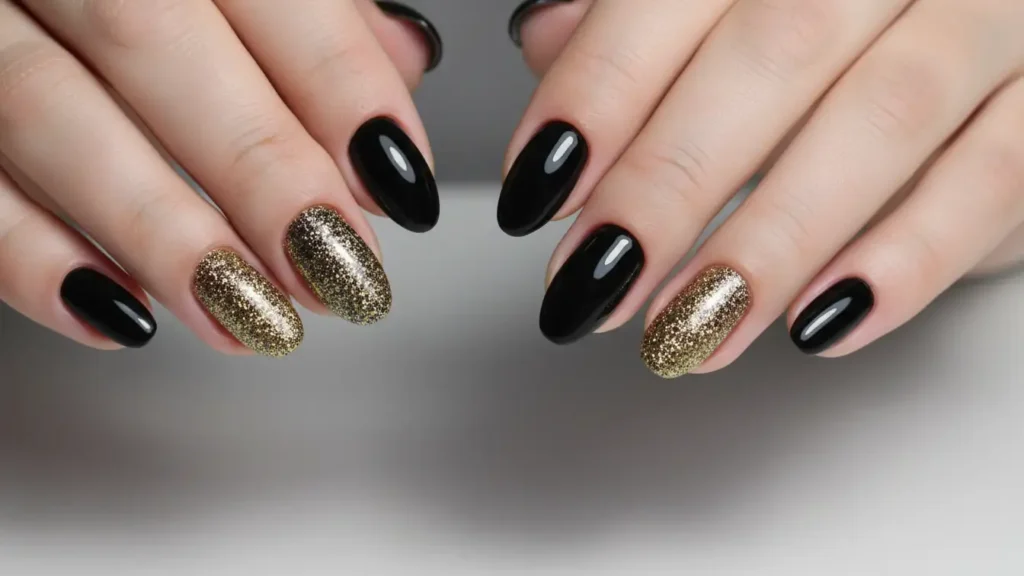
Want to make an entrance? Black ombre nails with gold glitter are dripping in drama and luxury. The dark-to-light gradient gives off serious high-fashion vibes. I wore these to a holiday party last year and got compliments all night long.
6. Burgundy with Gold Shimmer
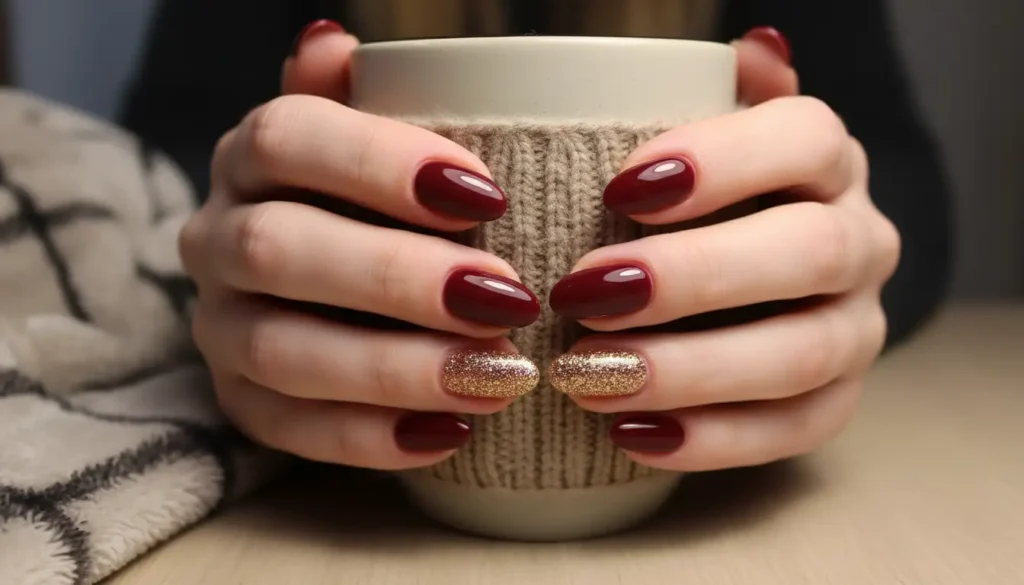
Deep burgundy fading into gold glitter screams fall sophistication. This rich color combination works amazingly well for autumn weddings or Thanksgiving dinner. The warm tones feel cozy yet elevated.
7. Emerald Green with Gold Accents
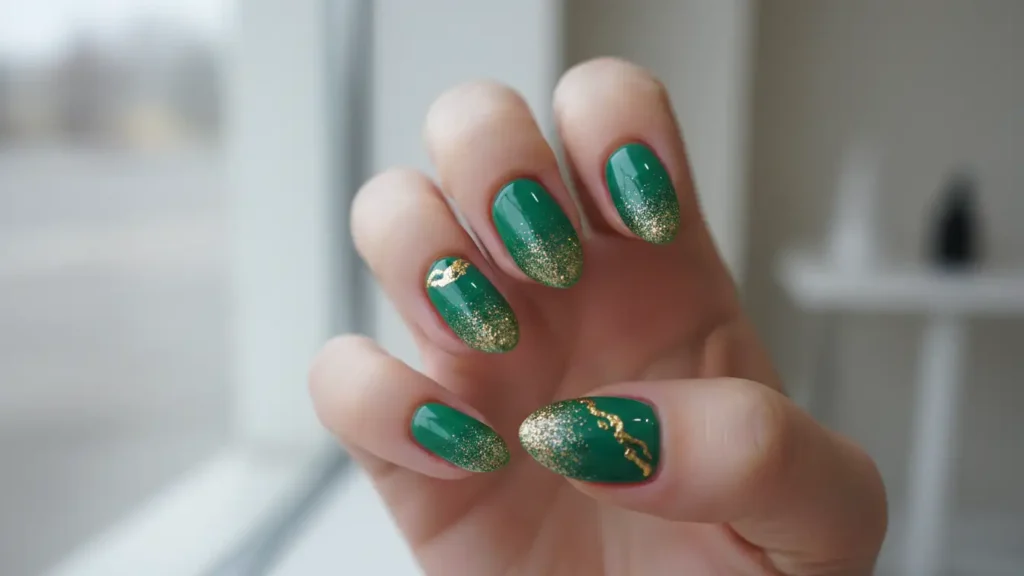
If you’re feeling bold and want something unique, emerald green paired with gold glitter creates a luxurious, jewel-toned effect. According to color combination research, this combo is perfect for holiday glam or when you want to stand out from the crowd.
8. Deep Navy with Silver Sparkle
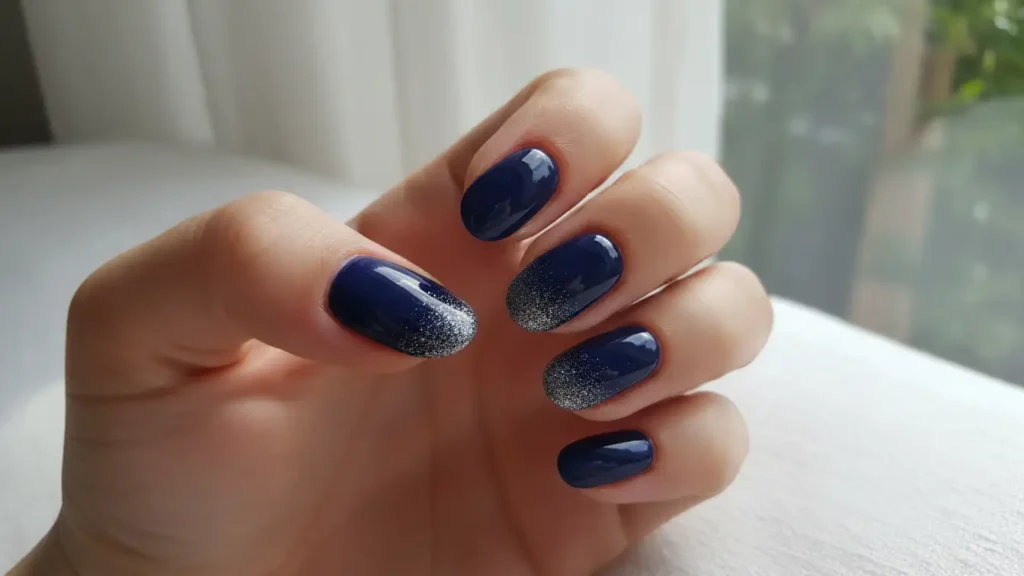
Navy is like black’s more interesting cousin. When you fade it into silver glitter, you get this mysterious, sophisticated look that feels modern and edgy. It’s a great alternative if you want something dark but not as intense as black.
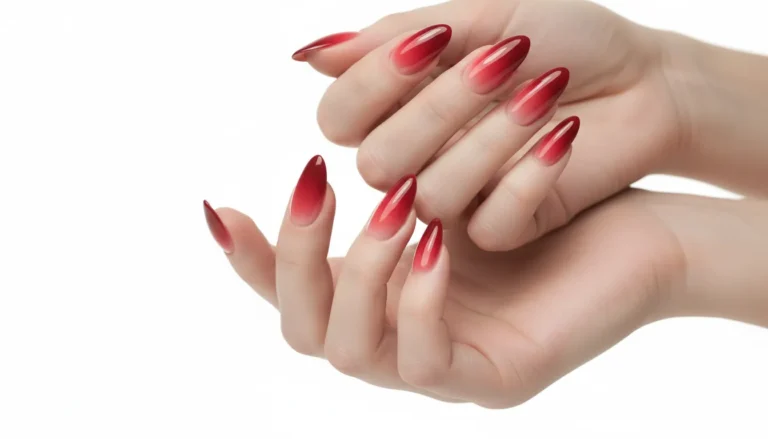
9. Hot Red Glitter Ombre
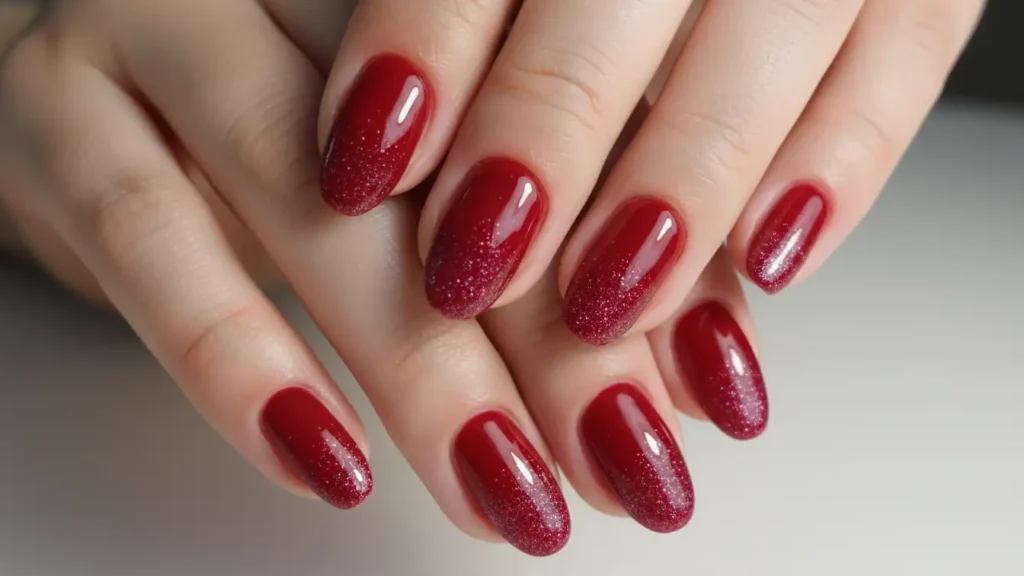
Nothing says confidence like bold red nails. Apply a classic red base and blend it into either matching red glitter or holographic sparkles for a show-stopping manicure. This is your go-to for nights out or when you need that extra boost of fierce energy.
Fun & Playful Designs
10. Baby Blue to Silver

Pastel lovers, this one’s for you! A dreamy baby blue base with silver glitter creates that ethereal, cotton-candy effect. It’s absolutely perfect for spring and summer, and looks especially amazing with almond-shaped nails.
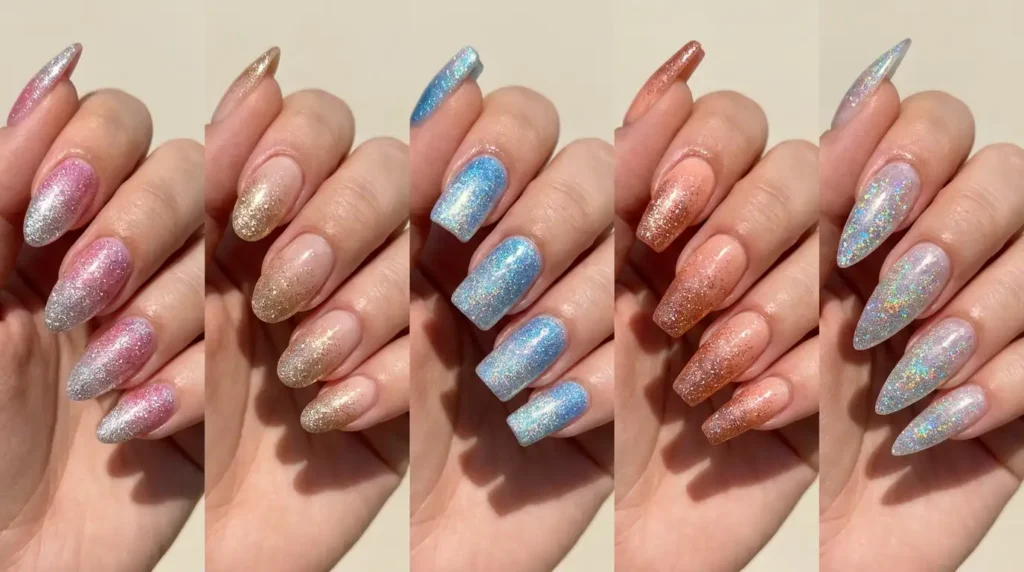
11. Lavender with Holographic Glitter
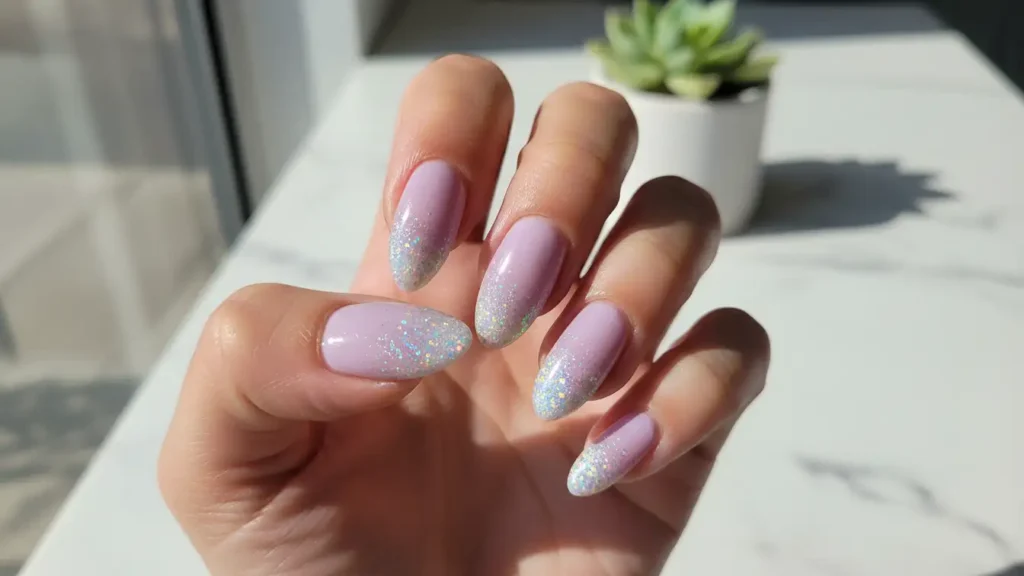
Soft, feminine, and a little bit futuristic. Lavender nails with holo glitter give you that mesmerizing rainbow effect that shifts colors in different lighting. So Instagram-worthy, and honestly, really fun to show off.
12. Coral Ombre with Gold Sparkle
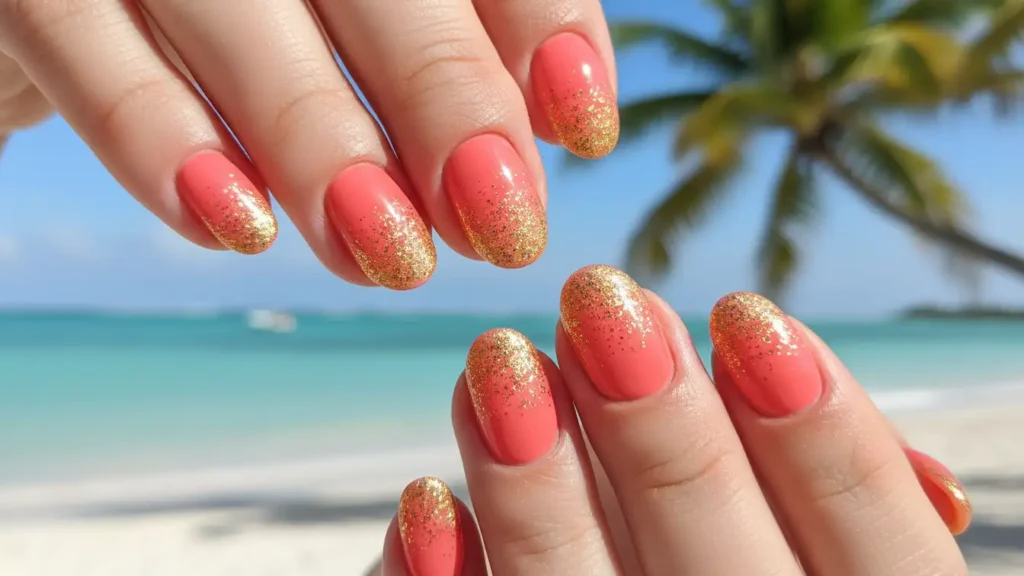
Bring on the tropical vibes! Coral fading into gold glitter is fresh, summery, and screams vacation mode. This color combo looks absolutely stunning with a tan and is perfect for beach trips or warm-weather events.
13. Rainbow Glitter Ombre
Feeling adventurous? Why choose one color when you can have them all? Using different colored glitters, you can create a rainbow gradient effect that’s playful and eye-catching. Perfect for festivals, pride celebrations, or anytime you want to embrace your fun side.
14. Peach to Gold Gradient
This warm combination feels like summer sunset in nail form. Peach is such an underrated nail color, and when you blend it with gold glitter, it creates this gorgeous, glowing effect that’s both soft and striking.
Trendy & Modern Styles
15. Matte Base with Glitter Tips
Here’s a cool twist—use a matte polish for your base color and add glossy glitter to the tips. The contrast between the flat matte finish and shiny sparkles creates serious visual interest. It’s edgy and modern.
16. Chocolate Brown with Gold Glitter
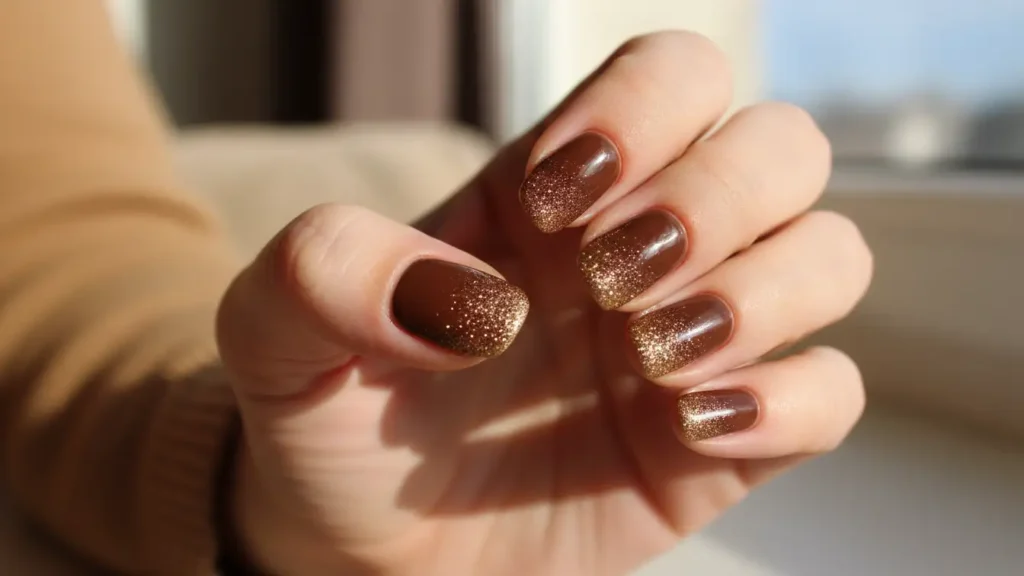
Brown nails are seriously trending right now, and pairing them with gold glitter takes the look to the next level. The warm, earthy tones make this an elegant fall-inspired manicure that still feels glamorous and trendy.
17. Mauve with Subtle Rose Gold
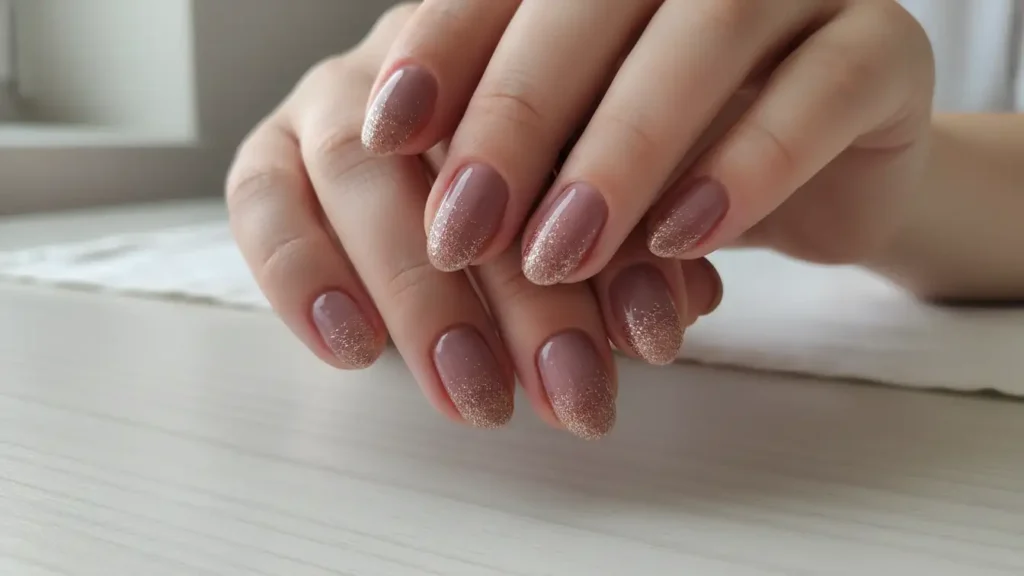
Mauve is one of those colors that just works on everyone. Add some rose gold glitter and you’ve got a chic, elevated look that’s perfect for both casual and dressy occasions. Not too flashy, but definitely noticeable.
18. Holographic Rainbow Tips
If you want something that’ll make people do a double-take, holographic glitter is your friend. The way it shifts through different colors as you move your hands is seriously mesmerizing. Start with a clear or nude base for maximum impact.
19. Smoky Gray with Silver Glitter
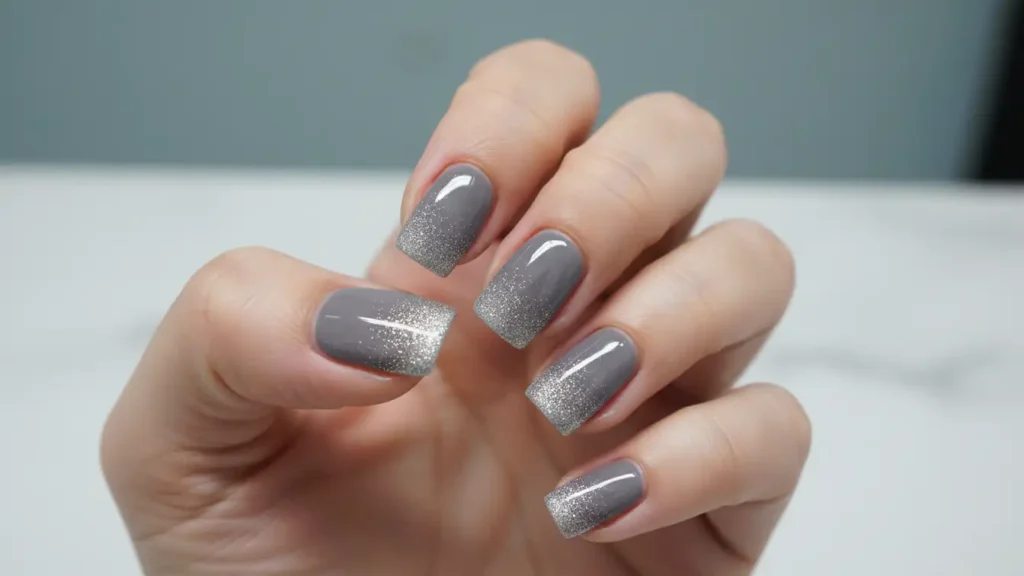
Gray nails have this cool-girl appeal that I absolutely love. Add silver glitter at the tips and you get an edgy-yet-classy finish that’s perfect for a sleek, modern aesthetic.
20. Black Cherry to Deep Glitter Fade
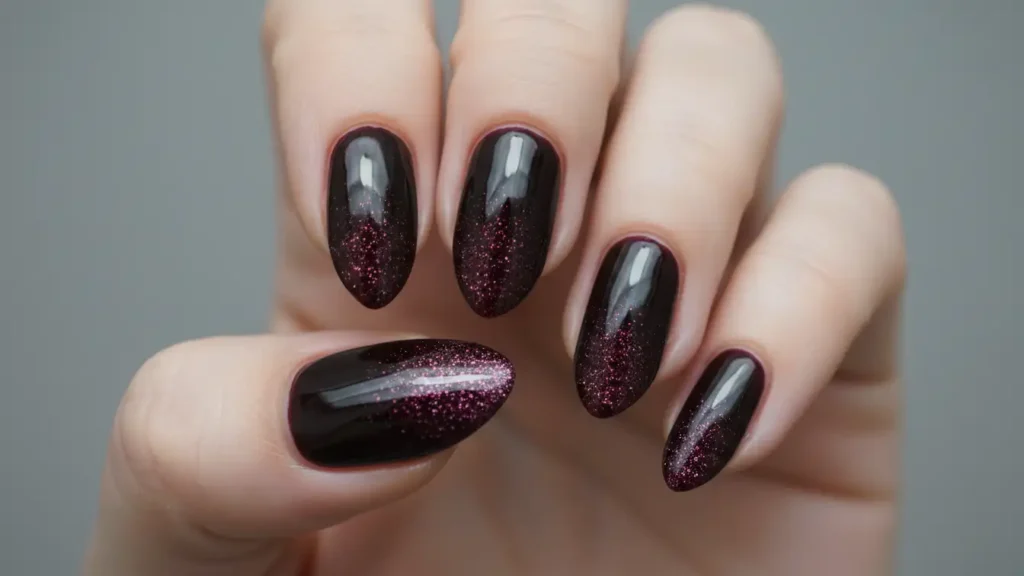
This vampy combination of black cherry melting into dark glitter is effortlessly cool and moody. Perfect for fall, winter, or anytime you want to add a little drama to your look.
Special Occasion Showstoppers
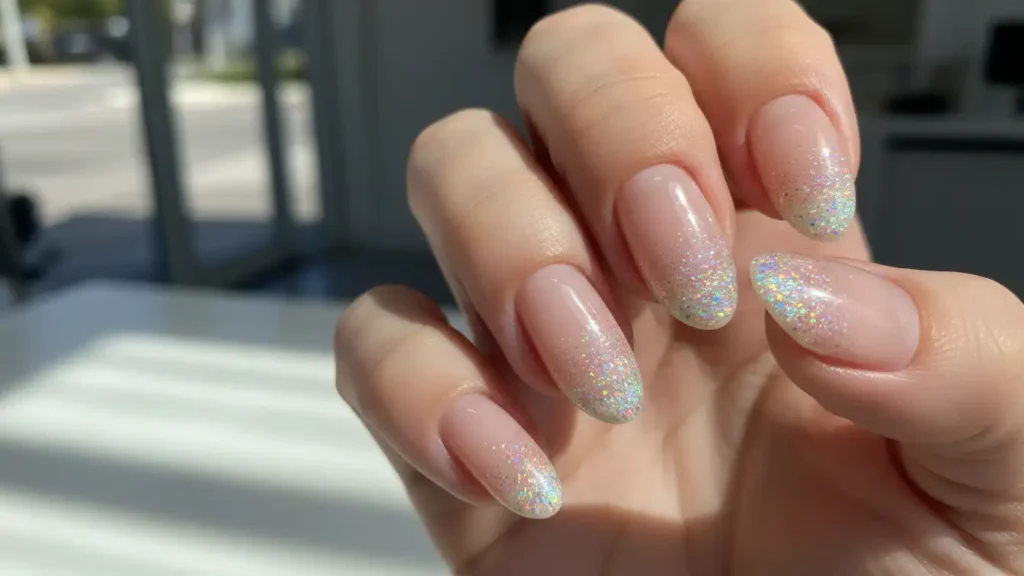
21. Clear to Diamond Glitter
For that “glass nails” effect with extra sparkle, start with a clear or sheer base and add diamond-like glitter pieces. The transparent gradient with chunky sparkles is absolutely stunning for weddings or formal events.
22. Purple Glitter to Light Lavender
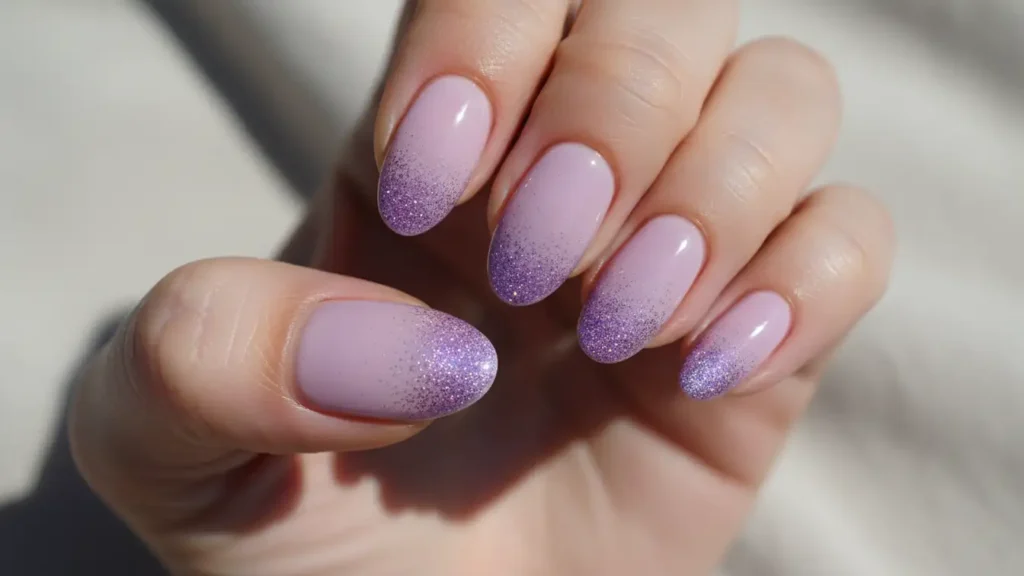
Starting with concentrated purple glitter at the base and fading into soft lavender creates this gorgeous reverse ombre effect. It’s unique, eye-catching, and perfect for anyone who loves purple.
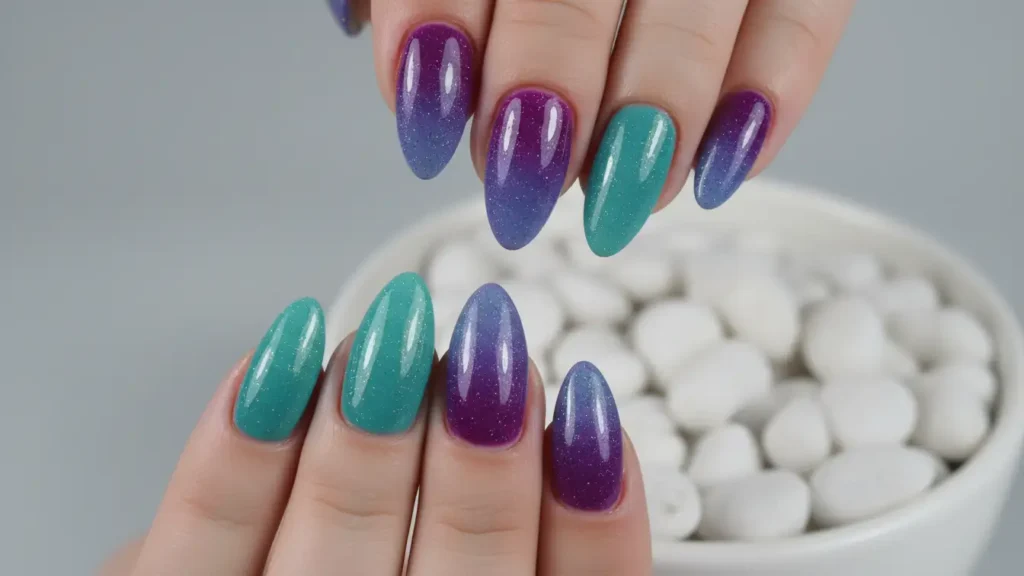
23. Teal and Purple Fusion
Bold, vibrant, and absolutely striking. Combining deep teal with purple and topping it with green glitter creates a look that’s daring and sure to turn heads wherever you go.
24. Gold Foil Accent Ombre
Instead of using regular glitter, try incorporating gold foil pieces into your ombre design. The flakes catch light differently than traditional glitter and create a more artistic, textured effect.
25. Nude with Rhinestone Accents

Take your glitter ombre up a notch by adding tiny rhinestones along the cuticle or scattered throughout the glitter gradient. This creates a princess-worthy, bridal-appropriate look that’s absolutely stunning.
Comparing Different Glitter Types for Your Ombre
| Glitter Type | Best For | Finish | Difficulty Level |
|---|---|---|---|
| Fine Glitter | Subtle, everyday looks | Smooth, refined | Easy |
| Chunky Glitter | Bold statements, parties | Textured, dramatic | Moderate |
| Holographic | Eye-catching effects | Multi-dimensional | Easy |
| Iridescent | Soft, magical vibes | Color-shifting | Easy |
| Metallic Flakes | Luxe, foil-like finish | Reflective, artistic | Moderate |
How to Create Glitter Ombre Nails at Home (The Easy Way)
Alright, so you’ve fallen in love with a design and now you want to recreate it yourself. Don’t worry—I’ve got you covered with a step-by-step tutorial that actually works.
What You’ll Need
Before we dive in, gather these supplies:
- Base coat (seriously, don’t skip this)
- Base color polish (nude, pink, white, or whatever you choose)
- Glitter polish or loose glitter
- Makeup sponge or fluffy brush
- Top coat (glossy for maximum shine)
- Small brush for cleanup
- Nail polish remover and cotton swabs
The Sponge Method (Best for Beginners)
This is honestly the easiest way to get a smooth glitter gradient.
- Prep your nails properly. Push back cuticles, file to your desired shape, and buff the surface lightly. Apply your base coat and let it dry completely.
- Apply your base color. Paint 1-2 coats of your chosen base shade. Make sure it’s completely dry before moving on—patience is key here.
- Get your sponge ready. Take a small piece of makeup sponge and apply your glitter polish directly onto it. Don’t saturate it; you want just enough coverage.
- Dab on the glitter. Starting about 3/4 of the way down your nail (near the tip), gently dab the sponge onto your nail. Use a bouncing motion rather than dragging. Gradually work your way up, using lighter pressure as you go to create that fade effect.
- Build up layers. Let the first layer dry, then repeat the process. You’ll probably need 2-3 layers to get really good coverage and a smooth gradient.
- Clean up the edges. Dip a small brush in nail polish remover and carefully clean up any glitter that got on your skin or cuticles.
- Seal it in. Apply a generous coat of top coat to seal everything in and add serious shine. This step is crucial for making your glitter ombre nails last longer.
The Brush Method (For More Control)
If you’re working with loose glitter or want more precision:
- Complete steps 1-2 from above.
- Apply a thin layer of your base polish (still tacky) or clear polish to where you want the glitter.
- Using a fluffy brush, dip into your loose glitter and gently tap the bristles over your nail at a 45-degree angle.
- The glitter will stick to the tacky polish. Focus more glitter at the tip and gradually decrease as you move toward the cuticle.
- Let it dry completely, then seal with top coat.
Pro Tips & Common Mistakes to Avoid
Do These Things:
Use fine glitter for smooth results. Chunky glitter looks cool but can be lumpy and hard to work with, especially if you’re a beginner.
Apply thin layers. Multiple thin coats look way better than one thick, gloopy mess. Trust me on this.
Seal everything properly. A good top coat is your best friend. It prevents chipping and makes the glitter smooth to touch.
Work one nail at a time. Don’t try to rush through all ten nails at once. The polish will dry before you can apply the glitter, and you’ll end up frustrated.
Don’t Do These Things:
Don’t skip the base color. I know it’s tempting to just slap glitter directly onto your natural nail, but it won’t look as good or last as long. A solid base helps the ombre blend better.
Don’t use too much glitter at once. Build it up gradually. If you dump a ton of glitter on in one go, it’ll look messy and clumpy instead of gradient-like.
Don’t forget cuticle oil. Glitter can make your nails look dry and rough around the edges. Apply cuticle oil daily to keep everything looking polished and healthy.
Don’t cure gel layers improperly. If you’re using gel polish, make sure each layer cures fully. Uncured gel can peel and ruin your whole manicure.
Best Nail Shapes for Glitter Ombre
You might be wondering if your nail shape matters when it comes to glitter ombre nail ideas. Honestly? Any shape can rock this trend, but some work particularly well.
Coffin/Ballerina nails are probably the most popular choice because the tapered shape really showcases the gradient effect beautifully. The extra length gives you more canvas to work with.
Almond nails bring this elegant, feminine vibe that pairs perfectly with softer ombre combinations like pink to rose gold. The pointed oval shape is super flattering on most hand types.
Square nails create a modern, clean look that works great with bolder color combinations. If you like that Instagram-perfect aesthetic, square shape is your go-to.
Stiletto nails are for the bold among us. The dramatic pointed shape plus glitter ombre? That’s some serious statement-making energy right there.
Short nails can absolutely pull off glitter ombre too! Just adjust the gradient to be more compact. A French ombre with glitter tips looks particularly cute on shorter lengths.
Seasonal Glitter Ombre Ideas
Spring Inspiration
Spring calls for fresh, light colors. Think pastel bases with subtle glitters:
- Mint green to pearl white
- Baby blue with delicate silver
- Soft yellow fading to gold
- Lilac with iridescent shimmer
Summer Vibes
Summer is when you can really play with bright, bold colors:
- Hot pink with holographic glitter
- Coral to gold gradient
- Turquoise with silver sparkle
- Neon shades with matching glitters
Fall Elegance
Autumn deserves those rich, warm tones:
- Burgundy with gold
- Burnt orange to bronze
- Deep plum with copper glitter
- Chocolate brown with champagne shimmer
Winter Glamour
Winter is glitter season, let’s be real:
- Navy with silver sparkle
- Emerald green with gold
- Deep red with holographic accents
- Icy white to diamond glitter
Making Your Glitter Ombre Last Longer
Nobody wants their gorgeous manicure to chip after two days. Here’s how to make your glitter ombre nails stay fabulous for weeks:
Start with healthy nails. If your nails are peeling or weak, no amount of polish will stick properly. Keep them moisturized and consider using a strengthening base coat.
Cap your free edge. After applying each coat (base, color, glitter, top coat), swipe the brush along the very tip of your nail. This seals the edge and prevents chipping.
Reapply top coat every 2-3 days. This refreshes the shine and adds an extra layer of protection. It takes like two minutes and makes a huge difference.
Wear gloves for chores. I know, I know—but water and cleaning products are the enemy of any manicure. Just pop on some rubber gloves when you’re doing dishes or cleaning.
Use cuticle oil daily. This keeps the area around your nails healthy and prevents the polish from lifting at the edges.
When to Choose Glitter Ombre vs. Regular Ombre
Here’s the thing—sometimes regular ombre without glitter is actually the better choice. Let me break down when to choose which.
Choose glitter ombre when:
- You want to make a statement
- It’s a special occasion (party, wedding, holiday)
- You’re feeling bold and playful
- You want something eye-catching
Choose regular ombre when:
- You prefer a more understated look
- You work in a conservative environment
- You want something that feels sophisticated but subtle
- You’re not a fan of sparkle (hey, no judgment!)
Personally, I tend to go for glitter ombre on weekends and regular ombre during the work week. But honestly? Do whatever makes you happy.
Frequently Asked Questions
How long do glitter ombre nails last?
With proper application and care, you can expect 10-14 days for regular polish and 2-3 weeks for gel or dip powder. The key is using quality products and sealing everything with a good top coat.
Can I do glitter ombre on short nails?
Absolutely! The technique works on any nail length. Just adjust the gradient to be more compact. Focus the glitter more at the tip and blend it over a shorter distance.
What’s the easiest color combination for beginners?
Start with nude or light pink base and champagne or gold glitter. These colors are forgiving, blend easily, and look good on everyone. Plus, if you mess up a bit, it’s less noticeable than with darker colors.
How do I remove glitter nail polish?
Glitter can be stubborn to remove. Soak cotton pads in nail polish remover, place them on your nails, wrap with aluminum foil, and wait 10-15 minutes. The glitter should slide right off. For gel or dip powder, follow the proper removal process to avoid damaging your natural nails.
Can I use regular glitter instead of cosmetic glitter?
Please don’t. Craft glitter isn’t made for skin contact and can have sharp edges that might cut your nail bed. Always use cosmetic-grade glitter that’s specifically designed for nails.
My Final Thoughts
Look, glitter ombre nails aren’t just another passing trend—they’re a versatile, gorgeous way to express yourself through nail art. Whether you go subtle with champagne sparkles or bold with rainbow glitter, there’s genuinely a look for every personality and occasion.
What I appreciate most about this nail style is how adaptable it is. You’re not locked into one specific look. Play with different color combinations, experiment with various glitter types, and find what makes you feel amazing. That’s really what nail art should be about—making yourself happy.
Now here’s where it gets fun: which glitter ombre design are you dying to try first? Personally, I’m eyeing that emerald green with gold for the holidays. But I’d love to hear what catches your eye! Drop a comment and let me know which look you’re planning to recreate.
Remember, the perfect manicure is the one that makes you smile every time you look down at your hands. So grab your supplies, put on some good music, and get creative. You’ve got this!