10 Dreamy Birkin Bangs With Sunlit Layers to Try This Season
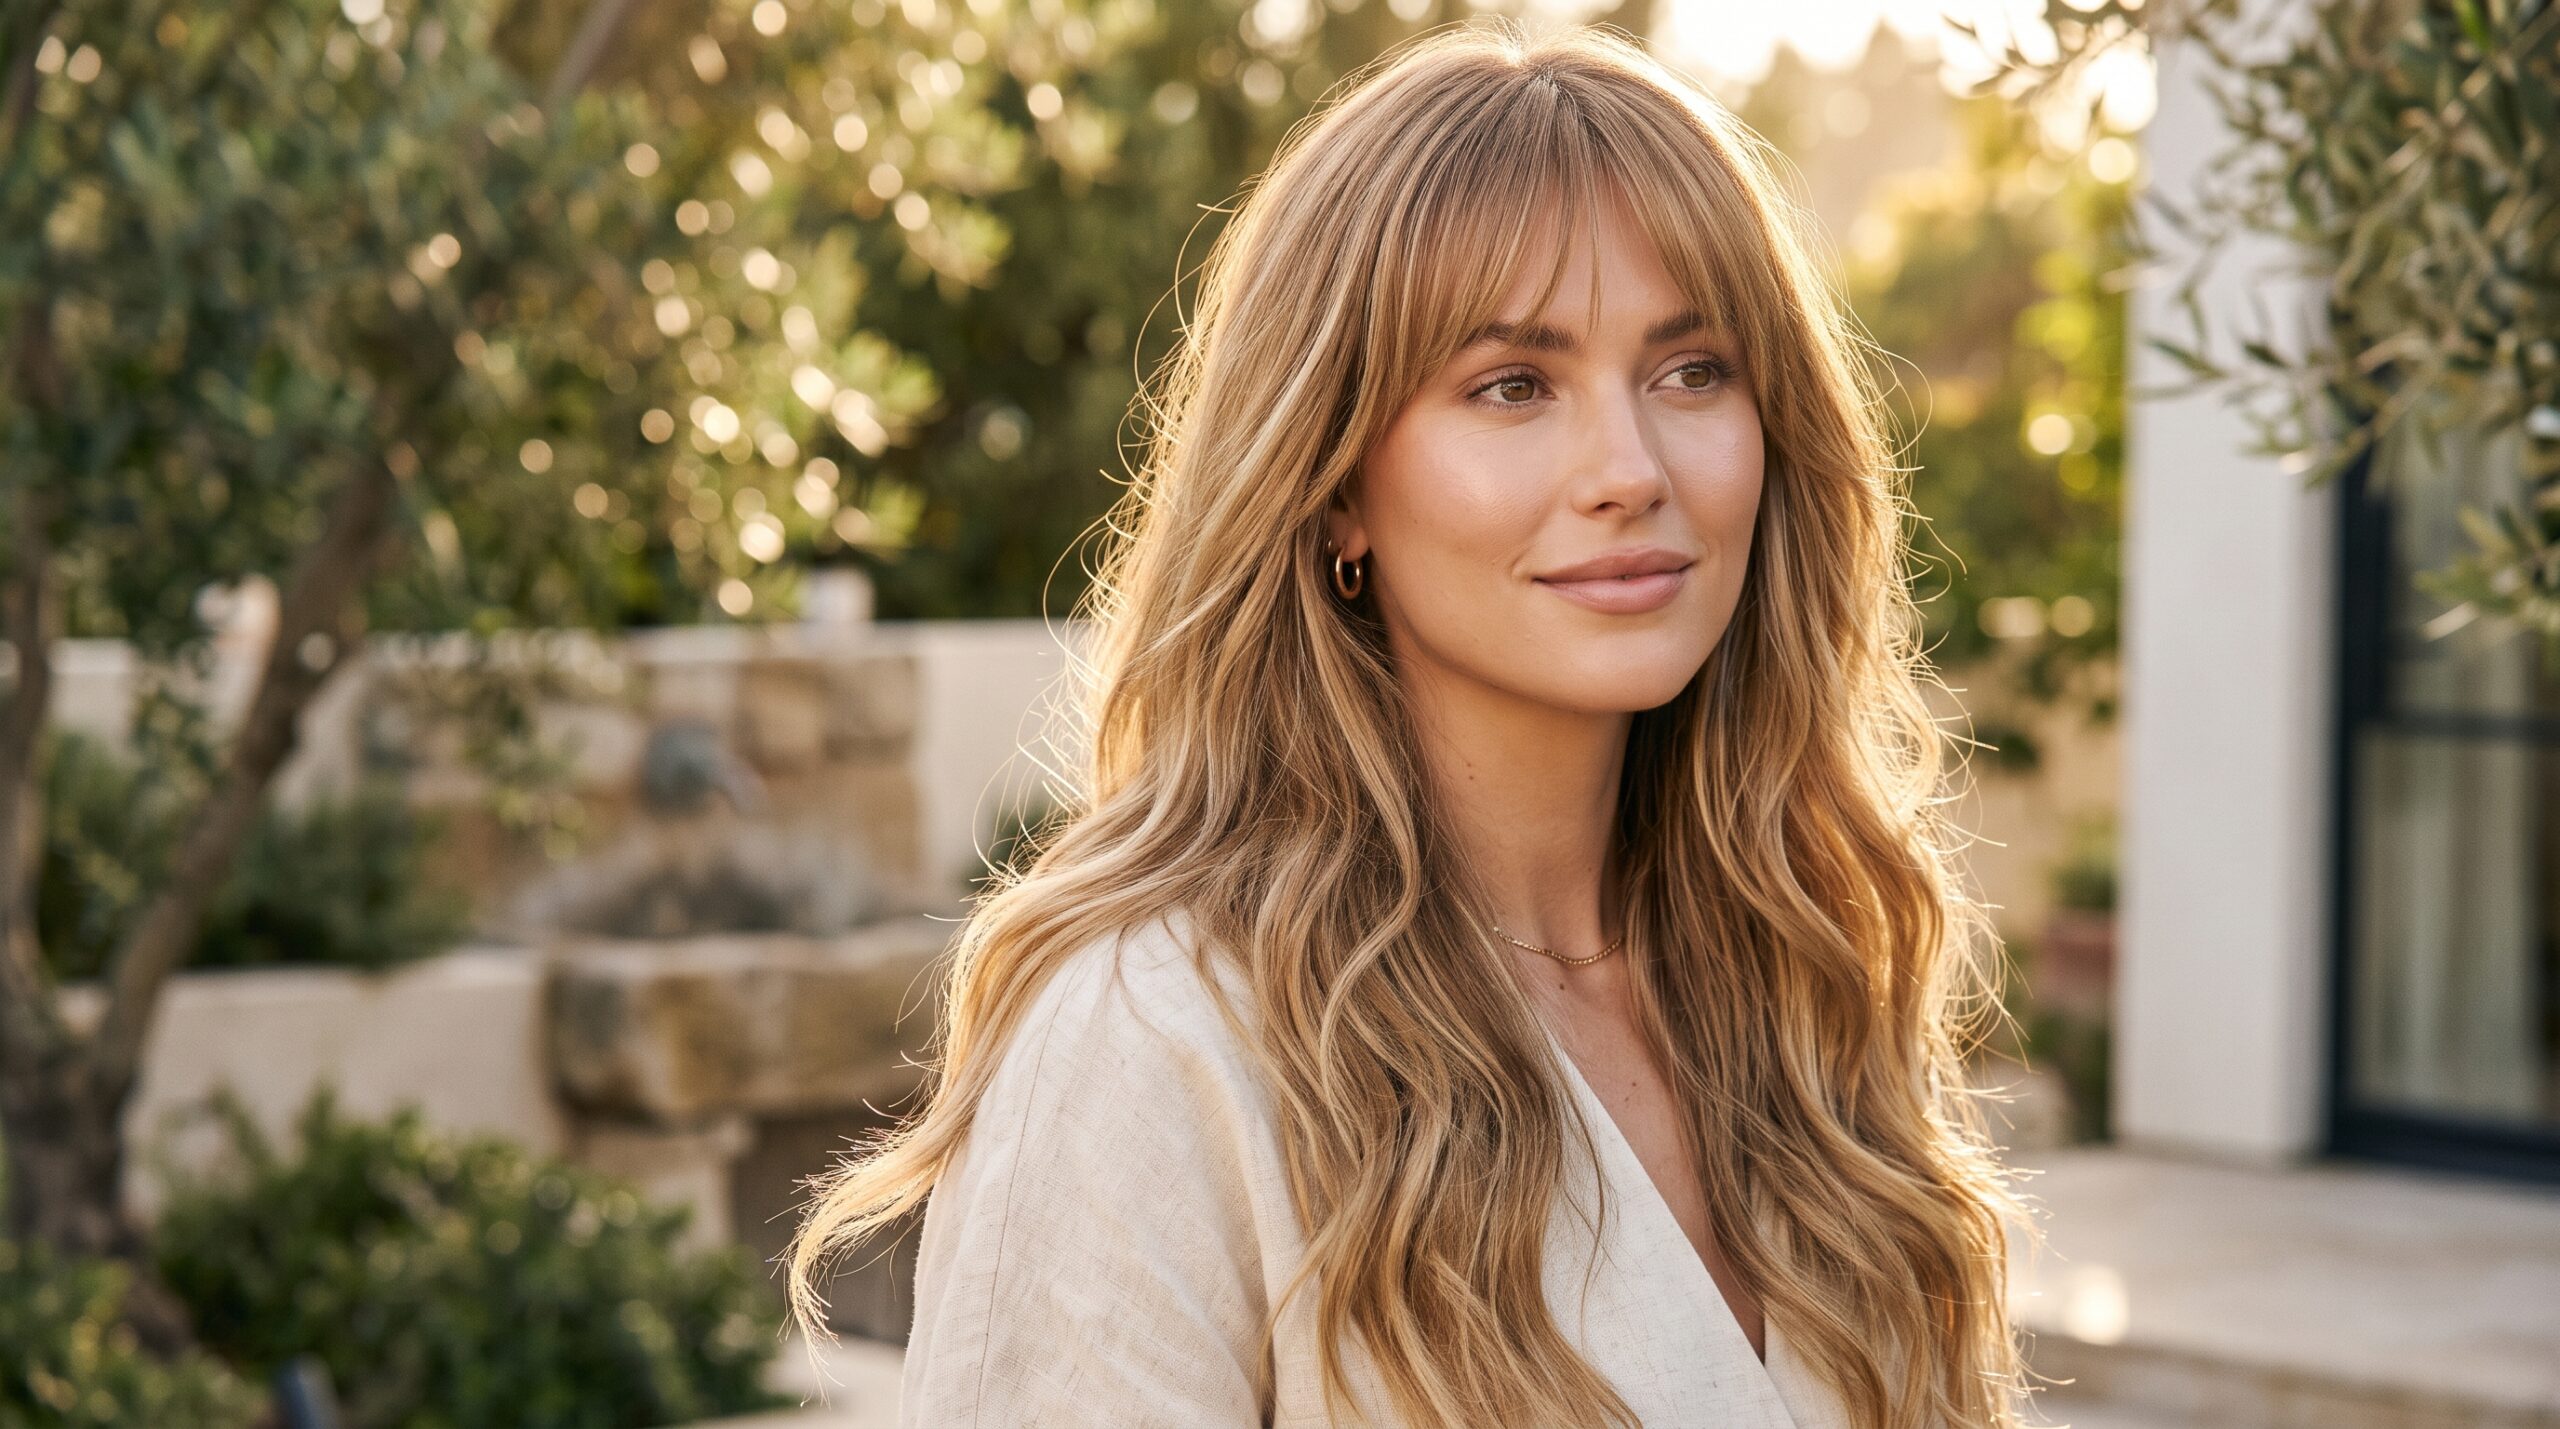
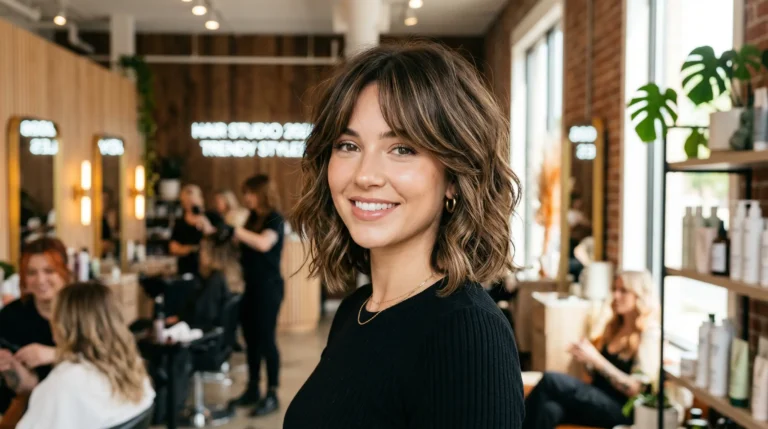
If you’ve been scrolling through your Pinterest feed lately, chances are you’ve stopped on a soft, glowy fringe that somehow looks both undone and expensive at the same time. That’s the magic of Birkin bangs with sunlit layers — a haircut trend that pairs a light, wearable fringe with warm, light-catching layers that make hair look brighter and fuller without extra effort. It’s not a stiff, salon-perfect look. It’s the opposite: loose, breathable, and forgiving on busy mornings.
Part of why this cut has held on so long is that it doesn’t ask for a total haircut overhaul. In most cases, a stylist can add the fringe and reposition a few existing layers around it, which means you keep most of your length while still getting that noticeably softer, brighter frame around your face. It also plays nicely with color — subtle highlights or a soft balayage through the front pieces tend to be what gives these cuts their signature “sunlit” glow, so if you’re due for a color refresh anyway, this is a good moment to combine the two.
Below you’ll find ten different takes on this trend, each with its own personality — from feathered and beachy to smooth and polished. Whether your hair is straight, wavy, or has a bit of natural curl, there’s a version here worth bringing to your next appointment.
For more volume and movement, explore these layered haircuts.
Birkin Bangs With Sunlit Layers: 10 Ways to Wear the Look
Each style below builds on the same foundation — a soft, brow-grazing fringe combined with warm, sun-kissed layering — but changes the texture, volume, or finish to suit different hair types and face shapes. Save the ones that catch your eye and bring them straight to your stylist.
1. Airy Golden Fringe
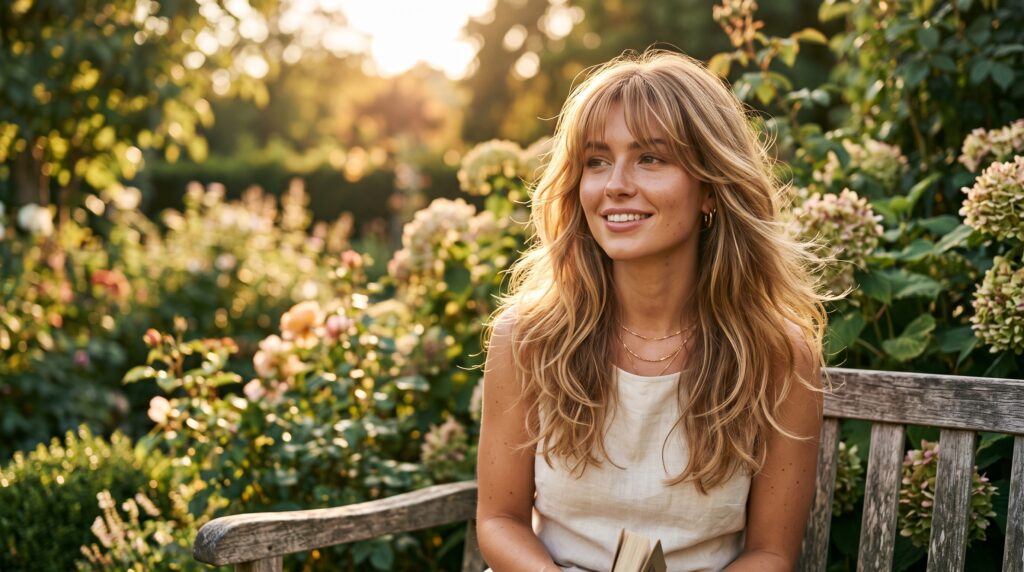
This version keeps the bangs loose and broken up rather than blunt, so they never feel heavy on the forehead. The golden layers underneath pick up light and give the whole cut a bit of shimmer, which is especially noticeable outdoors or under warm lighting. It reads as put-together without looking overworked, so it moves easily from a weekday errand to a casual dinner.
How to style it:
- Blow-dry the fringe from side to side while it’s still damp.
- Flip the front pieces outward, then brush them back into place.
- Finish with a light texturizing spray for grip.
Best for: Oval, heart, and long face shapes; straight to wavy hair You’ll need: Round brush, blow dryer, heat protectant, light mousse, texturizing spray
2. Soft Curtain Fringe With Honey Tones
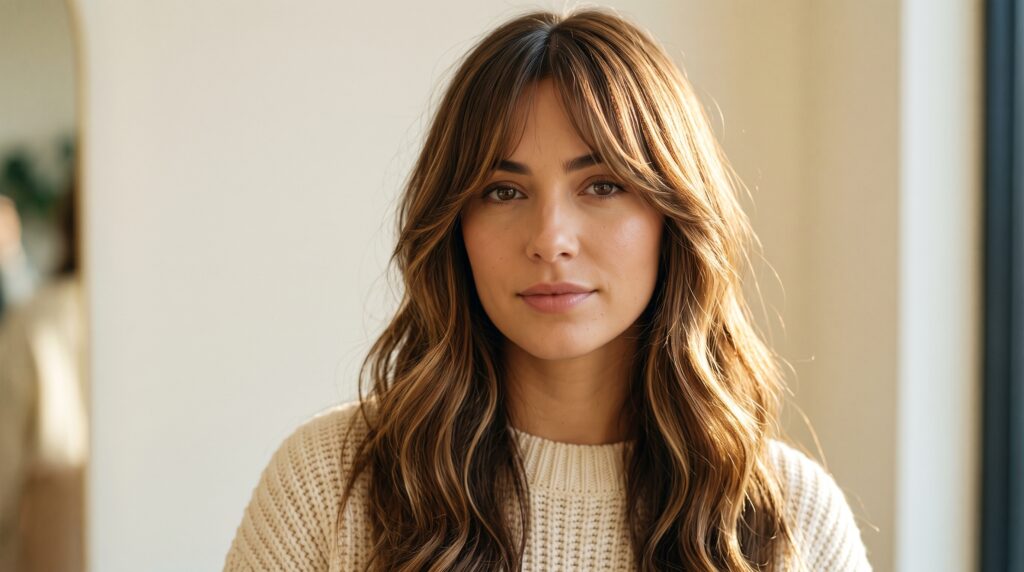
For anyone who wants bangs that feel less committal, this style opens gently through the center instead of sitting in one solid block. Honey-warm pieces woven through the front brighten the whole face without changing the relaxed shape underneath. It’s an easy in-between option if you’re not ready for a full, dense fringe but still want that soft framing effect.
How to style it:
- Part the fringe loosely down the middle.
- Blow-dry the bangs downward first, then coax them apart with your fingers.
- Set with a large roller or round brush for a gentle curve.
Best for: Heart, oval, and round face shapes; straight to softly wavy hair You’ll need: Velcro roller, blow dryer, medium round brush, heat protectant, light hairspray
3. Wispy Fringe With Face-Framing Pieces
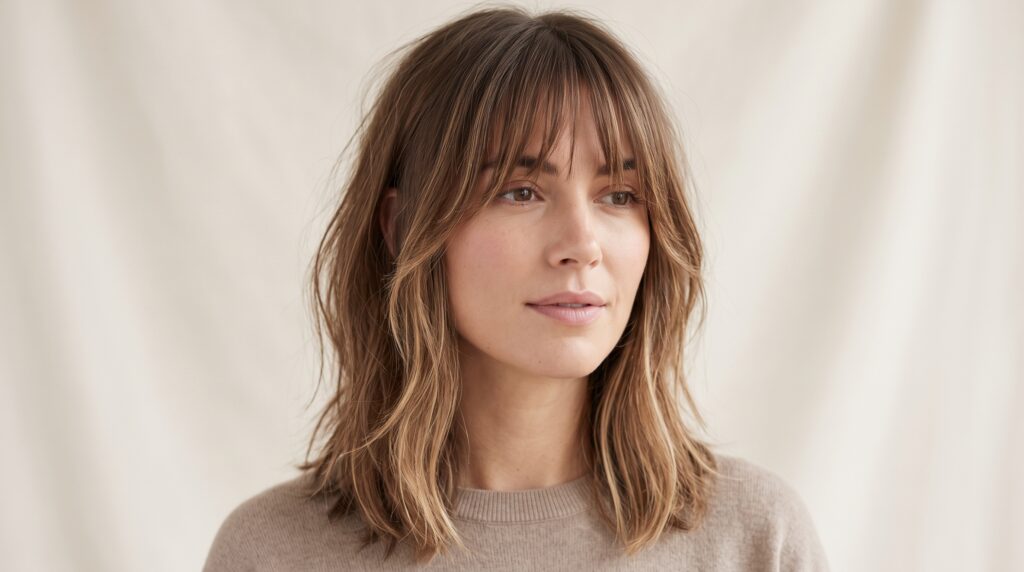
Here, the bangs stay thin and airy while longer strands drape gently along the cheeks and jaw. The effect is delicate rather than dramatic, which makes it a comfortable entry point if you’ve never had bangs before. Because the texture is meant to look a little imperfect, it’s genuinely quick to maintain day to day.
How to style it:
- Rough-dry the bangs with your fingers instead of a brush.
- Twist a few face-framing sections away from the face.
- Smooth a small amount of styling cream through the ends.
Best for: Oval, square, and heart face shapes; straight, wavy, or loosely curly hair You’ll need: Blow dryer, styling cream, paddle brush, heat protectant, finishing mist
4. Feathered Fringe With Beige Layers
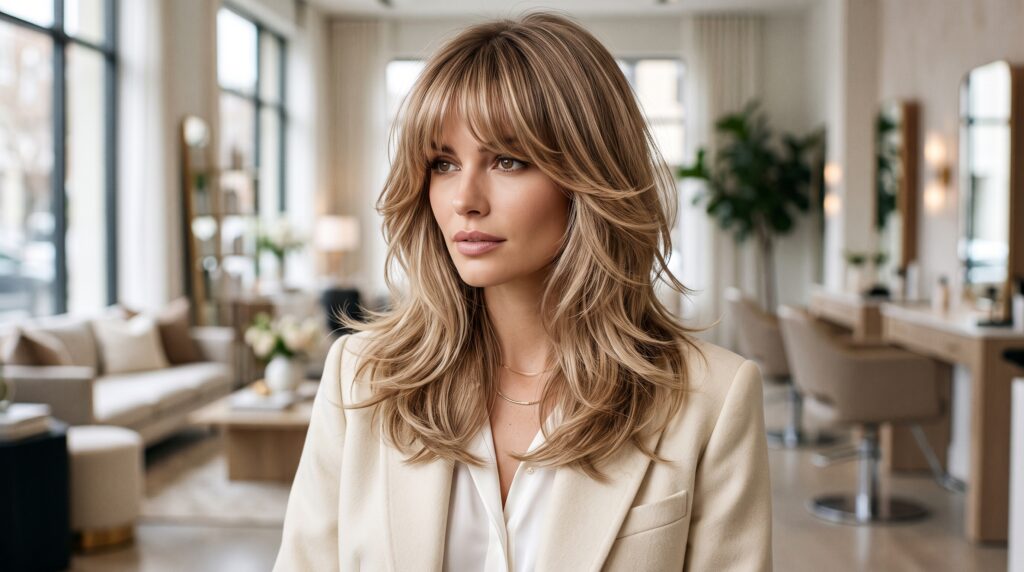
This take adds noticeably more lift at the root, which opens up the face more than a flatter fringe would. Warm beige layering through the front keeps everything looking sun-warmed rather than flat or one-dimensional. It’s a good choice when you want a fringe with a bit more presence but still soft around the edges.
How to style it:
- Lift the roots of the bangs briefly while blow-drying.
- Feather the ends outward using a round brush.
- Smooth the crown lightly, keeping the tips loose.
Best for: Long, oval, and heart face shapes; straight to wavy hair You’ll need: Round brush, blow dryer, heat protectant, light serum, root-lift spray
5. French-Style Fringe With Extra Volume
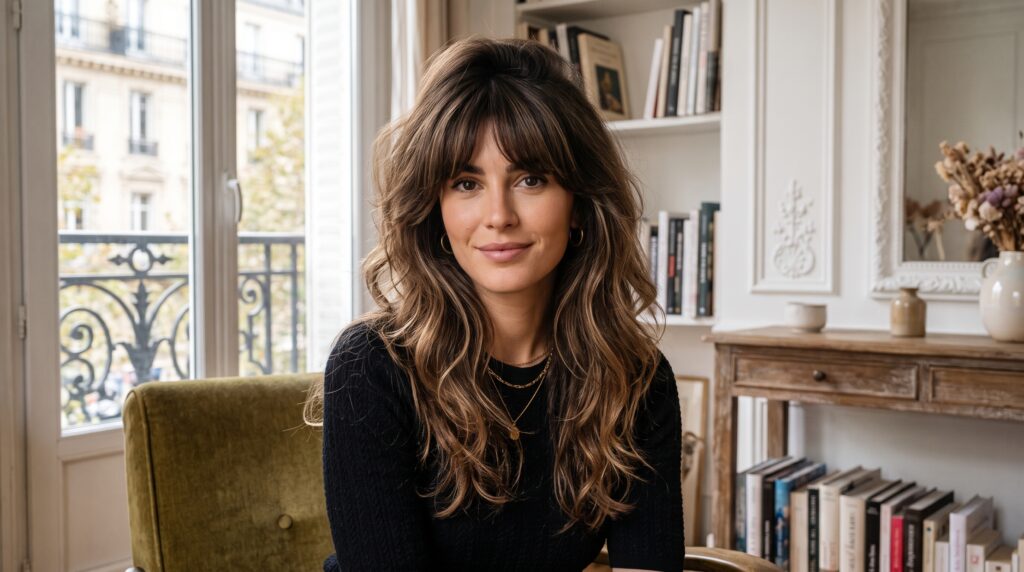
This one leans into that effortless, “didn’t try too hard” French look. The fringe skims the brow line while layers around the crown build in gentle fullness, so the cut never falls flat by midday. It’s a nice fit if your hair already has some natural texture, since you won’t need to fight against it to get the look.
How to style it:
- Blow-dry the bangs forward, then loosen with your fingertips.
- Lift the crown slightly with a brush for volume.
- Shake the layers out and finish with dry shampoo, even on clean hair.
Best for: Oval, long, and heart face shapes; straight to wavy hair You’ll need: Blow dryer, round brush, dry shampoo, heat protectant, light mousse
6. Piecey Textured Fringe With Sunlit Tips

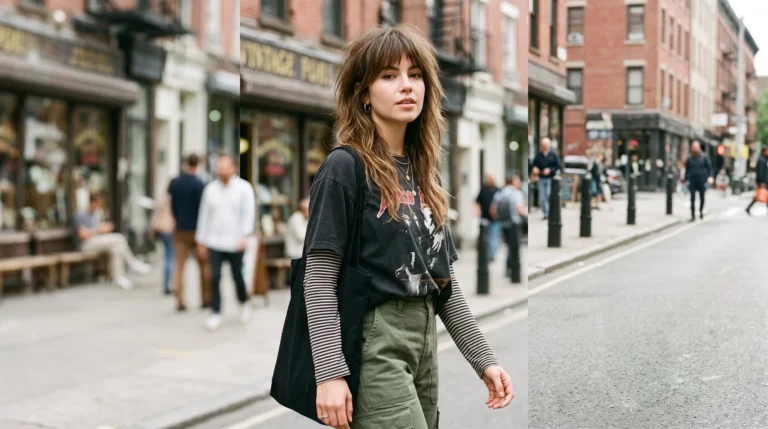
If you want something a touch more playful, this version brings in choppier texture through the fringe paired with lighter-toned tips. It has a slightly tousled, weekend-ready energy and tends to make finer hair look more substantial. Natural waves or bends only add to the effect here.
How to style it:
- Rough-dry the fringe loosely with your fingers.
- Curl a few pieces through the front layers for movement.
- Rake a small amount of texture paste through just the ends.
Best for: Round, oval, and heart face shapes; fine to medium straight or wavy hair You’ll need: Blow dryer, heat protectant, texture paste, curling iron, light spray
7. Collarbone-Length Cut With Flowing Layers
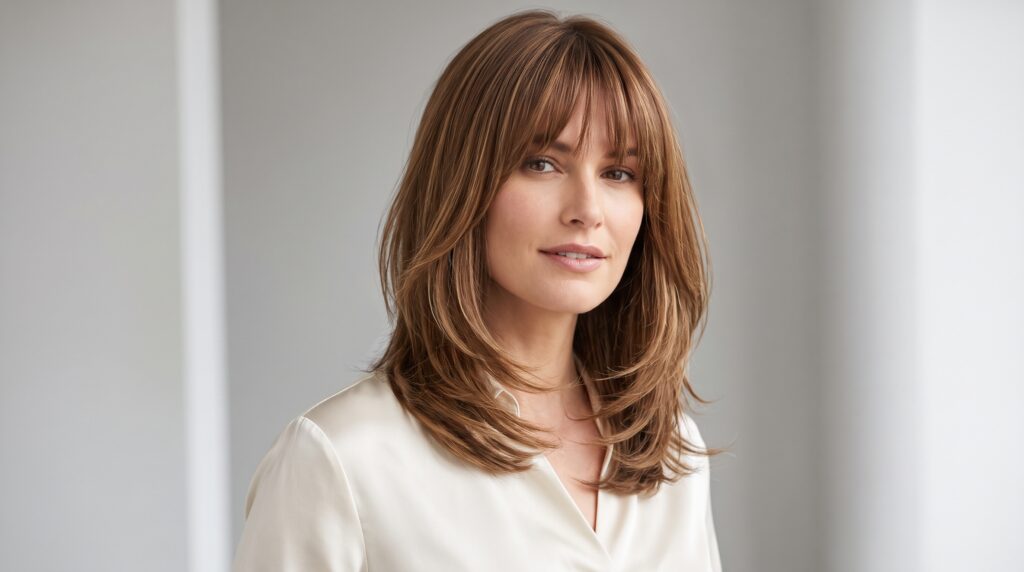
Landing right around the collarbone, this length is one of the most versatile on the list. The Birkin fringe adds personality up top, while soft layers through the sides let the whole cut move rather than sit stiffly. It’s practical, too — long enough to pin back on busy days but still short enough to feel fresh.
How to style it:
- Blow-dry the bangs down and slightly under.
- Brush the side layers away from the face.
- Mist lightly for soft, flexible hold.
Best for: Oval, round, and long face shapes; straight or softly wavy hair You’ll need: Medium round brush, blow dryer, light hairspray, heat protectant, smoothing cream
8. Shaggy Fringe With Glowy Layers
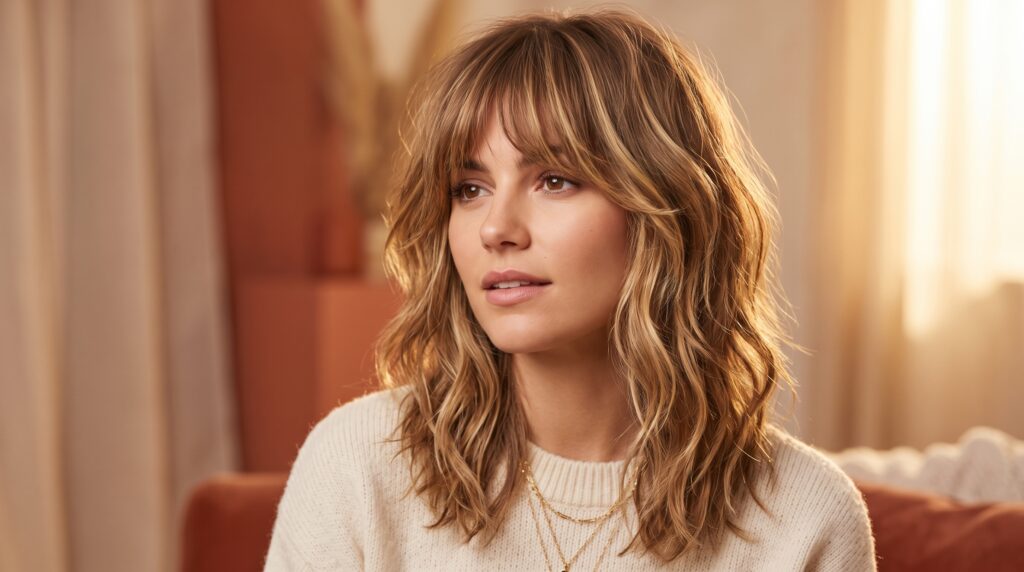
This is the version for anyone chasing bounce and volume over sleekness. Shag-inspired layers add lift and a lived-in finish, while the fringe stays soft rather than choppy. It photographs especially well with a little natural wave and tends to hold its shape from morning to night.
How to style it:
- Rough-dry the layers first to build natural lift.
- Refine only the bangs with a small round brush.
- Scrunch texture spray through the mid-lengths.
Best for: Heart, oval, and square face shapes; wavy or textured straight hair You’ll need: Diffuser, blow dryer, round brush, texture spray, heat protectant
9. Smooth Fringe With Long Blended Layers
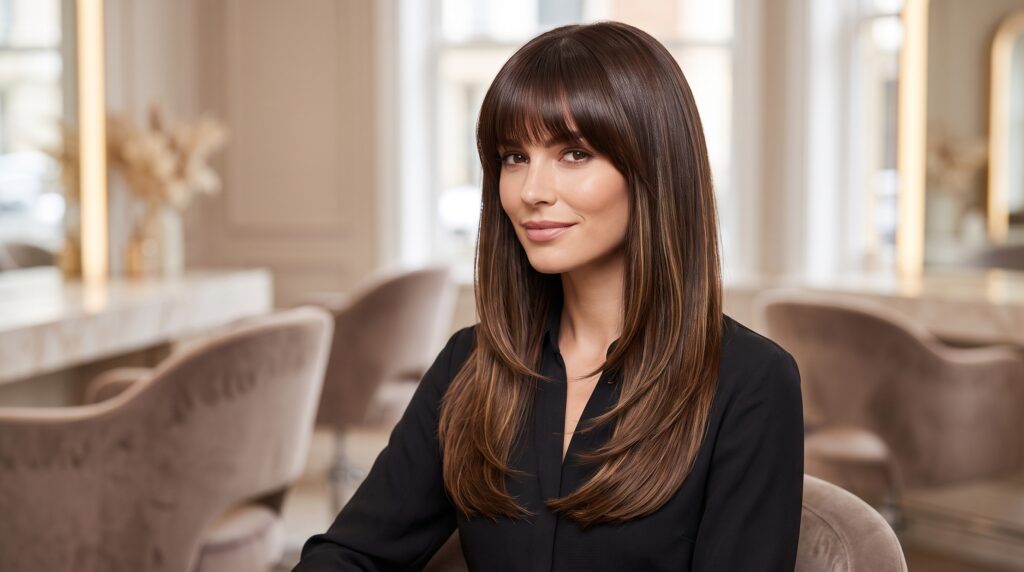
For a cleaner, more refined finish, this version skips the choppy texture in favor of long layers that melt seamlessly into the fringe. It shows off shine beautifully, particularly on straight or gently waved hair, and grows out gracefully since there are no hard lines to maintain.
How to style it:
- Blow-dry the bangs with steady tension for smoothness.
- Smooth the layers using a paddle or round brush.
- Apply a small amount of serum to the ends only.
Best for: Long, oval, and heart face shapes; straight to softly wavy hair You’ll need: Paddle brush, blow dryer, light serum, heat protectant, smoothing spray
10. Tousled Fringe With Golden Framing
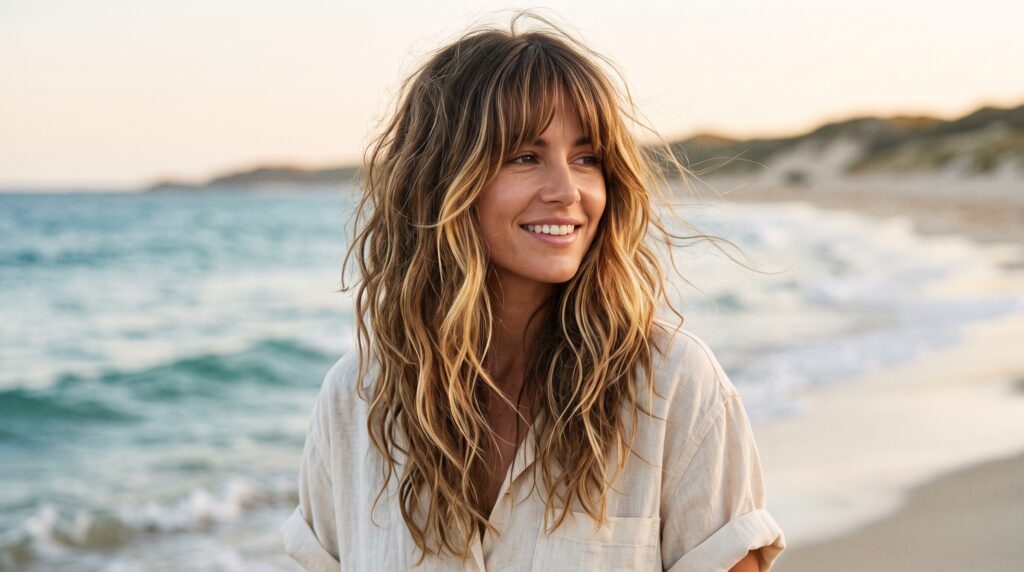
Closing out the list is the beachiest option — a relaxed, brow-skimming fringe paired with golden face-framing pieces that warm up the whole look. It thrives on imperfection, so it’s genuinely one of the lowest-maintenance styles here, and it blends easily into longer layers when you want a break from a defined fringe.
How to style it:
- Blow-dry the bangs forward with a light touch.
- Twist a few random front sections while drying for natural bends.
- Scrunch in a light spray to keep texture airy.
Best for: Round, heart, and oval face shapes; wavy or straight hair You’ll need: Blow dryer, heat protectant, texturizing spray, round brush, light mousse
Which Version Should You Choose?
Since face shape plays such a big role in how any fringe sits, it’s worth confirming yours before booking your appointment. For a solid breakdown of the different face shapes and which cuts flatter each one, Luxy Hair’s face shape guide is a genuinely useful reference to bring into the conversation with your stylist.
Beyond face shape, think honestly about how much time you actually spend on your hair each morning. The wispier, more textured versions on this list (numbers 3, 6, 8, and 10) tend to need the least effort, since a slightly undone finish is part of the design. The smoother, more polished versions (numbers 4, 5, and 9) look a little more intentional but ask for a few extra minutes with a round brush.
Final Thoughts
What makes Birkin bangs with sunlit layers such an appealing trend is how much room there is to make it your own. You can wear the fringe smooth and sleek one week, then rough-dry it for a beachier finish the next, without needing a whole new haircut. Start with whichever version above matches your natural texture most closely — styling always feels easier when you’re working with your hair instead of against it — and keep your routine simple so the softness stays the whole point.
If you try one of these, snap a photo before and after your appointment. It’s the easiest way to see exactly how the light layering and fringe shape change the way your whole haircut catches the light.
Frequently Asked Questions
Is this fringe style hard to maintain day to day? Not really. Because the look is meant to feel a little relaxed rather than perfectly polished, a quick blow-dry and a pass with a brush is usually all it needs.
Can thin hair pull off this style? Yes. Keeping the fringe light and the layers soft actually helps thin hair look fuller, since heavier, blunt fringes tend to draw more attention to sparse ends.
Which face shapes suit this trend best? Oval, heart, and long face shapes tend to wear it especially well, though the fringe length and fullness can be adjusted to flatter round or square faces too.
Does this work with wavy or curly hair? Definitely. Wavy and curly textures often make the layers look even more natural — a little styling cream or a quick blow-dry is usually enough to keep the fringe sitting the way you want.
How often does the fringe need a trim? Most people come back every three to five weeks to keep the length comfortable around the eyes, though this depends on how quickly your hair grows and whether you prefer it brow-skimming or a little longer.