The Complete Guide to Yellow Nails: 30+ Stunning Designs for Every Style & Season

Here’s something I’ve noticed: yellow nails don’t get the credit they deserve. Most people scroll right past them thinking they’re too bold or too summery. But once you see how versatile this color actually is—from buttery pastels to deep mustard tones—it’s pretty hard to go back to the same old neutrals.
I’m talking about a shade that works year-round, looks incredible on every skin tone, and somehow manages to be both cheerful and sophisticated at the same time. Whether you’re into minimalist vibes or full-on nail art, there’s a yellow nail design here with your name on it.
In this guide, I’m breaking down everything: the best shades for your undertones, designs that actually work in real life, maintenance tips so your yellow doesn’t fade to sad beige, and honest answers to questions like “Will this stain my nails?” (Spoiler: not if you do it right.)
Ready? Let’s get into it.
Why Yellow Nails Are Having Such a Huge Moment Right Now

You might be wondering why yellow nails are suddenly everywhere. Here’s the thing—they’re not really “sudden” at all. This trend’s been building quietly over the past few years, and now it’s finally getting the recognition it deserves.
Butter yellow became the breakout star in 2024, thanks to celebrities like Hailey Bieber and Selena Gomez rocking softer, creamier shades. In my experience, once a pastel makes it to mainstream fashion, it opens the door for bolder variations. Now here’s where it gets interesting: designers started pairing yellow with everything from chocolate brown to electric blue, proving it’s way more versatile than anyone expected.
What I love about this trend is how it taps into color psychology. Yellow is literally associated with happiness, optimism, and energy. When you’re feeling stuck in a rut or just need that extra boost, yellow nail polish gives you that instant mood lift every time you look down at your hands.
What Makes Yellow Nails Different from Other Bold Colors?
Unlike red (which screams power) or black (which feels edgy), yellow nails sit in this really interesting middle ground. They’re bold enough to turn heads but soft enough to wear to a job interview. You might be wondering if they work year-round, and honestly? They do.
- Spring/Summer: Obviously perfect for sunshine vibes
- Fall: Mustard and goldenrod shades feel incredibly cozy
- Winter: Paired with cranberry or navy, yellow adds unexpected warmth
The best part? Yellow nail designs photograph beautifully. If you’re someone who loves sharing your manis on Instagram, you’ll notice how yellow pops against almost any background without washing you out.
The Ultimate Yellow Nail Shade Guide (By Skin Tone)

This is probably the most important section of this whole guide, because here’s the truth: not all yellows are created equal. I’ve seen so many people write off yellow completely because they tried one shade that didn’t work for their undertones.
For Fair to Light Skin Tones
Best shades: Butter yellow, lemon sorbet, pale canary, soft sunshine
If you have fair skin, you want to avoid anything too neon or highlighter-bright—those can wash you out fast. Instead, go for those creamy, pastel-leaning yellows that feel more sophisticated than stark. What I love about butter yellow nails on lighter skin is how they create this really pretty contrast without being aggressive.
Try these combinations:
- Butter yellow with white tips (classic French twist)
- Pale yellow with gold chrome (adds dimension)
- Lemon cream with nude accents
Pro tip: If you have cool undertones, lean toward yellows with a slight peachy or creamy base. If you’re warm-toned, pure buttery shades will look incredible on you.
For Medium to Olive Skin Tones
Best shades: Goldenrod, honey yellow, warm mustard, amber
Now here’s where it gets fun. Medium skin tones can pull off a wider range of yellow nail polish shades than anyone else. You’ve got the flexibility to go super soft or surprisingly bold. What I’ve noticed is that warmer, richer yellows bring out the natural warmth in olive and tan skin beautifully.
Winning combinations:
- Mustard yellow with chocolate brown swirls
- Golden chrome on almond-shaped nails
- Warm yellow with terracotta accents
The key here? Don’t be afraid to experiment with depth. A deep goldenrod can look absolutely stunning where a pale butter yellow might feel a bit flat.
For Deep to Dark Skin Tones
Best shades: Bright lemon, neon yellow, deep marigold, golden sunshine
Listen—if you have deep skin, you can wear colors that would literally overwhelm lighter skin tones. Bold, saturated yellow nails look absolutely incredible against darker skin because of that gorgeous high-contrast effect. You might be wondering about neons, and the answer is yes, absolutely yes.
Stand-out looks:
- Electric yellow with gold foil (so luxe)
- Neon tips on nude base (editorial vibes)
- Deep yellow with white marble design
Real talk: Don’t let anyone tell you pastels won’t work on deep skin. They absolutely can—you just need to add dimension through chrome finishes, glitter, or strategic nail art.
25 Yellow Nail Designs That Actually Work in Real Life
Okay, let’s get to the good stuff. I’ve organized these yellow nail ideas by vibe so you can jump straight to what matches your style. Each design includes detailed application tips, what makes it work, and who it’s perfect for.
Minimalist Yellow Nail Designs (For the “Less is More” Crew)
Sometimes you want color without the commitment of full-on nail art. These designs give you that perfect balance.
1. Solid Butter Yellow Shorties (The Gateway Yellow)

This is your introduction to yellow nails without any intimidation factor. Short, rounded nails in a creamy butter shade look polished and professional while still feeling fresh and modern. What I love about this look is how it works with literally any outfit—jeans and a t-shirt, business casual, even a cocktail dress.
Application tips: Start with two coats of OPI Bee Mine Forever or Essie Aim to Misbehave. The key here is keeping your nails short (just past the fingertip) and perfectly shaped—file them into a soft round or squoval shape. Apply a glossy topcoat for that buttery, smooth finish. This look grows out beautifully, so you can easily get 7-10 days of wear.
Best for: Nail color beginners, office environments, anyone with an active lifestyle who can’t maintain longer nails. If you’ve never worn yellow before, start here.
2. Pale Yellow with High-Gloss Finish (Clean Girl Energy)

Think glazed donut nails but make it yellow. This look is all about that wet, glassy shine that catches the light from every angle. The pale yellow base keeps it subtle while the mirror-like finish makes it feel expensive and editorial. You might be wondering why this works so well—it’s because the glossy finish adds dimension that makes even a simple color look incredibly intentional.
How to achieve it: Apply two thin coats of a pale yellow polish (I recommend Sally Hansen Xtreme Wear in Mellow Yellow). Wait 5 minutes for it to fully dry, then apply a gel-effect topcoat like Essie Gel Couture Top Coat. The trick is to really flood the nail with topcoat—don’t be stingy. You want that thick, glassy layer. Reapply topcoat every 2-3 days to maintain the shine.
Best for: Minimalists who want their nails to look effortlessly chic, anyone who loves the “clean girl aesthetic,” people who want yellow but in a really subtle way.
3. Muted Mustard on Short Square Nails (Subtle Statement)

Mustard yellow is incredibly underrated. It’s warm, sophisticated, and reads almost neutral while still being interesting. On short square nails, this shade feels modern and fashion-forward without trying too hard. What I’ve noticed is that mustard works exceptionally well if you wear a lot of earth tones—it complements browns, creams, olives, and denim beautifully.
The technique: Mustard can look streaky if you’re not careful, so here’s what to do. Apply a white base coat first (yes, really—it makes the color more opaque). Then apply two thin coats of mustard polish. For this look, I love China Glaze Mustard the Courage or Zoya Kerry. Keep the nails short (1-2mm past your fingertip) and file them into a clean square shape with slightly softened corners. Finish with a satin or slightly matte topcoat for that lived-in, effortless vibe.
Best for: Fall and winter especially, anyone who wears neutrals, people who want color that doesn’t scream for attention, those working in creative but professional environments.
4. Single Yellow Accent Nail (Test the Waters)

If you’re genuinely not sure about yellow nails, this is your risk-free entry point. Paint four fingers in a sheer nude or soft white, then make your ring finger the star in whatever yellow shade speaks to you. This gives you a chance to see how you feel about yellow without the full commitment, and it’s also just a really chic, modern look in general.
Strategy: Choose a yellow shade that complements your nude base. If your nude leans pink, go for a warmer butter yellow. If it’s more beige, try a true lemon yellow. Apply your nude to all nails first, let it fully dry, then carefully paint your ring finger (or any accent finger—I actually love the middle finger for this). You can keep the accent nail simple or add tiny details like a single gold stripe or small floral design.
Best for: Anyone scared of yellow, people who like subtle nail art, those wanting to ease into bolder colors, anyone who keeps getting bored with all-one-color manicures.
Butter Yellow Nail Designs (The TikTok Favorites)
This softer, creamier yellow has become insanely popular, and for good reason. It’s yellow that somehow feels neutral.
5. Classic Butter Yellow Chrome (The Hailey Bieber Special)

This is THE look that made butter yellow go viral. The chrome powder over a butter yellow base creates this gorgeous, glazed, almost iridescent effect that photographs like a dream. It’s sophisticated enough for a wedding but fun enough for brunch with friends. Now here’s where it gets interesting: the chrome actually makes yellow more wearable because it softens the color intensity while adding luxury.
How to create it: Paint your nails with two coats of butter yellow gel polish (you need gel for this—regular polish won’t work with chrome powder). Cure under a UV/LED lamp. While the final layer is still tacky (don’t wipe it), use a silicone applicator or your finger to rub chrome powder onto each nail. Buff it in circular motions until you get that reflective finish. Seal with gel topcoat and cure again. The entire process takes about 20 minutes at home.
Pro tip: Use a gold or champagne chrome powder instead of silver for an even warmer, more buttery effect. This looks absolutely stunning on medium to deep skin tones.
Best for: Special occasions, anyone who loves the glazed donut nail trend, people who want yellow but more elevated, those with medium to long almond-shaped nails (the shape really showcases the chrome).
6. Butter Yellow French Tips (Fresh Take on a Classic)

French tips get a bad rap for being dated, but swap out that stark white for soft butter yellow and suddenly you’ve got something that feels current and cool. This look is incredibly versatile—it works on short nails, long nails, any shape, and it grows out beautifully without looking messy.
The application: Start with a sheer nude or pink base (I love OPI Bubble Bath or Essie Ballet Slippers). Apply two coats and let dry completely. For the tips, you have two options: freehand with a steady hand and thin brush, or use French tip guides for perfectly crisp lines. Paint the tips in your butter yellow shade—I recommend keeping the smile line fairly thin (2-3mm) for a modern look rather than the chunky tips of the 2000s.
Variation idea: Try this on short square nails for a minimalist vibe, or on long almond nails for something more glamorous. You can also reverse it—butter yellow base with nude tips—for an unexpected twist.
Best for: People who love French manicures but want something new, anyone needing a versatile look that works for multiple occasions, those who want low-maintenance nails (this grows out incredibly well).
7. Butter Yellow with White Daisies (Soft Girl Summer)

This is pure cottagecore, soft girl, sunshine energy. Tiny white daisies on a butter yellow base feel fresh, feminine, and romantic without being overly sweet. What I love about this design is that it’s detailed enough to be interesting but simple enough that you could actually do it yourself at home.
DIY technique: Paint all nails in butter yellow (two coats). On one or two accent nails per hand, use a dotting tool to create white flower petals—make 5-6 dots in a circle. Use a toothpick dipped in yellow to add a tiny center to each flower. Alternatively, grab some daisy nail stickers for foolproof results. Seal everything with glossy topcoat.
Styling tip: This looks especially beautiful on short to medium oval or almond nails. Keep the daisies small and delicate—oversized flowers can look cartoonish. Limit the design to 2-3 nails max so it doesn’t become overwhelming.
Best for: Spring and summer obviously, garden parties, outdoor weddings, anyone who loves floral designs, people wanting their first attempt at nail art (this is very forgiving).
8. Butter Yellow and Chocolate Brown Swirls (Minimalist Art)

This is one of those unexpectedly gorgeous color combinations that just works. The warmth of butter yellow and the richness of chocolate brown create this really cozy, neutral vibe that’s perfect for fall but honestly wearable year-round. The abstract swirls keep it from feeling too serious while still looking sophisticated.
Creating the swirls: Paint a butter yellow base (two coats). While the second coat is still slightly wet, drop small dots of chocolate brown polish onto the nail. Use a toothpick or thin brush to gently swirl the colors together—don’t overmix or they’ll turn muddy. The key is light, loose swirls that look organic and unplanned. Let it dry completely before applying topcoat. You can do this on all nails or just as an accent design.
Color recommendations: For the brown, try OPI Espresso Your Style or Essie Hot Cocoa. The contrast should be noticeable but not harsh.
Best for: Fall and winter, people who want nail art that looks expensive without being flashy, anyone transitioning from summer to autumn styles, those who wear a lot of neutral clothing.
Bold and Bright Yellow Nail Ideas (For the Maximalists)
If you want your nails to make a statement, these are it. Go big or go home.
9. Electric Neon Yellow (Highlighter Vibes)

This is not for the faint of heart. Electric neon yellow is LOUD, it’s bold, and it demands attention in the best possible way. You might be wondering if this is wearable in real life, and the answer is absolutely yes—if you have the confidence to pull it off. This shade photographs incredibly well, which is why it’s so popular for festivals, vacations, and summer events.
Application notes: Neon yellows are notoriously sheer, so you’ll need 3-4 thin coats for full opacity. Apply a white base coat first to make the color pop even more. I recommend Essie Aim to Misbehave or China Glaze Whip It Good. Here’s a game-changer: finish with a matte topcoat instead of glossy. The matte finish makes neon yellow look modern and editorial rather than juvenile.
Styling consideration: This works best on short to medium nails. On super long nails, neon yellow can start to look costume-y. Keep the shape simple—square or squoval—and let the color do the talking.
Best for: Summer vacations, music festivals, beach trips, anyone who loves being the center of attention, people with deep or medium skin tones (the contrast is stunning), those who want maximum impact with minimal nail art.
10. Neon Yellow with Black Geometric Design (Edgy Contrast)

Take that electric yellow and add crisp black geometric shapes—lines, dots, triangles, negative space—and you’ve got something that looks straight out of a fashion editorial. The contrast between the brightness of neon yellow and the starkness of black creates this really striking, almost graphic novel effect.
Design ideas: Try thin black vertical stripes on a few nails, leave some solid yellow, maybe add a black triangle or two. Use nail striping tape for perfectly straight lines—it’s way easier than trying to freehand. Apply your neon yellow base, place the tape in your desired pattern, paint over with black, then carefully remove the tape while the polish is still slightly wet. Seal with topcoat.
Shape matters: This design looks especially good on longer nails (medium to long coffin, almond, or stiletto) because you have more canvas to work with. On short nails, keep the geometric designs super simple or it can look cluttered.
Best for: People with edgy style, anyone who wants their nails to be a conversation starter, those attending fashion events or creative industry gatherings, anyone who loved the 80s/90s aesthetic.
11. Bright Yellow with Gold Foil (Sun Goddess)

This is yellow turned up to luxury. Random pieces of gold foil applied over a bright yellow base catch the light and add this really rich, textural element. It’s glamorous without being over-the-top, and there’s something about yellow and gold together that just feels warm and radiant.
How to apply gold foil: Paint your bright yellow base (I love OPI Never a Dulles Moment). While the topcoat is still tacky, press small pieces of gold leaf nail foil onto the nail in random spots. Don’t cover the whole nail—strategic placement looks better. Press firmly, then peel away the foil backing. Some areas will transfer, some won’t, and that irregular look is actually what makes this design work. Seal with another layer of topcoat.
Pro tip: This looks absolutely stunning on deeper skin tones. The yellow-gold combination against brown skin is just chef’s kiss.
Best for: Special events, weddings (especially as a guest), date nights, holiday parties, anyone who wants to feel extra, people who love metallic accents.
12. Canary Yellow with White Polka Dots (Playful Pop)

This is retro, it’s playful, and it’s surprisingly wearable. Canary yellow (that true, primary yellow) with crisp white polka dots gives off major vintage vibes—think 1950s pin-up meets modern minimalism. What makes this work is the precision—the dots need to be clean and evenly sized.
Dotting technique: Paint your canary yellow base. Once completely dry, dip a dotting tool in white polish and carefully apply dots in a pattern. You can do them all over (more playful), in a line along one edge (more modern), or just on one or two accent nails (more subtle). The key is consistency—all dots should be roughly the same size. Practice on paper first if you’re nervous.
Size and spacing: For short nails, use smaller dots spaced further apart. For longer nails, you can go bigger and cluster them more. Always seal with glossy topcoat to make the dots really pop.
Best for: Summer, anyone who loves vintage aesthetics, people who want fun nails without heavy commitment, those looking for an easy DIY nail art project.
French Tip Yellow Nail Designs (Modern Classics)
The yellow French tips trend isn’t going anywhere. Here’s how to do it right.
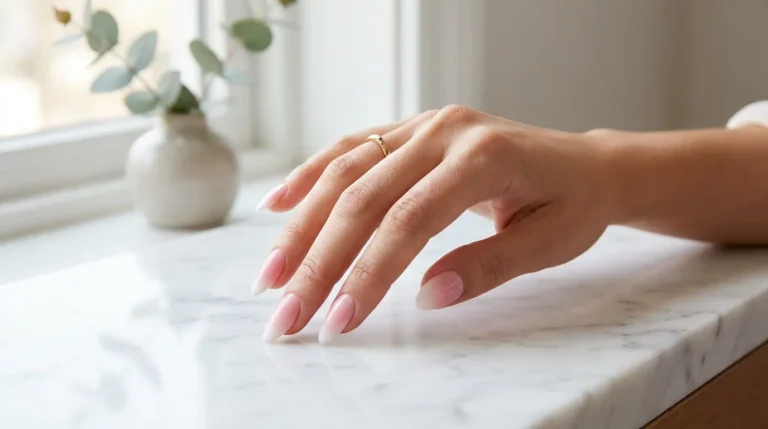
13. Pale Yellow Tips on Nude Base (Soft Sophistication)

This is French tips all grown up. Instead of that stark white that can look dated, soft pale yellow tips on a nude base feel modern, fresh, and incredibly versatile. This is also one of the most low-maintenance yellow nail designs because as your nails grow, the difference is barely noticeable. You can easily stretch this to two weeks between manicures.
The perfect execution: Choose a nude base that matches your skin tone—for fair skin, try something pinkish; for medium to deep skin, go for warm beige or taupe. Apply two coats. For the tips, use a pale, creamy yellow (not neon, not mustard—think lemon sorbet). The smile line should be thin—no thicker than 2-3mm. Use a thin brush for control or French tip guides for crisp lines.
Length and shape: This works on any length, but it shines on medium almond or oval nails. The elongated shape makes the yellow tips look really elegant rather than too cutesy.
Best for: Professional settings, brides and bridesmaids, anyone wanting a modern French mani, people who hate frequent salon visits, those new to yellow nails who want something subtle.
14. Reverse French with Yellow Half-Moon (Retro Twist)

Instead of painting the tips, paint the base of each nail (the half-moon by your cuticle) in yellow. This reverse French look has serious vintage vibes but feels totally current at the same time. It’s unexpected, which is exactly why it works.
Application method: This one’s a bit trickier. Start with nude or sheer pink on the entire nail. Once dry, use half-moon nail guides (or carefully freehand) to create a curved line at the base. Paint inside that curve with your chosen yellow shade. The half-moon should be relatively small—just covering the white part of your natural nail bed plus maybe 1mm beyond. Remove the guide while polish is still wet for clean lines.
Color variation: This works beautifully with butter yellow for a soft look, or bright lemon yellow for more drama. You can also do a full yellow nail with nude half-moons for the opposite effect.
Best for: Anyone who loves vintage aesthetics (1920s-1940s especially), people wanting unique nail art that’s still wearable, those with strong, healthy natural nails (since much of the nail shows), nail art enthusiasts looking for their next project.
15. Yellow Chrome French Tips (Futuristic Elegance)

Take traditional French tips and upgrade them with chrome powder just on the tips for a futuristic, almost holographic effect. This gives you the structure and elegance of French nails with a modern, eye-catching twist. The yellow chrome catches light differently than regular yellow polish, creating this really beautiful dimensional effect.
Creating the look: Apply gel polish in a sheer nude or soft pink (you need gel for chrome powder to adhere properly). Cure under your UV/LED lamp. For the tips only, apply a thin layer of yellow gel polish and cure. While that final layer is tacky, rub chrome powder onto just the tips using a silicone tool or your finger. Seal with gel topcoat and cure. The result is nude nails with shimmering yellow chrome tips.
Best chrome powder: Use gold or yellow chrome specifically—silver won’t give you that yellow effect. Chrome powder is reusable and one jar lasts forever.
Best for: People who love both classic and trendy styles, anyone wanting nails that photograph well, special occasions where you want to stand out, those who already do gel manicures at home.
Yellow Nail Art Designs (For When You Want to Go All Out)
Sometimes you just need full-on nail art. These designs deliver visual interest while still being wearable.
16. Sunflower Nail Art (Garden Party)

Sunflowers are cheerful, summery, and surprisingly versatile for nail art. Instead of covering every nail with sunflowers (which can look busy), paint them on one or two accent nails with the rest in coordinating colors. This gives you detailed art without overwhelming your hands.
How to paint sunflowers: On a nude, white, or pale yellow base, use a thin nail art brush to paint the center of the sunflower in dark brown. While it’s still wet, use the same brown to create texture by dotting with a toothpick. For the petals, use bright or golden yellow to paint oval shapes radiating from the center—usually 8-12 petals. Add tiny white highlights to some petals for dimension. Use green on one nail to paint stems or leaves for variety. Seal with glossy topcoat.
Easier alternative: Use sunflower nail stickers or decals. Apply them to a yellow or nude base for instant nail art.
Best for: Spring and summer, garden weddings, outdoor events, anyone who loves floral designs but finds roses too traditional, people wanting to try hand-painted nail art.
17. Lemon Slice Design (Citrus Fresh)

This is peak summer nails. Actual lemon slice cross-sections painted on your nails in yellow with white segments—it’s playful, it’s fresh, and it’s surprisingly easy to do. This design looks especially great if you’re headed somewhere tropical or just want to capture that vacation energy.
The technique: Paint most nails in white or pale yellow. On 1-2 accent nails per hand, paint a bright yellow circle taking up most of the nail. Divide it into segments (like a pizza) using thin white lines from the center outward—usually 6-8 segments. Add a thin yellow rind around the edge and a tiny bit of white for highlights. You can also add small yellow seeds in some segments for extra detail.
Polish picks: Use bright lemon yellow (Essie Aim to Misbehave) for the fruit and pure white for the segments.
Best for: Beach vacations, pool parties, summer BBQs, anyone who loves fruit-inspired designs, people who want fun nails without taking themselves too seriously.
18. Yellow and Blue Checkerboard (Y2K Throwback)

This design is pure nostalgia. Alternating yellow and light blue (or navy) squares create this graphic, retro look that’s having a major moment right now. It’s bold without being overwhelming, and there’s something really satisfying about the pattern.
Creating the checkerboard: Start with a white or nude base for opacity. Use nail striping tape to section off your nail into squares (usually 3×3 or 4×4 grid depending on nail size). Paint alternating squares in yellow and blue, removing the tape carefully while polish is still slightly wet. This takes patience but the result is so worth it. Seal with topcoat—this helps smooth out any slight height differences between colors.
Color combo options: Try butter yellow with baby blue for soft vibes, or neon yellow with navy for maximum contrast.
Best for: Anyone who loved the late 90s/early 2000s, people who enjoy graphic patterns, those wanting nails that make a statement, anyone comfortable with slightly time-consuming nail art.
19. Yellow Marble with White (Lemon Meringue)

Marble nails look incredibly intricate but they’re actually quite easy to do. Swirling pale yellow with white creates this beautiful, organic pattern that’s different on every nail. The effect is soft, elegant, and more interesting than a solid color without being too busy.
Marble technique: Apply white polish as your base. While still wet, add random drops of pale yellow across the nail. Use a toothpick or thin brush to swirl the colors together in loose, organic patterns—think of mixing cake batter but stopping before it’s fully combined. Don’t overwork it or the colors will blend into one muddy tone. Let dry and add glossy topcoat. The topcoat really makes the marble effect pop.
Best shapes: This looks gorgeous on any nail shape but particularly beautiful on almond or oval nails where the marble can flow with the nail’s natural curve.
Best for: People who want nail art that looks complex but is actually beginner-friendly, anyone loving the marble trend in home decor or fashion, spring and summer especially, those wanting soft, feminine nails.
20. Bumblebee Accent Nail (Cute Statement)

This is adorable without being childish. One or two nails featuring tiny bumblebee designs while the rest stay solid yellow (or yellow with black stripes). It’s playful, it’s on-theme with yellow, and it adds personality without overwhelming your whole manicure.
Design options: You can hand-paint tiny bees (oval yellow body with black stripes, add wings and dots for eyes), or use bee nail stickers for foolproof results. Place them on a light yellow base for maximum visibility. Add one or two bees per accent nail—more than that gets too busy.
Coordination: Keep most nails in solid butter or bright yellow, and limit bee designs to your ring fingers or middle fingers. You can also do alternating yellow and black striped nails for bumblebee-inspired art without literal bees.
Best for: People who love cute, whimsical designs, anyone wanting themed nails that aren’t overly literal, those looking for conversation-starter manicures, summer and spring.
Yellow Nail Designs for Different Seasons
21. Spring: Butter Yellow with Pastel Pink Flowers

This is spring in manicure form—sweet, fresh, and instantly mood-lifting. Butter yellow keeps it soft and wearable, while pastel pink flowers add that romantic, “first warm day” vibe without looking too busy. What I love about this design is it feels pretty and polished even if you’re not a nail-art pro.
How to achieve it:
Apply two coats of butter yellow and let it dry properly. On 1–2 accent nails per hand, use a dotting tool to create small pastel pink petals (5 dots in a circle). Add a tiny white dot in the center for a crisp finish, then seal everything with a glossy topcoat so the flowers look smooth, not raised.
Best for:
Brunch season, spring weddings, soft outfits, short to medium oval/almond nails, and anyone who wants nail art that still feels “everyday.”
22. Summer: Neon Lemon Yellow with White Micro Swirls (Poolside Pop)

This is the summer version of yellow that doesn’t whisper—it shows up. Neon lemon makes your hands look instantly sun-kissed, and the white micro swirls give it that fun, beachy movement without going full cartoon. It’s playful, but still clean.
How to achieve it:
Start with a white base coat (neon needs it to pop), then apply 3 thin coats of neon yellow for full opacity. Once dry, use a thin nail art brush (or a toothpick in a pinch) to add ultra-thin white swirls on 2–3 nails only. Finish with a glossy topcoat for that “wet shine” vacation look.
Best for:
Vacations, festivals, summer photos, beach days, medium length nails (square or almond), and anyone who wants compliments without extra gems or heavy art.
23. Fall: Mustard Yellow with Chocolate Brown French Tips (Cozy Chic)

Fall yellow isn’t bright—it’s rich and cozy. Mustard yellow paired with chocolate brown tips gives you that autumn palette everyone loves (think coffee, coats, and neutral outfits), but in a way that feels modern. It’s subtle enough for daily wear, but still has that “she knows fashion” energy.
How to achieve it:
Paint a mustard base (two thin coats). Once fully dry, use French tip guides or a thin brush to create chocolate brown tips. Keep the tips thin (2–3mm) so it looks current—not chunky. Finish with a satin topcoat if you want a softer fall vibe, or glossy if you want it more polished.
Best for:
Fall outfits, neutral wardrobes, office-friendly nails, short to medium square/squoval nails, and anyone who wants seasonal nails without going overly themed.
24. Winter: Golden Yellow with Navy Minimal Stars (Warm Contrast)

Winter nails usually go dark, but here’s the twist—yellow in winter looks so good when it’s styled like a contrast color. A rich golden yellow base with tiny navy star details feels festive without screaming holiday. It’s warm, elegant, and honestly… kind of unexpected in the best way.
How to achieve it:
Apply two coats of a deep golden yellow (not pastel—go richer). On one accent nail per hand, add tiny navy stars using a nail art pen, sticker decals, or a dotting tool (a star can be made from 5 small dots if you keep it simple). Seal with a glossy topcoat to make the gold look extra luxe.
Best for:
Winter parties, dinners, holiday season without glitter overload, medium almond/oval nails, and anyone who wants yellow to feel grown-up and stylish in cold weather.
Your Complete Yellow Nail Maintenance Guide
Here’s where we get practical, because the prettiest yellow nails in the world don’t matter if they chip in two days or stain your nail beds.
Preventing Yellow Nail Staining (The #1 Question)
Real talk: yellow polish CAN stain your nails, especially the brighter shades. But it’s completely preventable.
Your pre-polish must-dos:
- Always use a base coat – This is non-negotiable. I recommend Orly Bonder or OPI Natural Nail Base Coat. They create a barrier between your nail and the pigment.
- Apply two thin layers – One thick layer = more staining risk
- Let base coat dry completely – Give it at least 60 seconds
If you DO get staining (it happens), soak your nails in a mixture of baking soda and lemon juice for 5-10 minutes. The mild bleaching effect works wonders.
Making Your Yellow Manicure Last Longer
Yellow nail polish shows wear faster than darker colors because of its lightness. Here’s how to extend your mani:
Week 1 maintenance:
- Apply quick-dry topcoat every 2-3 days
- Wear gloves when doing dishes (hot water is your enemy)
- Use cuticle oil daily (keeps the nail bed healthy and polish flexible)
When to refresh:
- At first sign of tip wear, paint a thin layer just on the tips
- If you have chrome, re-dust powder on worn areas
- For nail art, keep nail art pens handy for quick fixes
The two-week rule: Most yellow nails look best for 10-14 days max. After that, you’re better off removing and reapplying than trying to patch.
Nail Health Between Yellow Manicures
Give your nails a break between back-to-back yellow manis. Here’s what I do:
The recovery routine:
- Remove polish with acetone-free remover
- Soak nails in warm water with a few drops of vitamin E oil
- Gently buff away any remaining staining
- Apply nail strengthener for 3-5 days
- Moisturize cuticles twice daily
Red flag warning: If your natural nails look yellow even after thorough removal, you might have nail fungus or a health issue. See a dermatologist—don’t just keep painting over it.
DIY Yellow Nails at Home: Step-by-Step
You don’t need a salon to get gorgeous yellow nail designs. Here’s exactly how to do it yourself.
Essential Tools You Actually Need
The basics:
- Quality base coat (Orly Bonder)
- Your chosen yellow polish (I’ll recommend specific shades below)
- Fast-drying top coat (Seche Vite)
- Nail file (180-grit for shaping)
- Cuticle pusher
- Nail prep dehydrator (game-changer for longevity)
For nail art:
- Dotting tools (various sizes)
- Fine striping brush
- Nail art tape
- Chrome powder (if doing chrome finish)
The Perfect Application Technique
Step 1: Prep (Don’t skip this)
- Remove old polish completely
- File nails to desired shape (oval and almond work best for yellow)
- Push back cuticles gently
- Wipe nails with nail prep dehydrator
Step 2: Base Layer (Your stain insurance)
- Apply thin layer of base coat
- Let dry for 60 seconds (seriously, wait)
- If using super bright yellow, apply second base coat layer
Step 3: Color Application (Technique matters)
- Wipe excess polish off brush
- Apply thin center stripe first
- Then sides
- Let first coat dry 2 minutes
- Apply second thin coat (better than one thick coat)
- For neons, you might need three thin coats
Step 4: Top Coat (Seal the deal)
- Wait 3-4 minutes after final color coat
- Apply top coat, wrapping the tips
- Let dry 10 minutes before touching anything
Pro tip: For butter yellow nails, apply two coats of color and top with a layer of sheer shimmer for that glazed effect.
Common DIY Mistakes (And How to Fix Them)
Mistake #1: Polish floods cuticles
Fix: Use a cleanup brush dipped in acetone to clean edges before polish dries.
Mistake #2: Bubbles in polish
Fix: Don’t shake the bottle—roll it between your palms. Shaking creates bubbles that show up in your manicure.
Mistake #3: Yellowing looks patchy
Fix: Your base coat might not be dry enough. Always wait before applying color.
Mistake #4: Tips chip immediately
Fix: You’re not wrapping the tips. When applying each coat, swipe across the nail edge.
Best Yellow Nail Polish Brands (My Honest Reviews)
I’ve tested a LOT of yellow nail polish over the years. Here’s what actually delivers.
Best Overall: OPI Bee Mine Forever
Why it wins: Creamy formula, applies evenly in two coats, lasts up to 10 days without chipping. The shade is a perfect butter yellow that flatters most skin tones. Buy here.
Best for: Anyone wanting a reliable, salon-quality butter yellow.
Best Budget: Sally Hansen Hard as Nails in Mellow Yellow
The deal: Under $5 and includes nail strengthener. The formula isn’t quite as smooth as OPI, but for the price, it’s fantastic. Three coats give you full opacity.
Best for: Testing out yellow before investing in premium polish.
Best Neon: Essie Aim to Misbehave
The vibe: This is BRIGHT. Electric, highlighter-bright yellow that literally glows. Needs three thin coats but holy wow, the payoff. Shop here.
Best for: Making a statement at summer festivals or beach vacations.
Best for Nail Art: China Glaze Lemon Fizz
Why I love it: Thin enough for detailed nail art but pigmented enough for full coverage. The brush is super precise. Perfect for painting lemons, sunflowers, or geometric designs.
Best for: DIY nail artists who need control.
Best Gel Polish: Gelish Dipped in Honey
The pros: Two-week wear, no chipping, gorgeous honey-yellow shade. You’ll need a UV lamp, but if you do your own gel at home, this is worth it.
Best for: Commitment-phobes who want yellow nails to last.
Yellow Nails for Different Nail Shapes
Your nail shape changes how yellow nail designs look. Here’s the breakdown.
Best Yellow Looks for Short Nails

Short nails + yellow = surprisingly chic. The key is choosing shades and designs that don’t overwhelm.
What works:
- Solid butter yellow (elongates fingers)
- Pale yellow French tips (modern and clean)
- Single accent nail with nail art
- Glossy finish (adds length visually)
What doesn’t:
- Heavy 3D nail art (looks crowded)
- Super dark mustard (can look muddy)
- Thick glitter (makes nails look shorter)
Yellow Nail Designs for Almond Shape

Almond nails are THE perfect canvas for yellow. The tapered tip makes yellow look elegant instead of overwhelming.
Ideal styles:
- Chrome butter yellow (Hailey Bieber classic)
- Yellow ombré (fades beautifully)
- Detailed floral art (the shape showcases detail)
- Deep goldenrod (sophisticated, not cutesy)
Coffin/Ballerina Nails in Yellow

Long coffin nails in yellow make a STATEMENT. This is not subtle—embrace it.
Go-to looks:
- Neon yellow with geometric black designs
- Yellow marble with gold leaf
- Bright lemon with white tips
- Mix-and-match yellow shades per nail
Square and Squoval Yellow Nails

These shapes give you a modern, clean backdrop that works with almost any yellow shade.
Try these:
- Mustard yellow (the squared tip grounds it)
- Yellow checkerboard (retro vibes)
- Yellow with negative space (contemporary)
- Glossy bright yellow (bold but balanced)
Budget-Friendly Yellow Nail Tips
Look, not everyone wants to drop $50 at the salon every two weeks. Here’s how to get gorgeous yellow nails without breaking the bank.
Drugstore Dupes That Actually Work
Instead of expensive salon gels:
- Sally Hansen Miracle Gel in Lemon Heaven (no UV lamp needed)
- Revlon ColorStay in Buttercup (7-10 day wear)
- Wet n Wild WildShine in Yellow Nails (under $2!)
Instead of professional nail art:
- Press-on nails from Target ($7-12 for reusable sets)
- Nail stickers for instant designs
- Striping tape for geometric looks (pack lasts months)
DIY Yellow Nail Ideas Under $20
Complete starter kit:
- One yellow polish of choice ($3-8)
- White polish for nail art ($3)
- Clear top coat ($4)
- Dotting tool ($3)
- Nail tape ($2)
Total: ~$15-20 and you can create dozens of looks.
When to Splurge vs. Save
Splurge on:
- Base coat (prevents staining—worth it)
- Top coat (makes everything last longer)
- One quality yellow shade you’ll wear often
Save on:
- Trendy shades you’ll only wear once
- Nail art tools (drugstore versions work fine)
- Nail prep products (acetone is acetone)
Troubleshooting Common Yellow Nail Problems
Things go wrong sometimes. Here’s how to fix them.
My Yellow Nails Look Chalky
The problem: Not enough coats or polish is too old.
The fix: Yellow shows brushstrokes more than any other color. Always apply 2-3 thin coats. If your polish is thick and goopy, add a few drops of nail polish thinner (NOT nail polish remover—that’s different).
My Yellow Polish Stained My Nails
The problem: Skipped base coat or used low-quality polish.
The fix: Soak cotton pads in lemon juice mixed with baking soda. Hold on nails for 10 minutes. Gently buff with a nail buffer. Apply vitamin E oil after.
Yellow Doesn’t Look Good on Me
The problem: Wrong undertone for your skin.
The fix: You probably tried the wrong shade. Cool undertones need peachy-yellows. Warm undertones need true buttery yellows. Deep skin needs bolder, more saturated yellows. Go back to the skin tone section and try a different shade family.
My Yellow Manicure Chips in 2 Days
The problem: Poor prep or low-quality products.
The fix:
- Use nail dehydrator before base coat
- Wrap your tips (swipe polish over the edge)
- Apply top coat every 2-3 days
- Wear gloves for cleaning/dishes
The Yellow Turned Greenish
The problem: Your top coat reacted with the yellow pigment.
The fix: Use a quick-dry top coat instead of regular. Some regular top coats have ingredients that react with bright pigments.
Frequently Asked Questions About Yellow Nails
Do yellow nails work for professional settings?
Absolutely—if you choose the right shade. Butter yellow nails and soft mustard tones are perfectly office-appropriate. They read as neutral-adjacent while still being interesting. Neon yellows might be too much for conservative environments, but softer shades work great.
Can I wear yellow nails year-round?
Yes! Here’s how:
- Spring/Summer: Butter, lemon, neon
- Fall/Winter: Mustard, goldenrod, honey
The key is matching the intensity to the season. Pastels feel spring, while deeper tones suit fall.
How do I prevent yellow nail polish from staining?
Three words: always base coat. Apply two layers if you’re using bright yellow. Also, don’t leave yellow polish on for more than 2 weeks straight. Give your nails a break between applications.
What’s the difference between butter yellow and regular yellow?
Butter yellow is a soft, creamy pastel with slightly warm undertones. Think actual butter. Regular yellow is brighter and more primary. Butter yellow is more versatile and universally flattering.
Can I mix yellow nail polish with other colors?
Yes! Yellow mixes beautifully with:
- White (for pastels)
- Orange (for peachy tones)
- Gold (for metallic effects)
- Brown (for mustard)
Just use a mixing palette and test before committing.
Do yellow nails look good on short nails?
They look GREAT on short nails, actually. The color pops without overwhelming your hand. Stick to glossy finishes and avoid super thick designs.
What’s the best yellow nail shape?
Oval and almond shapes make yellow look most sophisticated. Square works well for bold, modern looks. Coffin is best for statement neons.
How long does yellow nail polish typically last?
With proper application and maintenance:
- Regular polish: 5-7 days
- Gel polish: 2-3 weeks
- Dip powder: 3-4 weeks
Yellow shows chips faster than dark colors, so maintenance matters.
Are there any medical reasons to avoid yellow nails?
If you have yellow nail syndrome (a rare condition where nails naturally turn yellow and thicken), painting them yellow might mask symptoms your doctor needs to see. Also, if you notice your natural nails turning yellow without polish, see a dermatologist—it could indicate fungal infection or other health issues.
Otherwise, yellow nail polish itself is completely safe for healthy nails.
What nail art looks best with yellow?
Yellow is incredibly versatile for nail art. The most popular combinations are:
- White florals (daisies, sunflowers)
- Black geometric designs
- Gold foil or leaf
- Blue elements (checkerboard, waves)
- Pink and yellow color blocking
The key is ensuring your design doesn’t overwhelm the yellow—let the color be the star.
Can I do yellow nails at home or do I need a salon?
You can absolutely do yellow nails at home! In fact, yellow is one of the easier colors to DIY because it’s so forgiving. Just follow the application technique I outlined in the DIY section, use quality products, and take your time with prep. The only time I’d recommend a salon is for complex nail art or if you want gel extensions.
How do I choose between matte and glossy yellow?
Glossy yellow: More versatile, works for any occasion, shows dimension, feels classic
Matte yellow: More modern, editorial, sophisticated, hides imperfections better
For beginners, I always recommend glossy because it’s easier to apply and lasts longer. You can always add a matte topcoat later if you want to switch it up.
Do I need special tools for yellow nail art?
Not really. For basic yellow nail designs, you need:
- Dotting tools (under $5)
- Striping brush (under $3)
- Nail tape (under $2)
That’s literally it for 90% of designs. Anything fancier is optional.
Yellow Nails and Your Wardrobe: Styling Tips
Now here’s something most guides completely skip: how to actually style yellow nails with your outfits. Because let’s be honest, nails are an accessory.
Colors That Look Amazing With Yellow Nails
Perfect pairings:
- White and cream – Classic, clean, effortless
- Denim blues – Casual, American summer vibes
- Navy – Surprisingly chic, nautical energy
- Black – Bold contrast, very editorial
- Chocolate brown – Warm, retro, autumn perfection
- Blush pink – Soft, feminine, spring garden party
- Sage green – Nature-inspired, cottagecore aesthetic
Avoid:
- Neon orange (clashes terribly)
- Lime green (too jarring)
- Bright purple (competes for attention)
Seasonal Outfit Combinations
Spring with butter yellow nails:
Pair with white linen dresses, light denim jackets, pastel cardigans, floral prints. The softness complements spring’s fresh energy perfectly.
Summer with neon yellow nails:
Go bold with tropical prints, bright swimwear, white tank tops, colorful sundresses. Neon yellow screams vacation mode.
Fall with mustard yellow nails:
Style with camel coats, brown leather jackets, burgundy sweaters, plaid patterns. Mustard is practically made for autumn.
Winter with golden yellow nails:
Pair with rich jewel tones (emerald, sapphire), cream knits, metallic accessories. Golden yellow adds warmth to winter’s darker palette.
Jewelry That Complements Yellow Nails
Gold jewelry: Obviously perfect. Yellow and gold are basically cousins. Stack delicate gold rings, wear gold bracelets, go for gold hoops.
Silver jewelry: Actually works better than you’d think, especially with cooler-toned yellows. Creates nice contrast.
Rose gold: Beautiful with warmer yellows like honey and mustard. Very feminine, very now.
Avoid: Statement rings that completely hide your nails. What’s the point of a great manicure if you’re covering it?
The Psychology of Yellow Nails: What They Say About You
Color psychology is real, and yellow nails send specific signals. Here’s what people subconsciously pick up on.
Positive Associations
Optimism and positivity: Yellow is literally the color of sunshine. People who wear yellow nails are often perceived as upbeat, friendly, approachable. If you’re in a customer-facing role or want to seem more accessible, yellow nail polish is a strategic choice.
Creativity and confidence: Unlike safe neutrals, choosing yellow shows you’re willing to stand out. It signals creative thinking and self-assurance. You might be wondering if this works in professional settings—it absolutely can, especially in creative industries.
Energy and warmth: Yellow radiates energy. If you’re naturally introverted but want to project more outgoing energy, yellow nails give you that boost without having to change your personality.
What Your Yellow Shade Choice Says
- Butter yellow: Soft, approachable, sophisticated, warm
- Neon yellow: Bold, confident, fun-loving, trend-aware
- Mustard yellow: Intellectual, artistic, vintage-inspired, cozy
- Golden yellow: Luxurious, elegant, classic, refined
Now here’s where it gets interesting: you can use these associations strategically. Job interview in a creative field? Butter yellow shows personality without being overwhelming. First date? Neon yellow signals confidence and fun energy. Professional conference? Golden yellow feels polished and put-together.
Yellow Nails Through the Decades: A Quick History
1960s-70s: Yellow nails were part of the mod and disco movements. Think bright, bold, paired with mini skirts and platform shoes. It was all about making a statement.
1980s-90s: Yellow mostly disappeared from mainstream nail trends (except for neon moments in the late 80s). People associated it with staining rather than fashion.
2000s-2010s: Yellow stayed niche, mostly appearing in nail art as accent colors rather than full manicures.
2020-Present: The butter yellow nails trend exploded thanks to social media and celebrity influence. Hailey Bieber’s glazed yellow manicures basically launched a thousand tutorials. Now yellow is having its full main-character moment.
What I love about this is how yellow went from “weird choice” to “totally chic” in just a few years. Fashion is cyclical, and yellow’s time has definitely come.
Celebrity Yellow Nail Inspiration
Let’s talk about who’s actually wearing yellow nails and absolutely killing it.
Hailey Bieber: The queen of butter yellow chrome nails. Her glazed yellow manicures went so viral they basically defined the trend. She pairs them with minimalist outfits, letting the nails be the statement piece.
Selena Gomez: Rocks softer, more pastel yellows for a romantic, feminine vibe. Often pairs them with floral dresses and natural makeup.
Zendaya: When she wears yellow nails, she goes BOLD. Think neon yellow with graphic designs, usually coordinated with her outfit for red carpet events.
Dua Lipa: Experimental with yellow—does everything from neon tips to mustard full sets. Not afraid to mix textures and finishes.
The lesson here? Yellow nails work across different style aesthetics. You don’t have to change your whole vibe—just adapt the shade and finish to match your personal style.
Yellow Nails for Special Occasions
Different events call for different approaches to yellow nail designs.
Wedding Guest Yellow Nails
Best choices: Soft butter yellow with delicate gold accents, pale yellow French tips, subtle yellow ombré. You want to look polished without stealing attention from the bride.
Avoid: Neon shades, heavy 3D designs, anything too bold or distracting.
Vacation and Beach Yellow Nails
Perfect for travel: Neon yellow (photographs amazingly), bright yellow with tropical designs, yellow and blue combinations. Go bold—vacation is the time.
Pro tip: Get gel or dip powder before traveling. Regular polish chips fast with sun, salt water, and sunscreen.
Professional Event Yellow Nails
Office-appropriate: Butter yellow on short to medium nails, mustard on any length, golden yellow with minimal design. Keep it sophisticated.
Skip: Anything neon, super long lengths, heavy glitter or 3D elements.
Date Night Yellow Nails
Flirty options: Butter yellow chrome (very Hailey Bieber), yellow with delicate nail art, glossy bright yellow on medium length nails. Aim for confident but not overwhelming.
Festival and Concert Yellow Nails
Go wild: Neon yellow with bold designs, glitter topcoats, mix-and-match fingers, 3D elements. This is your moment to experiment.
Environmental and Health Considerations
Let’s get real about what’s actually in yellow nail polish and what you should know.
Choosing Non-Toxic Yellow Nail Polish
Traditional nail polishes contain some pretty harsh chemicals. If you’re concerned about what you’re putting on your body, look for these certifications:
“5-free” polishes exclude:
- Formaldehyde
- Toluene
- DBP (dibutyl phthalate)
- Formaldehyde resin
- Camphor
“7-free” or “10-free” exclude even more questionable ingredients.
Brands doing it right:
- Ella + Mila (7-free, vegan)
- Zoya (10-free, big color range)
- Pacifica (7-free, budget-friendly)
You might be wondering if non-toxic polishes work as well. Honestly? The formulas have gotten SO good that you won’t notice a difference in application or wear time.
Sustainable Yellow Nail Care
Eco-friendly tips:
- Buy refillable polish bottles when possible
- Dispose of old polish properly (not down the drain)
- Use reusable cotton rounds instead of disposable ones
- Choose brands with recyclable packaging
- Buy quality over quantity (one good polish beats five cheap ones)
Pregnancy and Yellow Nails
If you’re pregnant, you CAN wear yellow nail polish, but here’s what to consider:
- Choose well-ventilated spaces for application
- Opt for 5-free or better formulas
- Avoid long salon sessions in early pregnancy
- Skip acrylic and gel if you’re concerned about fumes
- Listen to your body—if scents make you nauseous, wait
Always check with your doctor if you have concerns, but painting your nails is generally considered safe during pregnancy.
Final Thoughts: Why You Should Try Yellow Nails Right Now
Here’s the thing about yellow nails: they’re one of those trends that seems intimidating until you actually try it. Then you realize yellow is way more wearable, versatile, and mood-boosting than you ever expected.
I’ve seen people transform their entire nail game just by stepping outside their usual nude-and-red comfort zone. Yellow forces you to be a little bolder, a little more creative, a little more yourself. And in my experience, that confidence shows up in unexpected ways—not just in your manicure, but in how you carry yourself.
Whether you start with a soft butter yellow on short nails or go full neon coffins with nail art, the point is to start somewhere. Use this guide, try different shades, experiment with designs, and figure out what feels authentically you.
Because at the end of the day, yellow nails aren’t just about following a trend. They’re about finding a color that makes you happy every single time you look down at your hands. And honestly? That’s worth trying.
Now go forth and get those gorgeous yellow nails. Your fingers will thank you.
Ready to start your yellow nail journey? Save this guide, screenshot your favorite designs, and don’t forget to share your results. Drop a comment below telling me which yellow shade you’re trying first—I’d love to see how your manicure turns out!
Pin this guide for later, and check out our other nail care tutorials for more inspiration. Happy painting! 💛✨