Cute Crochet Plant Ideas: Your Ultimate Guide to Adorable Yarn Greenery
There’s something magical about cute crochet plant ideas that instantly transforms any space into a cozy haven. I’ll be honest—I’ve killed more houseplants than I’d care to admit. But when I discovered crocheted plants? Game changer.
These charming little creations bring all the warmth and personality of real greenery without the guilt of watching another succulent bite the dust. Whether you’re scrolling through Pinterest at 2 AM looking for your next project or you’re a seasoned crocheter hunting for fresh inspiration, you’ve landed in the right place.
What Makes Cute Crochet Plant Ideas So Irresistible?

Cute crochet plant ideas aren’t just trending—they’re becoming a staple in modern home décor. And honestly? I get it. They combine two things people absolutely love: the satisfaction of creating something with your own hands and the instant mood boost that comes from greenery in your space.
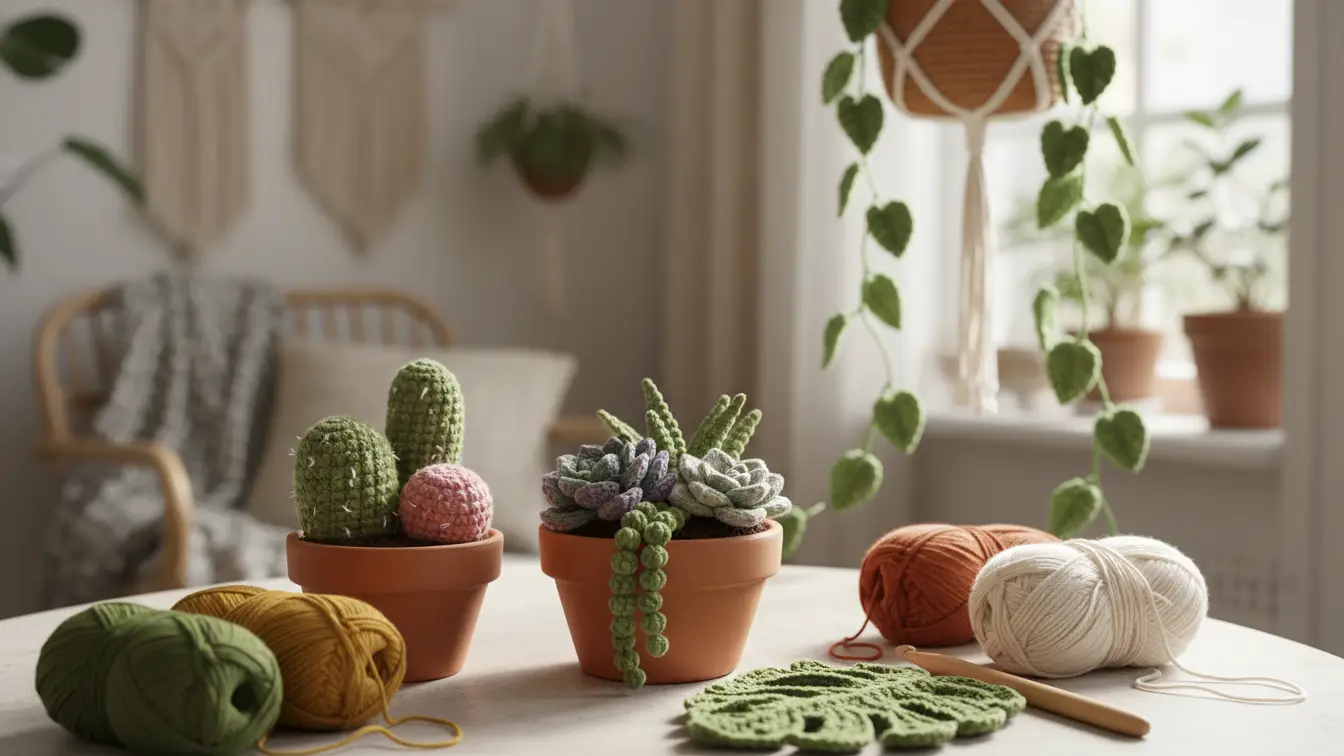
In my experience, what makes these projects so special is their versatility. You can make a tiny crochet cactus for your desk, a dramatic hanging plant for your window, or an entire collection of amigurumi succulents to fill that awkward corner in your living room.
For real-life styling inspiration, check out how to decorate your living room so your crochet plants actually look intentional.
Now here’s where it gets interesting—crochet plant décor fits perfectly into the 2025 crafting trends. According to recent crochet trend forecasts, nature-inspired designs, sustainable crafting, and maximalist home décor are all having their moment. And crocheted plants? They tick every single box.
Why Everyone’s Obsessed with Crochet Plant Patterns Right Now
You might be wondering what’s driving this obsession with cute crochet plant ideas. Let me break it down for you.
First off, we’re seeing a massive shift toward sustainable crafting practices. People want to create meaningful décor pieces that last forever—not disposable stuff that ends up in landfills. A crocheted monstera will still be gorgeous in ten years, unlike that fern you bought from the grocery store that died within a week.
Second, apartment living has become the norm for millions of people. Dark corners, limited sunlight, and tiny windowsills make it nearly impossible to keep real plants alive. But crochet plants? They thrive in those exact conditions. No sunlight needed. Zero maintenance. Just pure, adorable charm.
And if you’re working with a tiny space, these small bedroom ideas that make your room feel bigger will help you style without clutter.
Third—and this might surprise you—there’s a therapeutic element to creating these little green friends. The repetitive motions of crocheting provide a meditative experience that’s been shown to reduce anxiety and stress. You’re not just making décor; you’re investing in your mental health.
The Different Types of Cute Crochet Plant Ideas
When we talk about cute crochet plant ideas, we’re actually covering quite a range of projects:
Amigurumi Plants: These are your stuffed, three-dimensional creations—think adorable cacti with faces, plump succulents, or chunky snake plants. They’re typically worked in the round and stuffed with polyfill to give them that squishy, huggable quality.
Hanging Crochet Plants: Inspired by trailing vines like pothos or string of pearls, these pieces feature cascading elements that look stunning by windows or in corners. Many crafters are combining these with macramé plant hangers for an extra bohemian touch.
Flat Crochet Flowers: Perfect for creating bouquets or wall art, these crochet flower patterns range from simple daisies to intricate roses. They work up quickly and make fantastic gifts.
Plant Pot Cozies: These wrap around existing pots—real or artificial—adding texture and warmth. They’re super beginner-friendly and let you practice new stitches without committing to a complex project.
Who Should Try These Cute Crochet Plant Ideas?
Here’s the beautiful thing about cute crochet plant ideas—they’re genuinely for everyone. But they’re especially perfect if you:
- Love cottagecore aesthetics and want that cozy, handmade vibe
- Live in an apartment with limited natural light
- Have a black thumb but still crave greenery in your space
- Enjoy giving thoughtful, handmade gifts
- Want to reduce stress through a creative hobby
- Are drawn to bohemian home décor styles
- Need pet-safe “plants” (no more worrying about cats nibbling on toxic leaves!)
What I love about this craft is that it doesn’t discriminate by skill level. Absolute beginners can start with simple crochet cactus patterns using basic single crochet stitches. Meanwhile, experienced crafters can challenge themselves with realistic botanical patterns that incorporate multiple stitches and techniques.
Essential Materials for Your Crochet Plant Journey
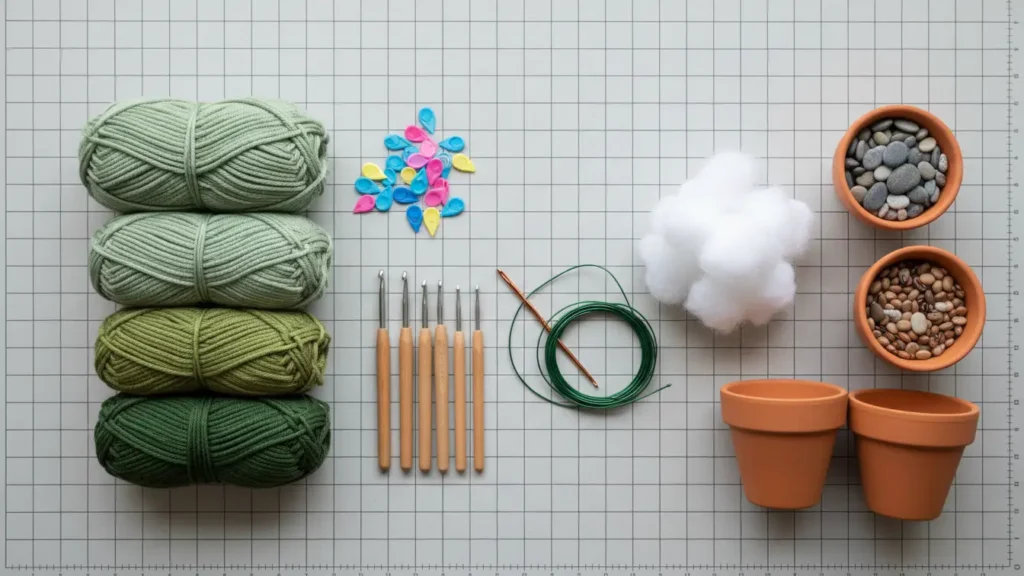
Before you dive into making cute crochet plant ideas, let’s talk about what you’ll actually need. The good news? You probably already have most of these supplies.
Yarn Choices for Crochet Plants
The yarn you choose dramatically impacts how your finished plant looks. Here’s what works best:
Cotton Yarn: This is the gold standard for amigurumi plants. Cotton holds its shape beautifully, has excellent stitch definition, and comes in every shade of green imaginable. Popular choices include Lily Sugar’n Cream, Lion Brand 24/7 Cotton, and Paintbox Yarns Cotton DK.
Acrylic Yarn: More budget-friendly and still effective. Acrylic is softer than cotton, which makes your plants more cuddly. Red Heart Super Saver and Caron Simply Soft are excellent options that won’t break the bank.
Chenille Yarn: Want your cactus to look extra plush? Chenille creates that velvety texture that’s incredibly satisfying to touch. Just be aware it’s trickier to work with.
Mercerized Cotton: For those ultra-realistic plant projects, mercerized cotton provides a slight sheen that mimics real leaves beautifully.
Other Essential Supplies
| Supply | Purpose | Pro Tips |
|---|---|---|
| Crochet Hooks | Creating stitches | Use a size smaller than your yarn recommends for tighter stitches and less visible stuffing |
| Polyfill Stuffing | Giving shape to 3D plants | Don’t overstuff—it should be firm but slightly squishy |
| Stitch Markers | Tracking rounds | Essential for amigurumi; clip-on markers are easiest |
| Tapestry Needle | Weaving in ends, sewing pieces | Get one with a large eye and blunt tip |
| Safety Eyes (optional) | Adding personality to kawaii plants | Install before stuffing completely; they’re permanent once clicked in |
| Wire (optional) | Supporting stems and leaves | Floral wire wrapped in green floral tape looks most realistic |
| Small Pots | Displaying finished plants | Terracotta pots from dollar stores work perfectly |
| Pebbles or Beans | Weighing down bottoms | Prevents top-heavy plants from tipping over |
Now here’s a pro tip I wish someone had told me earlier: buy your yarn in person when possible. Colors look completely different online versus in person, and you’ll want to see if that “forest green” is actually the shade you’re imagining.
12 Absolutely Adorable Cute Crochet Plant Ideas to Try
Alright, let’s get into the fun part—specific cute crochet plant ideas you can start making today. I’ve organized these from beginner-friendly to more advanced, so you can find your perfect starting point.
1. Classic Crochet Cactus

This is THE project every beginner should start with. A simple crochet cactus pattern typically uses just single crochet stitches worked in continuous rounds. You’ll make a tube shape, stuff it, then cinch the top closed.
Skill Level: Beginner
Time to Complete: 1-2 hours
Perfect For: Desk décor, gift giving, practicing basic amigurumi techniques
The beauty of cacti is that they’re forgiving. Slightly uneven stitches? That just adds to the realistic texture. Many patterns include optional flowers or kawaii-style faces if you want to add personality.
2. String of Pearls Hanging Plant

This trendy succulent translates beautifully into crochet. You’ll create tiny “pearls” (basically small stuffed circles) and attach them to a long chain to create those signature trailing strands.
Skill Level: Easy-Intermediate
Time to Complete: 3-4 hours
Perfect For: Windowsills, hanging in corners, gifts for plant lovers
What I love about this pattern is its modularity. Make the strands as long or short as you want. Create multiple strands for a fuller look. You can even add gradient color changes for an ombré effect.
3. Amigurumi Snake Plant

The snake plant crochet pattern has become incredibly popular, and for good reason. Those tall, architectural leaves look stunning worked in variegated green yarn with darker green accents.
Skill Level: Intermediate
Time to Complete: 4-6 hours
Perfect For: Statement pieces, modern décor, improving your shaping skills
Pro tip: Insert wire into the leaves before closing them up. This lets you pose them exactly how you want and prevents drooping over time.
4. Hanging Basket with Cascading Vines

This project combines multiple techniques to create a complete hanging planter. You’ll typically crochet the basket itself, then create long vine strands with leaves attached at intervals.
Skill Level: Intermediate
Time to Complete: 6-8 hours
Perfect For: Empty corners, above windows, Instagram-worthy décor
The hanging crochet plant patterns available now are absolutely stunning. Many incorporate different shades of green and even add small flowers for extra visual interest.
5. Cute Cactus with Personality
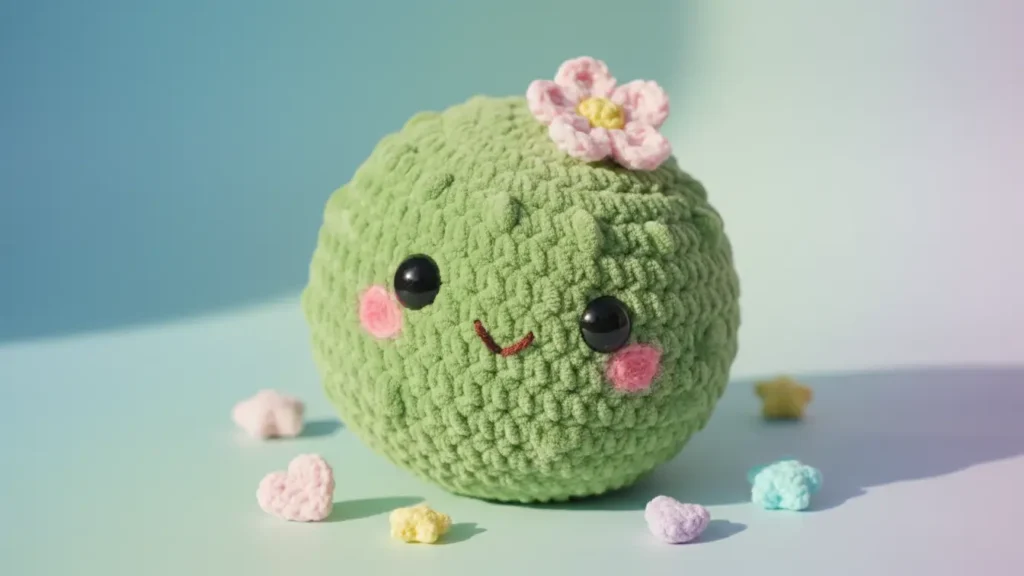
Taking the basic cactus up a notch, these patterns add faces, little arms, or flowers on top. Think of them as the kawaii version of desert plants—absolutely irresistible.
Skill Level: Easy
Time to Complete: 2-3 hours
Perfect For: Children’s rooms, quirky gifts, practicing embroidery details
You can customize these endlessly. Add safety eyes for a modern look, or embroider closed eyes for a sleepy cactus. Some crafters even make entire families with baby cacti.
6. Realistic Monstera Leaf

For those ready to level up, realistic monstera crochet patterns challenge you to create those distinctive split leaves that the plant is famous for.
Skill Level: Advanced
Time to Complete: 3-5 hours per leaf
Perfect For: Botanical home décor, wall art, practicing advanced shaping
These patterns often incorporate increases, decreases, and working in different directions to achieve that signature fenestration (those holes in the leaves). The result is genuinely impressive.
7. Mini Succulent Garden

Instead of making one large plant, create a collection of tiny succulents in a single container. This lets you practice different succulent crochet patterns and creates a more dynamic display.
Skill Level: Beginner-Intermediate
Time to Complete: 6-10 hours for a full collection
Perfect For: Coffee table centerpieces, gifts, using up yarn scraps
I’ve seen crafters get incredibly creative with these, mixing different textures and adding painted details to make each succulent unique.
8. Crochet Flowers in a Vase

This classic never goes out of style. Create a bouquet of crochet flowers—roses, daisies, tulips, sunflowers—and arrange them in a vase.
Skill Level: Varies by flower type
Time to Complete: 1-2 hours per flower
Perfect For: Permanent bouquets, Mother’s Day gifts, wedding décor
What’s brilliant about crocheted flowers is they never wilt. Make a bouquet once and enjoy it forever. Add a few drops of essential oil to the flowers for a subtle scent boost.
9. Ivy Chain with Trailing Leaves

Create flowing ivy that you can drape across bookshelves, wind around picture frames, or hang from curtain rods. The ivy crochet patterns typically feature a base chain with leaves worked off the sides.
Skill Level: Intermediate
Time to Complete: 4-6 hours depending on length
Perfect For: Shelf styling, photo backdrops, seasonal décor
You can make these in traditional green or switch to autumn colors for fall decorating. Some crafters even add tiny white flowers along the vine for a romantic touch.
10. Crochet Plant Pot Cozy
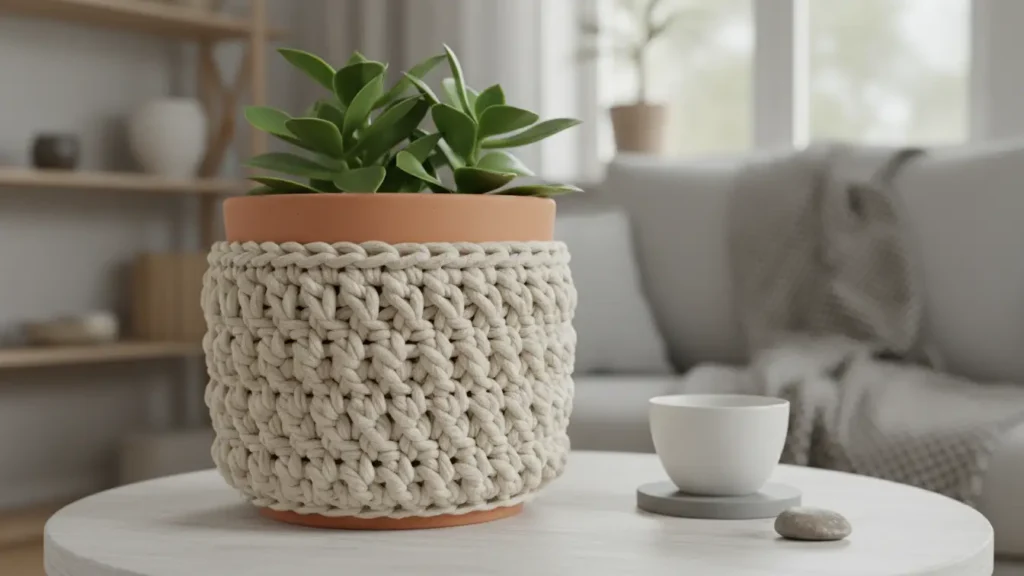
Maybe you already have plants (real or fake) but want to add some handmade charm. Pot cozies wrap around your existing pots, adding texture and warmth.
Skill Level: Beginner
Time to Complete: 1-2 hours
Perfect For: Quick projects, gift toppers, stash busting
These work up so fast they’re perfect for market sales or craft fairs. You can create them in any size to fit standard pot dimensions.
11. Mushroom Garden Companions

While technically fungi rather than plants, crochet mushrooms have become incredibly popular companions to plant collections. Their whimsical shape and bright colors add personality to any arrangement.
Skill Level: Easy
Time to Complete: 1-2 hours
Perfect For: Adding whimsy, cottagecore aesthetic, quick gifts
The mushroom cap is typically worked in the round with increases, while the stem is a simple tube. Add white dots to the cap for that classic toadstool look.
12. Aloe Vera Plant

The chunky, sculptural leaves of aloe translate beautifully into crochet. These aloe vera patterns typically use increases and decreases to create that distinctive tapered leaf shape.
Skill Level: Intermediate
Time to Complete: 4-5 hours
Perfect For: Kitchen décor, practicing leaf shaping, gifts for wellness enthusiasts
Many patterns suggest using variegated yarn to mimic the natural color variations in aloe leaves. Some even include instructions for making the distinctive white spots on the leaves.
Step-by-Step: Creating Your First Crochet Plant
Let me walk you through creating a basic crochet cactus—the perfect starter project for exploring cute crochet plant ideas. This assumes you know basic crochet stitches (chain, single crochet, increases, and decreases).
Materials Needed
- Worsted weight yarn in green (approximately 50g)
- Size G/6 (4mm) crochet hook
- Polyfill stuffing
- Tapestry needle
- Stitch marker
- Small terracotta pot (3-4 inches)
- Optional: safety eyes, embroidery floss for flowers
Instructions
Step 1: Create the Base
Start with a magic ring. Work 6 single crochet stitches into the ring. Pull tight. Place your stitch marker in the first stitch—you’ll be working in continuous rounds without joining.
Step 2: Increase Rounds
Round 2: Work 2 sc in each stitch around (12 sts)
Round 3: 1 sc, 2 sc in next st repeat around (18 sts)
Round 4: 2 sc, 2 sc in next st repeat around (24 sts)
Step 3: Work the Body
Rounds 5-15: Work 1 sc in each stitch around (24 sts). This creates the main body of your cactus. You can work more or fewer rounds depending on how tall you want your cactus.
Step 4: Add Texture (Optional)
For that authentic cactus look, create vertical ridges by working in the back loops only every third or fourth round. This creates subtle texture lines.
Step 5: Shape the Top
Round 16: 2 sc, decrease repeat around (18 sts)
Round 17: 1 sc, decrease repeat around (12 sts)
Begin stuffing your cactus firmly but not too tightly. Continue stuffing as you work the final rounds.
Round 18: Decrease around (6 sts)
Step 6: Finish and Close
Cut yarn leaving a long tail. Thread through remaining stitches and pull tight to close. Weave in ends.
Step 7: Add Details
This is where personality comes in! You can:
- Add embroidered flowers on top
- Attach safety eyes and a smile
- Create small “arms” (tiny tubes attached to the sides)
- Add white French knots to mimic spines
Step 8: Display
Place your cactus in the terracotta pot. You can add some actual pebbles around the base for stability and authenticity, or crochet a “soil” top that sits in the pot.
Congratulations! You’ve just completed your first crochet plant. Now you can’t stop, can you? That’s the addictive nature of these projects—you’ll find yourself making an entire garden before you know it.
Advanced Techniques for Stunning Crochet Plants
Once you’ve mastered the basics of cute crochet plant ideas, you’ll want to explore techniques that take your projects from cute to absolutely stunning. These methods require practice, but they’re totally worth the effort.
Creating Realistic Texture
Real plants have texture—veins in leaves, bumpy cacti surfaces, velvety petals. You can recreate this in crochet using several techniques:
Front Post/Back Post Stitches: Working around the post of stitches rather than through the top loops creates raised texture perfect for leaf veins or cactus ridges. Check out this tutorial on post stitches to master the technique.
Surface Crochet: This involves crocheting directly onto a finished piece to add details like leaf veins or patterns. It’s perfect for adding dimension without sewing separate pieces.
Mixed Stitch Patterns: Combining single crochet, half double crochet, and double crochet in strategic ways creates organic-looking curves and shapes. This is essential for realistic botanical crochet patterns.
Color Work and Shading
Professional-looking crochet plants often incorporate subtle color changes that mimic nature:
Variegated Yarn: Using yarn that slowly transitions through different shades creates natural-looking color variation without changing yarns constantly.
Strategic Color Changes: Real plants have darker bases and lighter tips (or vice versa). Plan your color changes to match this pattern.
Painting and Shading: Yes, you can paint your finished crochet! Fabric paint or acrylic paint diluted with water can add shadows, highlights, or entirely change the color. Just go lightly and build up gradually.
Structural Support
Professional crochet plant ideas often incorporate support structures to maintain their shape:
Floral Wire: Insert wire into stems and leaves before closing them. This allows you to bend and pose your plants realistically. Wrap the wire in green floral tape first to prevent it from poking through.
Pipe Cleaners: These work great for smaller projects and are easier to work with than wire. Plus, they’re fuzzy, so they grab onto the stuffing and stay put.
Wooden Dowels: For larger plants with tall stems, insert a wooden dowel through the center for support. Paint it green first so it blends in.
Assembly Techniques
How you put your plant together makes a huge difference in the final appearance:
Invisible Joining: Instead of obvious seams, use the mattress stitch or ladder stitch to create nearly invisible joins between pieces.
Strategic Placement: Pay attention to where leaves emerge from stems in real plants. Research your specific plant species to get the arrangement right.
Layering: Create depth by layering leaves or petals at different heights and angles. Don’t just line everything up—nature is beautifully chaotic.
Styling and Displaying Your Cute Crochet Plant Ideas

Creating cute crochet plant ideas is only half the fun—displaying them is where your creative vision really comes to life. Let me share some styling strategies that work beautifully.
Container Choices
The pot or container dramatically impacts how your crochet plant is perceived:
Terracotta Pots: The classic choice for a reason. Their earthy tone complements any color of yarn and adds authenticity. You can paint them, leave them natural, or age them with chalk paint techniques.
Modern Ceramic Planters: Clean white or concrete-look planters give your crochet plants a contemporary feel perfect for minimalist or Scandinavian aesthetics.
Vintage Finds: Thrifted teacups, vintage tins, or antique containers add character and work beautifully with cottagecore style.
Macramé Hangers: Combine your crochet plants with macramé plant hangers for double the handmade charm.
Glass Terrariums: Create miniature ecosystems with multiple small crochet plants, pebbles, and moss in glass containers.
Placement Ideas Throughout Your Home
Living Room Styling:
- Create a gallery wall mixing framed art with hanging crochet plants
- Style a coffee table with a collection of small succulents in varying heights
- Fill empty corners with tall statement plants like snake plants or monstera
- Add trailing ivy along the top of bookshelves
If you want a more polished, magazine-style setup, start with these stylish living room ideas and layer crochet plants on top.
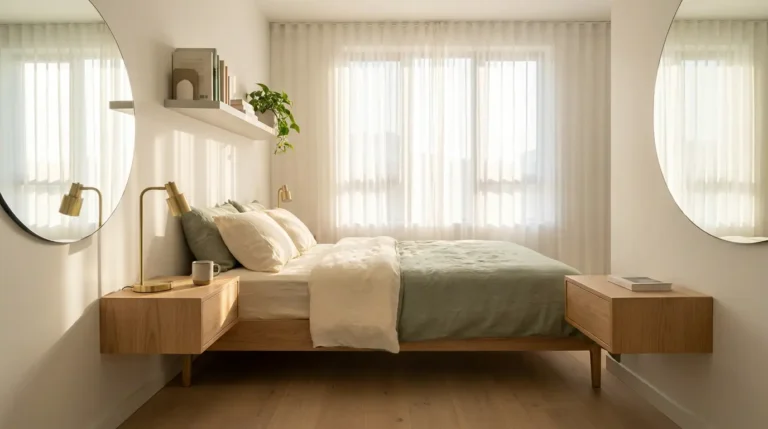
Bedroom Accents:
- Place a cute cactus on your nightstand for personality without real-plant worries
- Hang trailing plants on either side of your bed as living headboard décor
- Create a mini garden on a windowsill with varied crochet plants
- Use plant pot cozies on existing décor to tie in your color scheme
Kitchen Character:
- Line up herb-inspired crochet plants on a window shelf
- Create a vertical garden on a blank wall using multiple hanging plants
- Add small plants to open shelving between dishes
- Make it functional by adding labels and using them as recipe holders
Bathroom Spa Vibes:
- Since real plants struggle in many bathrooms, crochet plants are perfect here
- Hang trailing plants from the shower curtain rod
- Place a collection of succulents on the vanity
- Add a statement plant next to the bathtub for that spa atmosphere
Office Productivity Boost:
- Keep a cute desk buddy cactus by your keyboard
- Create a mini garden on your desk using small terracotta pots
- Hang plants by your window for visual interest during Zoom calls
- Use larger plants to define spaces in open offices
Seasonal Styling Swaps
One brilliant advantage of crochet plants over real ones? You can easily swap them out seasonally:
Spring: Focus on pastel flowers, cherry blossoms, and tulips. Create bouquets in soft pinks, yellows, and lavenders.
Summer: Bright tropical plants like monstera, palm leaves, and vibrant succulents in bold greens and coral tones.
Fall: Transition to autumn-colored ivy, pumpkins mixed with plants, and warmer earth tones.
Winter: Create evergreen arrangements, add white flowers to mimic snow, or make festive cacti in holiday colors.
Troubleshooting Common Crochet Plant Problems
Even experienced crocheters run into issues when creating cute crochet plant ideas. Let’s tackle the most common problems and their solutions.
Issue #1: Visible Stuffing
Problem: Your stitches are too loose and white stuffing shows through the green yarn.
Solutions:
- Use a smaller hook than your yarn recommends (typically one or two sizes smaller)
- Crochet more tightly by adjusting your tension
- Add an extra layer by crocheting a liner in the same color yarn before stuffing
- Use colored stuffing that matches your yarn (you can tint white stuffing with fabric dye)
Issue #2: Wonky Shape
Problem: Your plant leans, won’t stand up, or looks misshapen.
Solutions:
- Check your gauge—inconsistent tension creates uneven shapes
- Add weight to the bottom (beans, pebbles, or pellets)
- Insert wire or pipe cleaners for structural support
- Adjust stuffing amount—too much creates barrel shapes, too little causes sagging
- Block your finished piece if it’s flat (pin to shape while damp, let dry)
Issue #3: Can’t Count Stitches
Problem: You keep losing track of where you are in the pattern, especially in continuous rounds.
Solutions:
- Use bright, easy-to-see stitch markers
- Place markers at the beginning of each round AND at quarter points
- Count out loud (seriously, it helps!)
- Make tic marks on paper after completing each round
- Use different colored stitch markers for different sections
Issue #4: Color Changes Look Messy
Problem: Where you changed yarn colors looks sloppy or obvious.
Solutions:
- Change colors in the “wrong” part of the stitch so the join happens on the inside/back
- Carry unused colors along inside your work instead of cutting and rejoining
- Use the invisible join method for seamless color transitions
- Plan color changes at natural breaking points (where leaves meet stems, for example)
Issue #5: Pieces Won’t Stay Together
Problem: Leaves keep falling off, or pieces separate at the seams.
Solutions:
- Use more stitches when attaching pieces (go around 2-3 times)
- Lock your knots more securely before cutting yarn tails
- Apply a tiny dab of fabric glue at attachment points (hidden inside)
- Weave ends through attachment areas for extra security
- Consider sewing instead of slip stitching pieces together
Issue #6: Flat Pieces Curl
Problem: Your flat leaves or petals curl at the edges.
Solutions:
- This often indicates tension issues—try to maintain consistent tension
- Block the finished pieces (pin flat while damp, let air dry)
- Add a border of slip stitches around the edge to weigh it down
- Insert thin wire around the perimeter for structure
- Accept that some curl is natural and actually adds realistic texture!
Taking Your Crochet Plant Business to the Next Level
Many crafters discover that their cute crochet plant ideas aren’t just a hobby—they could be a business. If you’re considering selling your creations, here’s what you need to know.
Finding Your Niche
The crochet market is competitive, so defining your unique angle is crucial:
Realistic Botanicals: Target plant enthusiasts who want realistic replicas of specific species Kawaii/Cute Style: Focus on adorable, personality-filled plants with faces and accessories Luxury/High-End: Create museum-quality pieces with complex techniques and premium materials Quick and Affordable: Make simple, budget-friendly plants perfect for impulse purchases Custom/Personalized: Offer plants in specific colors or with custom details
Pricing Your Work
One of the biggest mistakes new sellers make is underpricing. Calculate costs properly:
Materials Cost: Yarn + stuffing + pot + any embellishments
Labor Cost: (Hours to complete) × (Your hourly rate)
Overhead: Percentage for business expenses (shipping supplies, platform fees, etc.)
Profit Margin: Typically 30-50% markup
For example: A small cactus taking 2 hours at $15/hour labor + $3 materials + 20% overhead = $37.80 minimum before profit. Don’t sell yourself short!
Best Selling Platforms
Etsy: The go-to marketplace for handmade goods. High traffic but also high competition. Use excellent SEO practices and stunning photos.
Instagram: Perfect for building a brand and direct sales. Use reels showing your process to gain followers. Check out successful crochet Instagram accounts for inspiration.
Local Markets: Craft fairs and farmer’s markets let you build local connections and test products in person.
Your Own Website: Using platforms like Shopify or Square Online gives you complete control (but requires more marketing effort).
Standing Out in the Market
Photography Is Everything: Invest time in learning product photography. Good lighting, clean backgrounds, and multiple angles make enormous differences in sales.
Tell Your Story: Share your process, your why, your journey. People connect with makers, not just products.
Offer Something Unique: Maybe you use eco-friendly materials, donate proceeds to environmental causes, or offer plants from around the world. Find your hook.
Provide Excellent Service: Fast shipping, beautiful packaging, and responsive communication create repeat customers and glowing reviews.
Build a Brand: Consistent style, messaging, and quality help customers recognize and remember you.
Caring for and Maintaining Your Crochet Plants
The beauty of cute crochet plant ideas is their low maintenance—but they’re not zero maintenance. Here’s how to keep them looking fresh.
Regular Dusting
Dust accumulates on crocheted items just like any surface:
- Use a soft brush or lint roller weekly
- For delicate pieces, use a can of compressed air
- Gently shake hanging plants outside occasionally
Deep Cleaning
Every few months, your crochet plants may need a wash:
Hand Washing Method:
- Fill a sink with cool water and gentle soap
- Submerge the plant and gently squeeze (don’t wring!)
- Rinse thoroughly with cool water
- Press between towels to remove excess water
- Reshape while damp and air dry completely
Important: Remove any wire, wooden dowels, or non-washable embellishments first. Consider washing only the yarn components and leaving pots dry.
Preventing Fading
Keep your crochet plants looking vibrant:
- Keep out of direct sunlight to prevent color fading
- Store in low-humidity areas to prevent mildew
- Use UV-protective spray on pieces displayed in sunny windows
Storage Tips
If you rotate seasonal plants or need to store some temporarily:
- Keep in breathable containers (avoid plastic bags that trap moisture)
- Add lavender sachets to deter moths
- Stuff with acid-free tissue to maintain shape
- Store flat pieces